
2018
The snow came and went throughout winter giving us a chance to get a little more done.
1-14-18
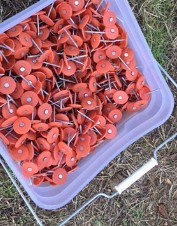
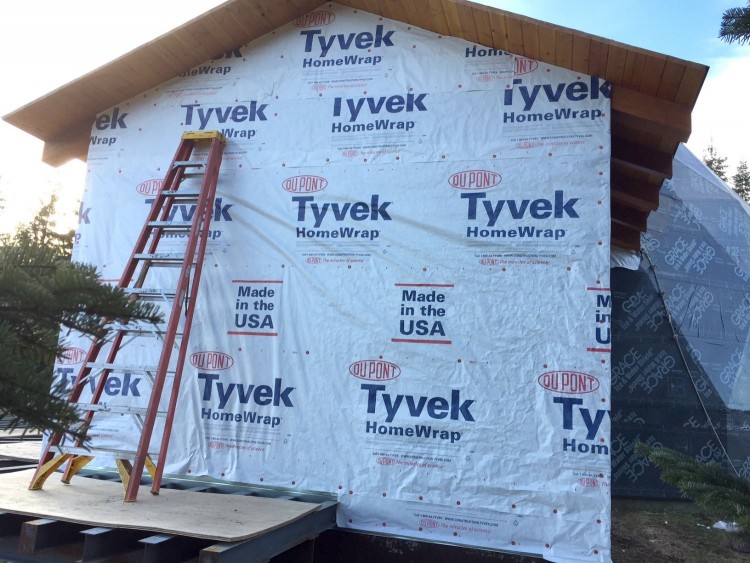
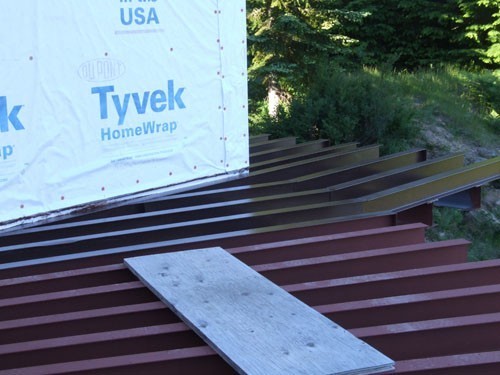
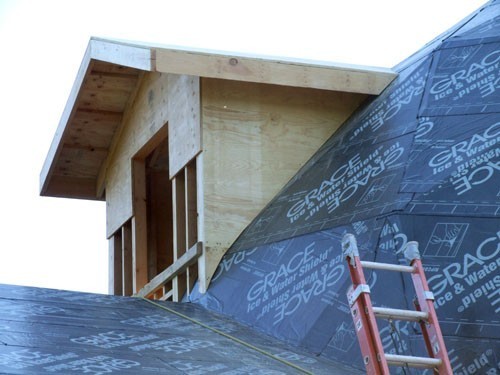
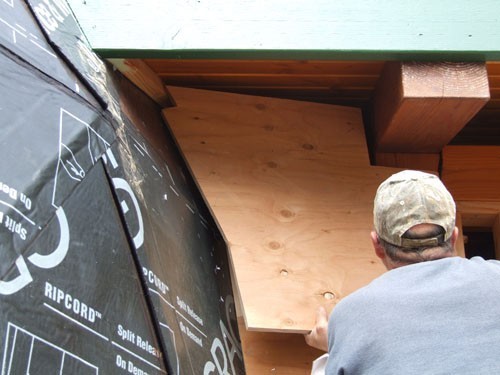
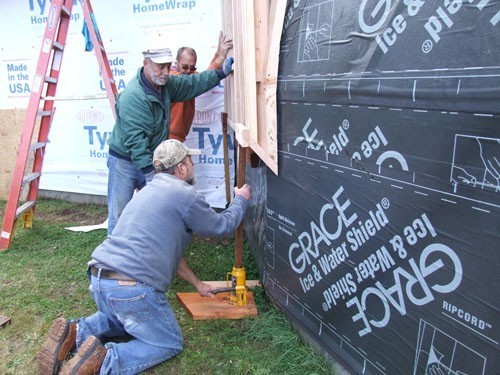
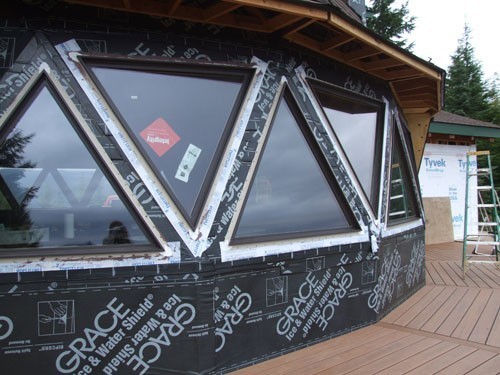
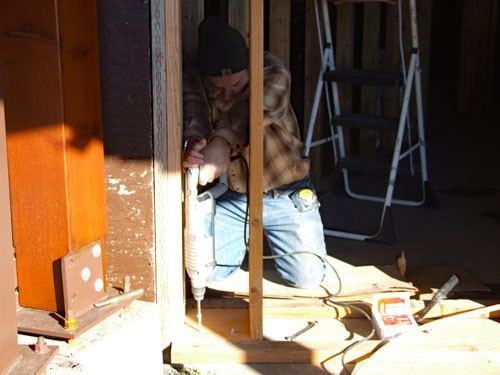
On our last trip to the dome we hung tyvek. It got dark before we got it all nailed off and some was only held with staples. With the holidays and family we didn't get back as soon as we wanted and the bedroom tyvek blew off.
On our last trip to the dome we hung tyvek. It got dark before we got it all nailed off and some was only held with staples. With the holidays and family we didn't get back as soon as we wanted and the bedroom tyvek blew off.
We hung new tyvek on the bedroom in a wind storm. Boy was that fun!
Then we secured it with many of these nails with plastic washers.


4-24-18
We spent the first weekend after tax season in Disney Land with Renae & Josh & the Boys.
We spent the first weekend after tax season in Disney Land with Renae & Josh & the Boys.
5-11-18
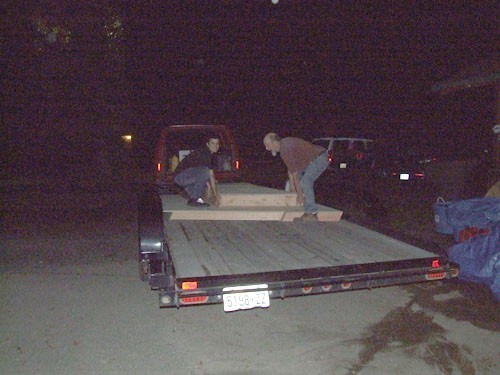
Then we decided it was time to get serious about selling the Northwoods cabin. So we started moving stuff to the dome and junk to the dump.
Then we decided it was time to get serious about selling the Northwoods cabin. So we started moving stuff to the dome and junk to the dump.

After three weekends we are (mostly) junk free and have new flooring.
We had an open house on Memorial Day and had a better turn out than we expected.

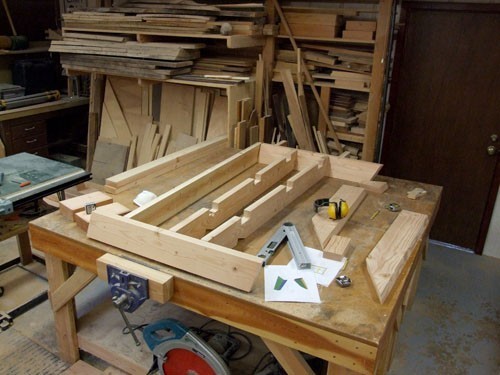


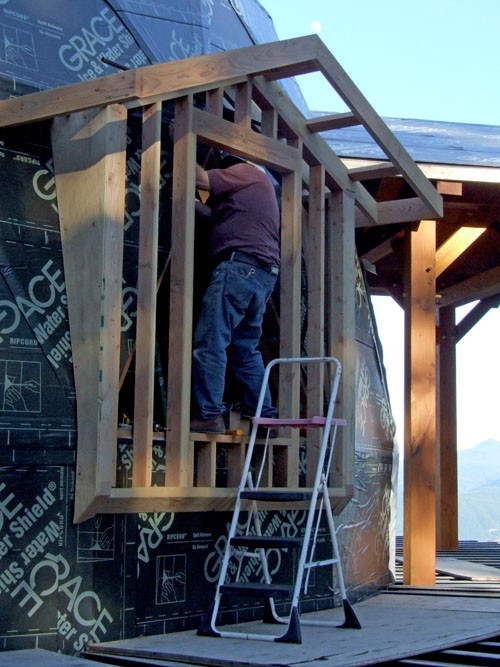
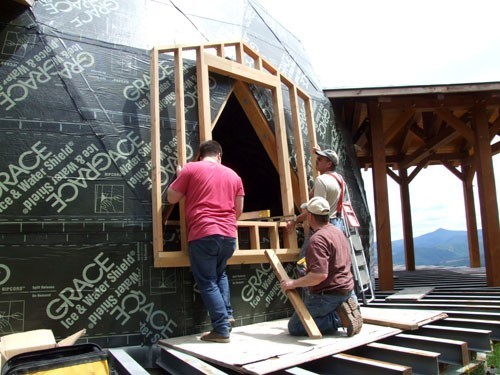
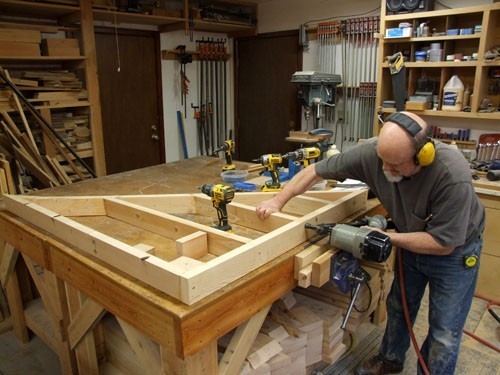
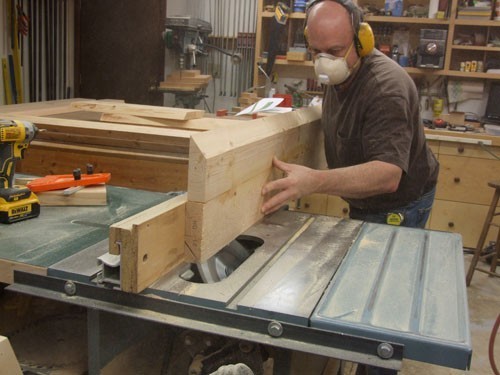
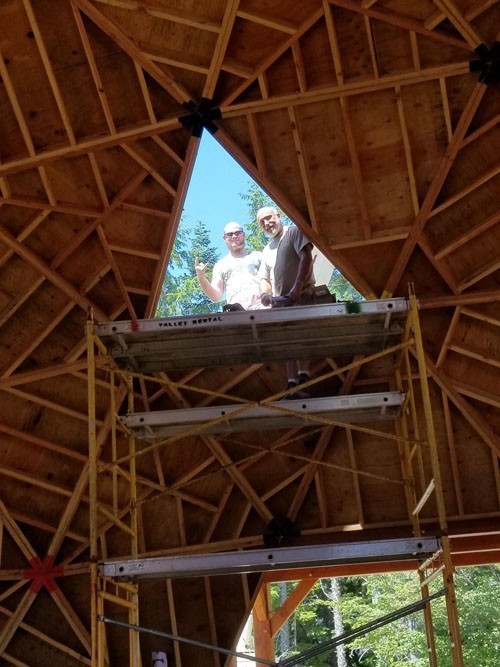
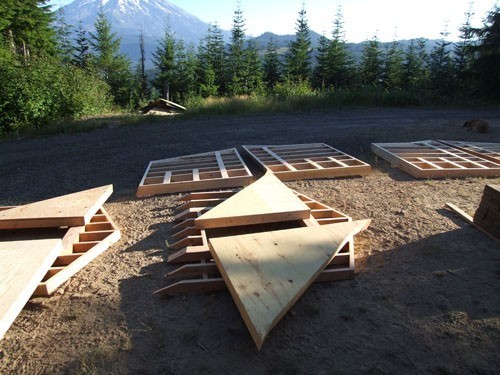
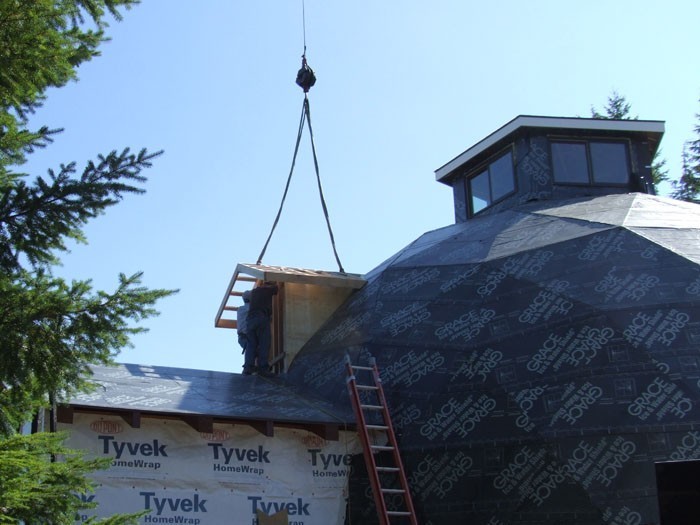
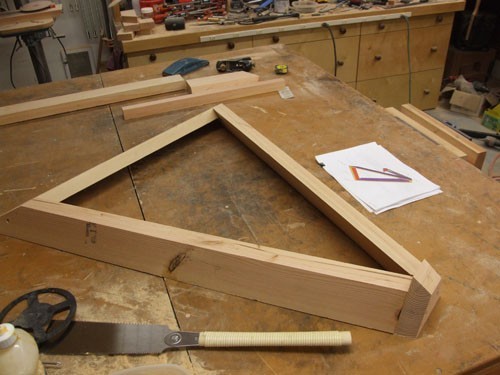
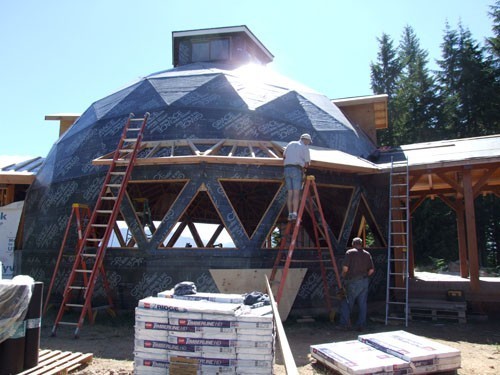
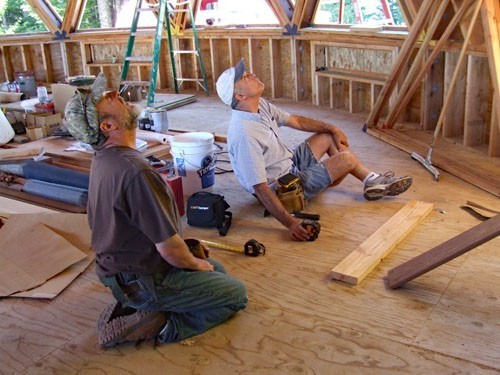
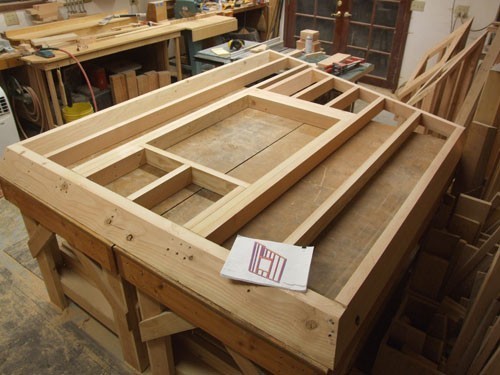
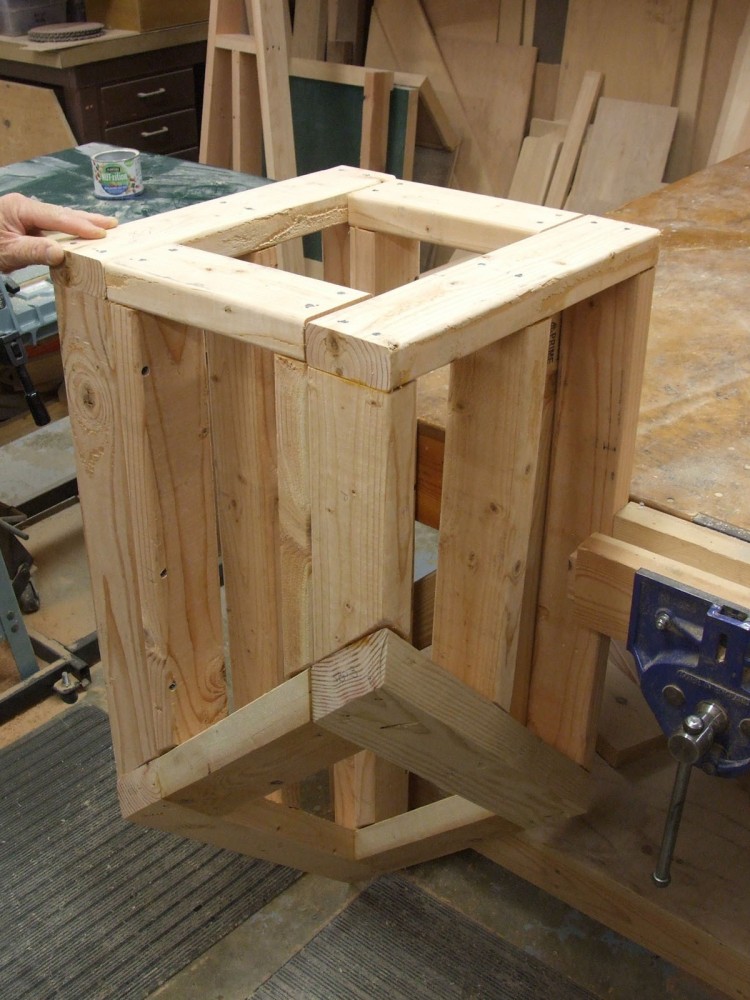
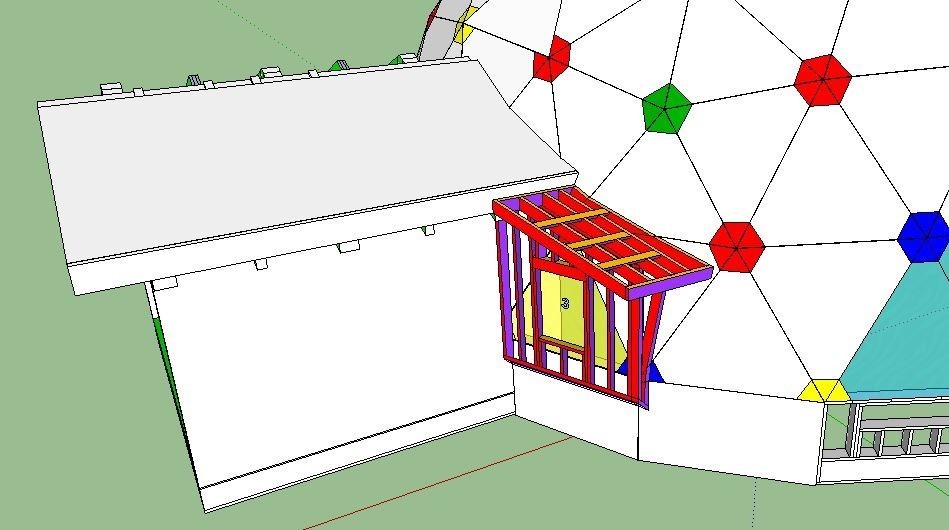
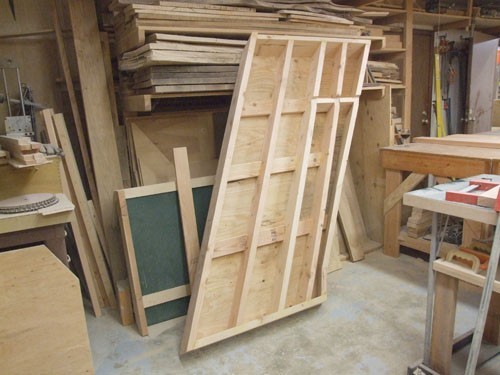
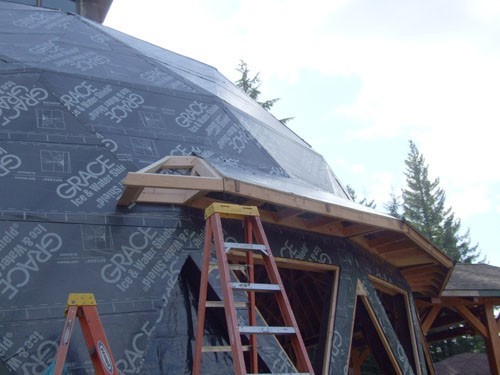
Time to get back to the dome project. First thing is to build dormers. I can't even explain how frustrating these have been to draft.
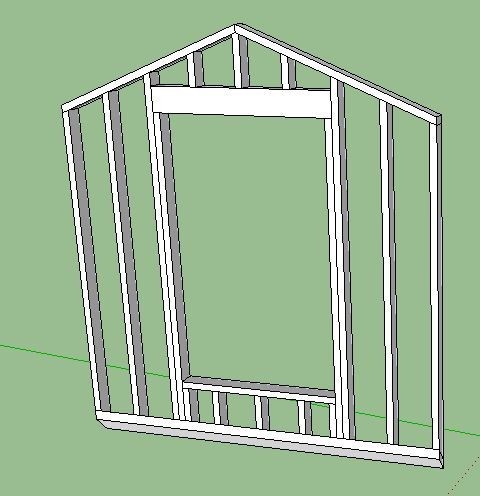
We started with the lower bedroom dormer. Dan built the front wall first without too much problem.
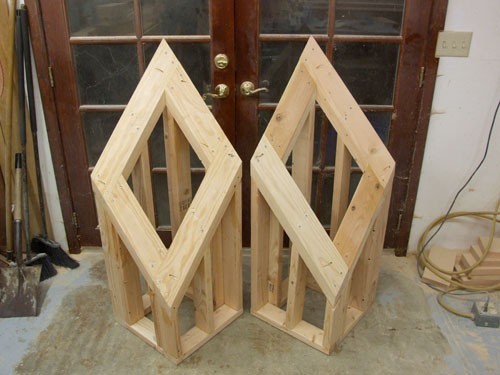
Then came the real fun....
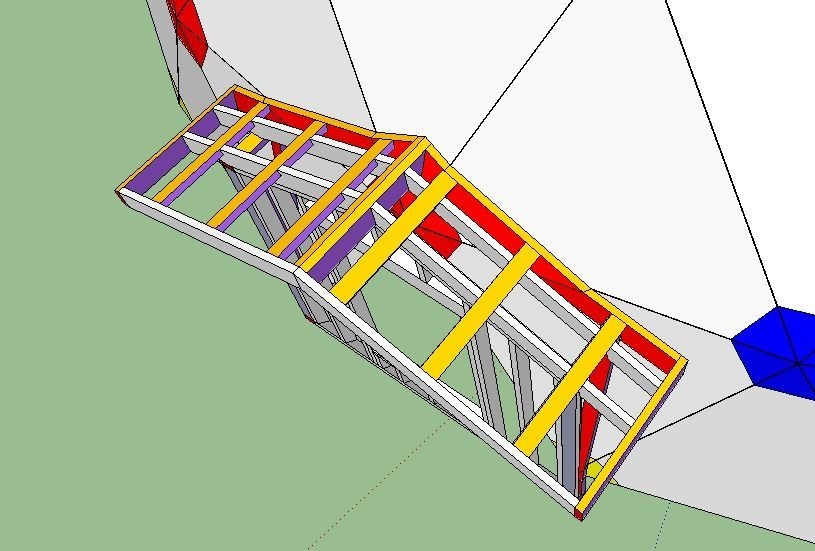
Roof panels with cleats that wrap around and attach to the dome.
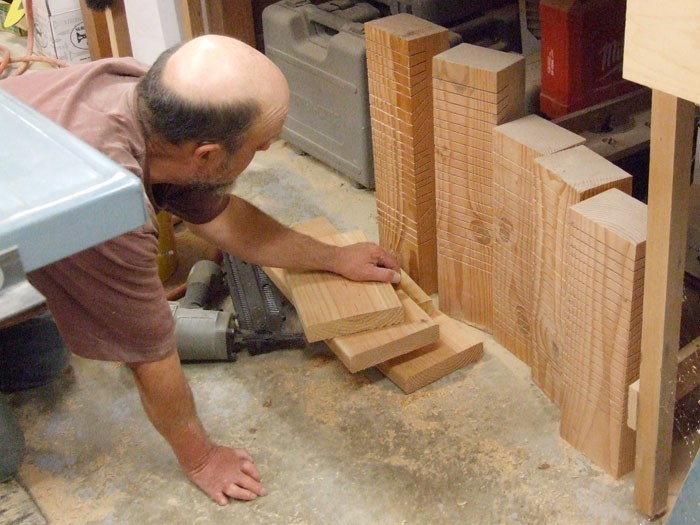
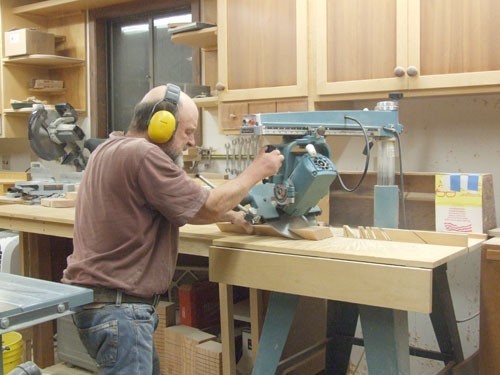
These cleats are ridiculous. They are beveled on four sides and mitered. In other words they are compound-compound cuts.
We had to color code the pieces to keep track of their orientation. The angles we recorded off of sketch-up for the cuts didn't work. We figured out we needed to draft a square edge before taking every single angle measurement.
Dan spent several frustrating days developing techniques in the shop before he was happy with his first cleats.
But he did it and now we are off and running. OK it's more like we're off and crawling.
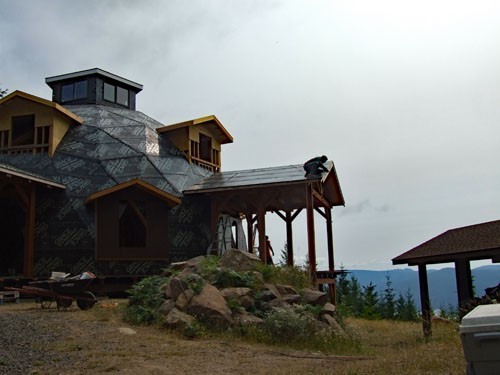
We have Jerome (Yea!!!) coming back to roof the cabin dome in August so we have our work cut out for us.
We have Jerome (Yea!!!) coming back to roof the cabin dome in August so we have our work cut out for us.
Back to home page

6-23-18
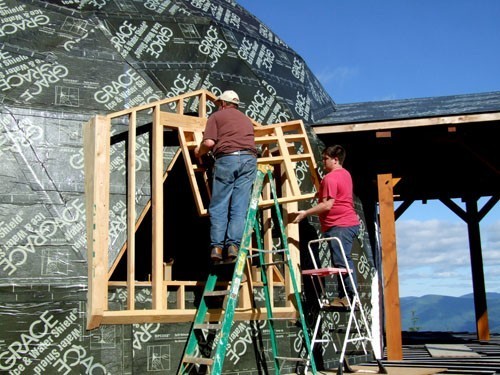
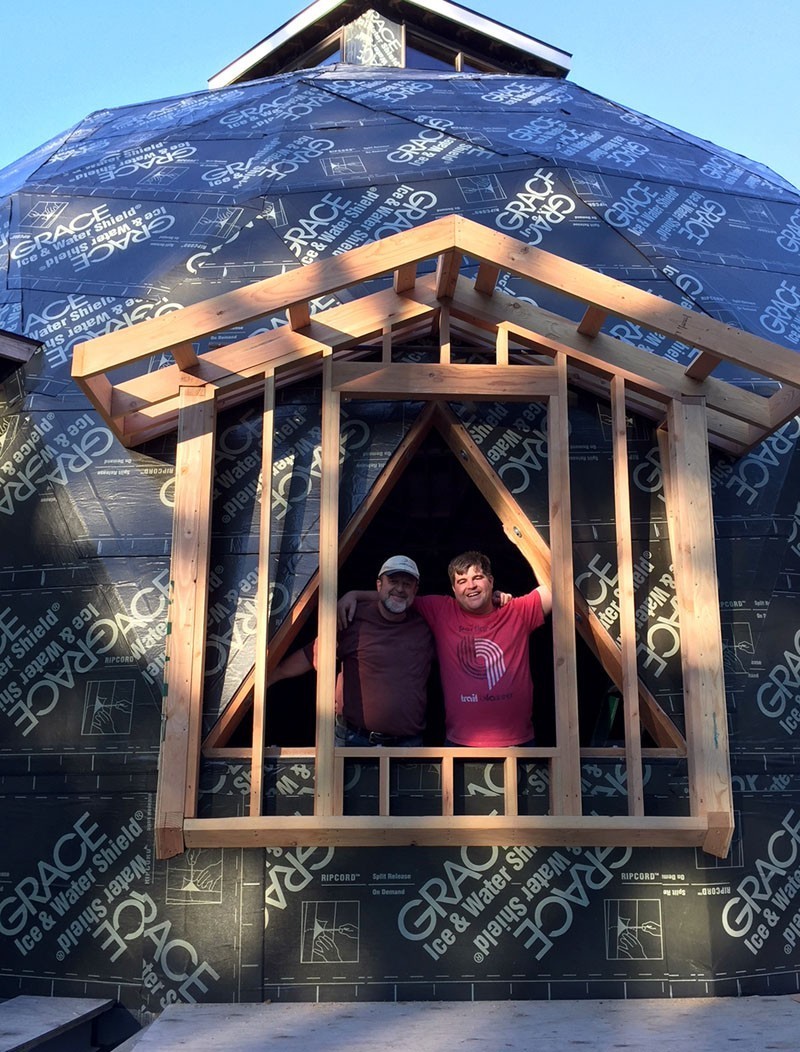
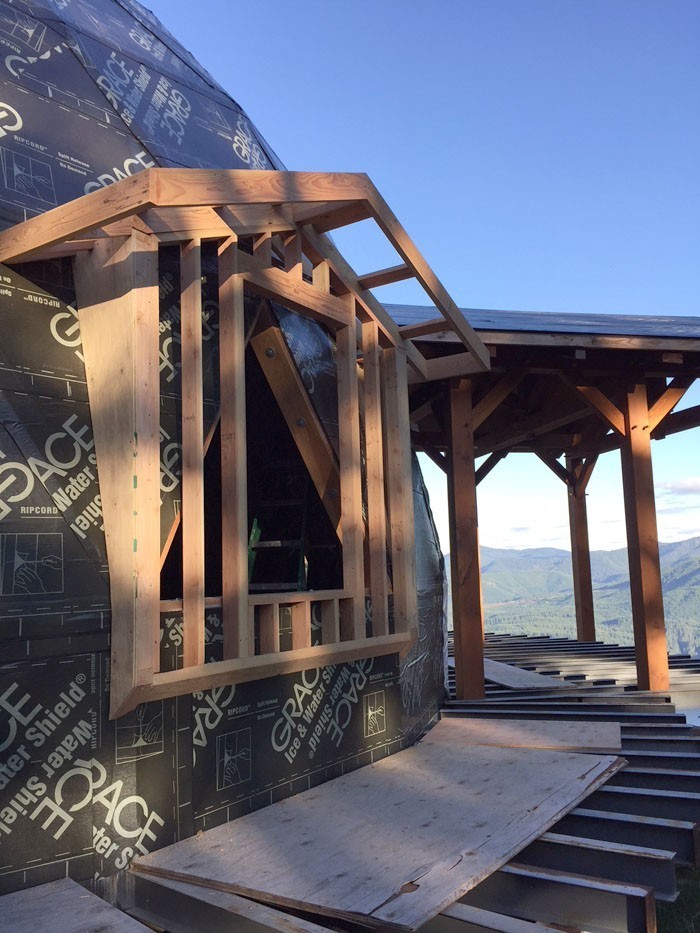
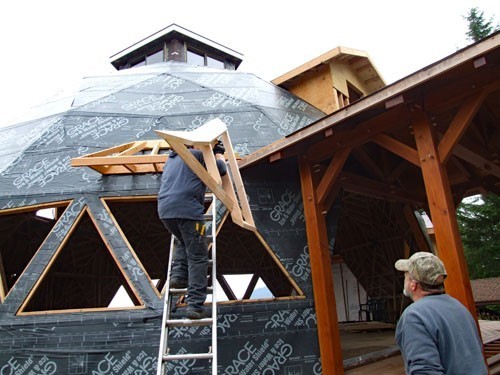
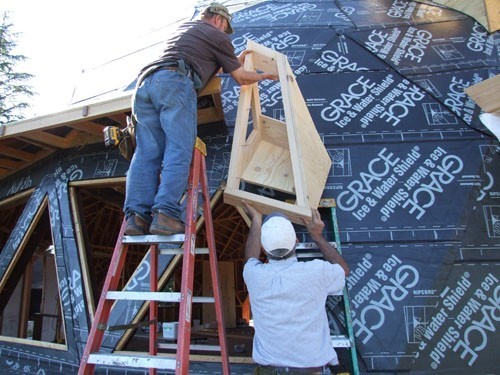
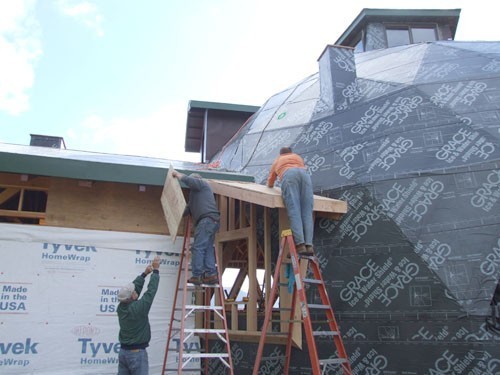
We have one dormer built. We want to install it to make sure it fits before building the rest. Dan starts by cutting the Grace at the seams on the outside.
We have one dormer built. We want to install it to make sure it fits before building the rest. Dan starts by cutting the Grace at the seams on the outside.
Danny came home to help celebrate Ethan's graduation. Then he came with us to the dome to help. After removing the nails he knocks out the temporary sheeting.
Danny, Bruce, and Dan position the front and add temporary bracing.
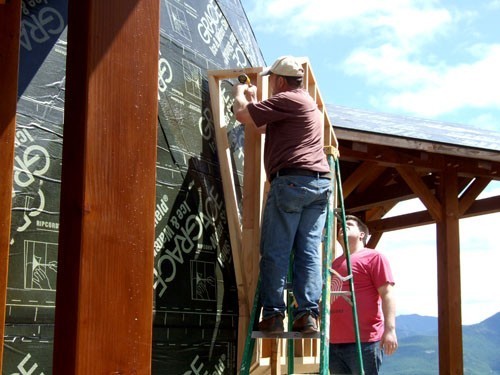
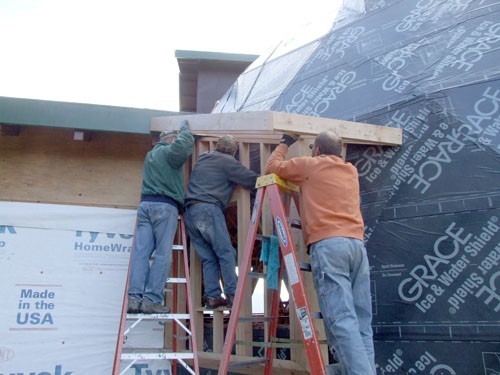
Once it is in place Dan marks it, drills it, and secures it with lag bolts.
Then the sides are attached.
After everything is secure and the side sheeting is on, they put the roof panels up.
Then they get secured. We are running out of time for today so we will add the rest of the pre-cut sheeting next time.
It wasn't quite as easy as I make it sound, but with a little persuasion it fit nicely.
It always makes the job more fun when working with family and friends.
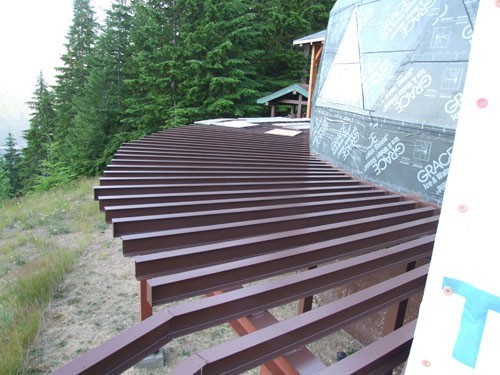
Bruce has been working during the week putting primer and paint on our steel deck framing. He has a lot done but a lot to go. It is looking great.


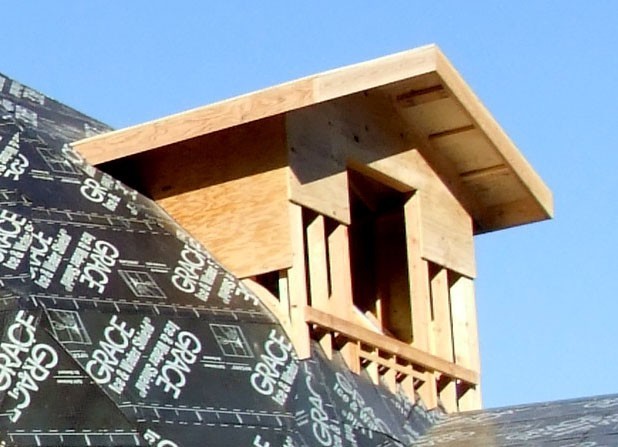
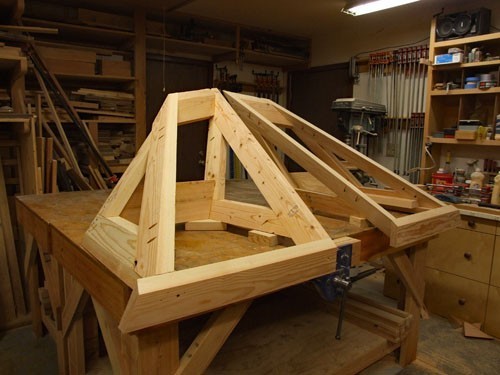
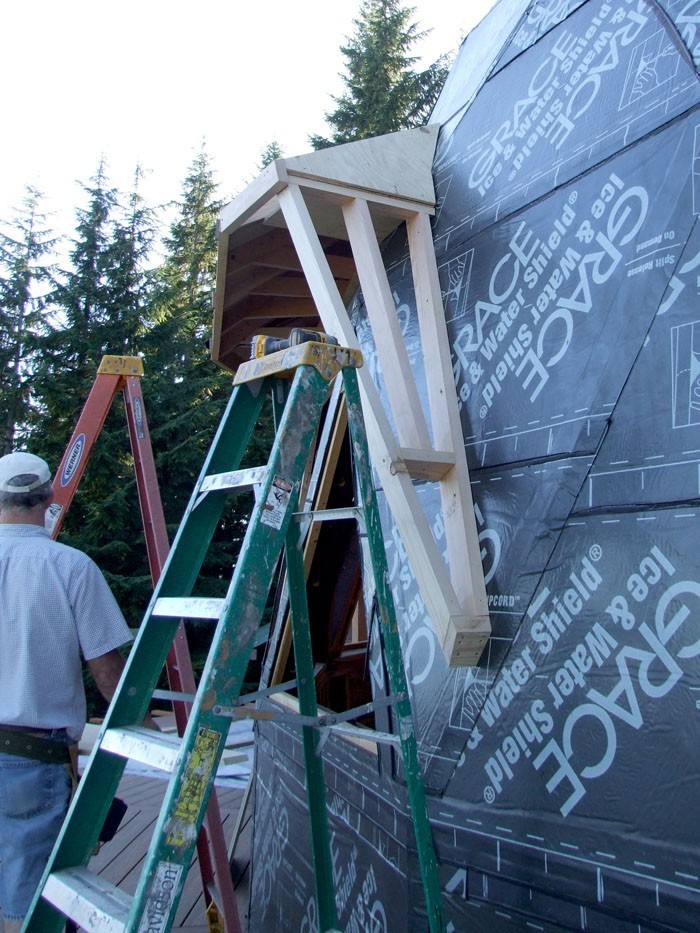
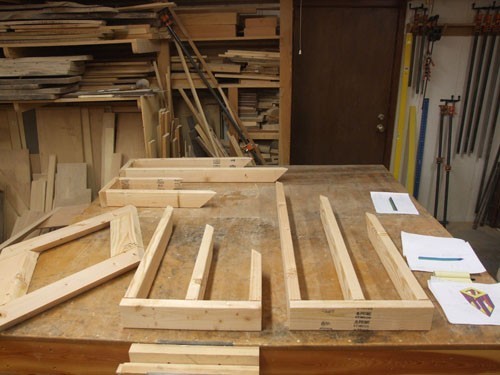
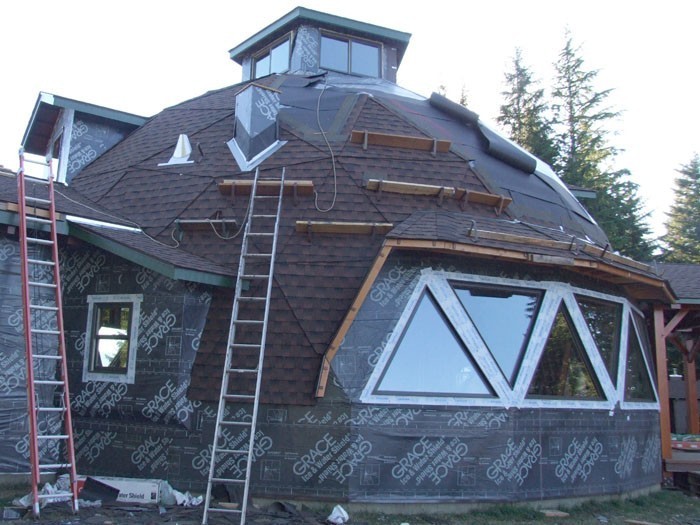
Time to start on the three upper dormers. Pictures posted in the shop helps Dan visualize where all the pieces go.
Three completed front panels.
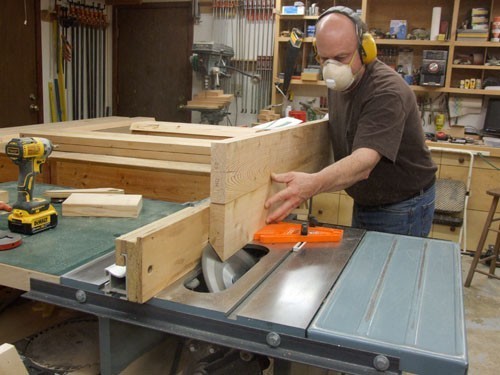
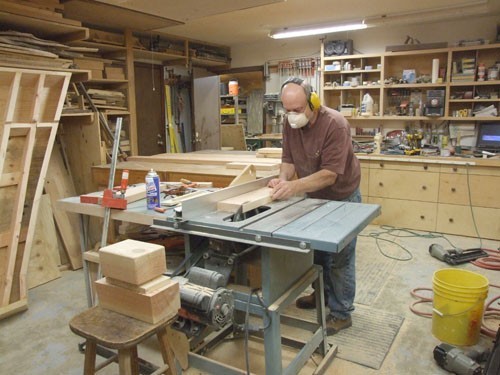
Using the radial arm saw that was once his father's, Dan is able to make bevel cuts up to 59 degrees.
For compound miter cuts that have a swing angle exceeding 40 degrees, Dan has to use the skill saw. The gauge for setting the bevel angle is not precise enough so Dan built a jig to help set the bevel.
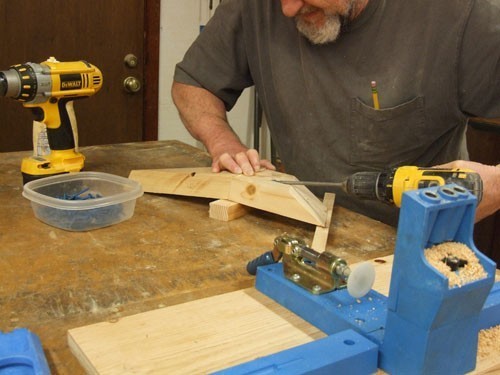
Using a pocket screw jig Dan drills holes for pocket screws (screws installed at an angle) in the cleat pieces.
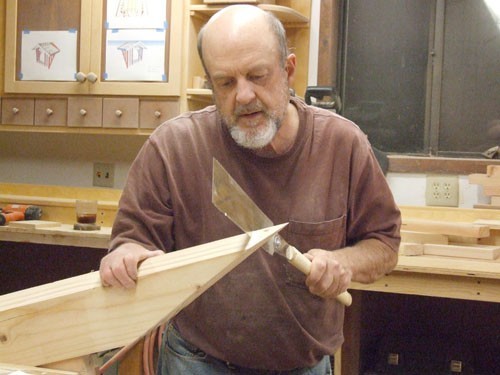
A bevel cut changes the end or the edge of a board to a specific angle while a swing or miter cuts across the face of a board.
Two from one side then flip it over and add one in the middle for a very secure joint.
Using the pocket rocket part of the jig for the long pieces.
Then attaching all the pieces together.
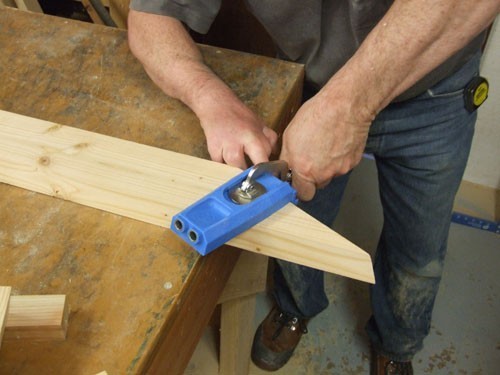
The square end is made square. Elementary, dear Watson.
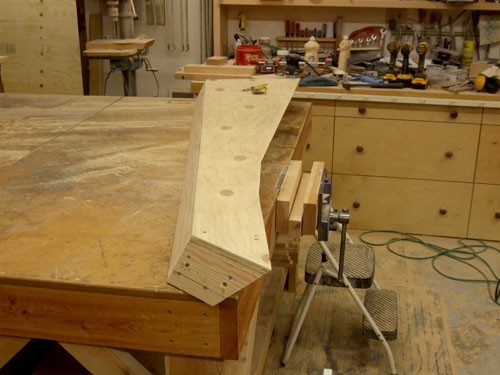
And there you have a side wall frame that will wrap around the dome.
Next the studs are added.
Everything is glued, screwed, and nailed.
A cleat is added for a nailer board needed for when installing interior sheeting.
And another wall panel is complete.
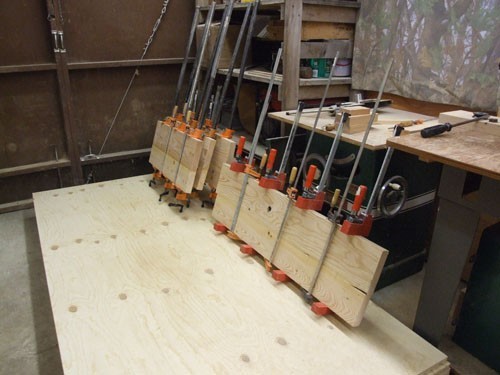
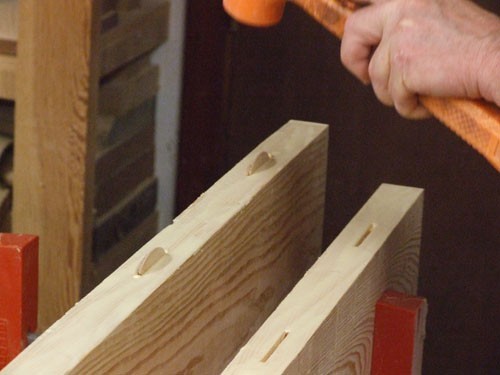
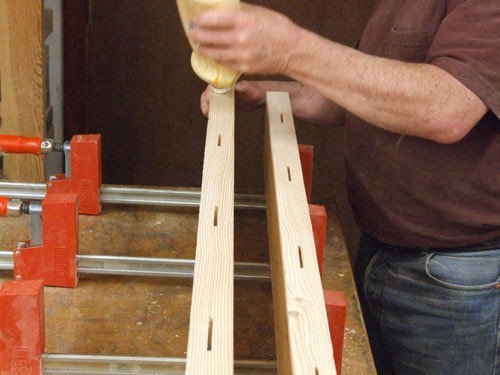
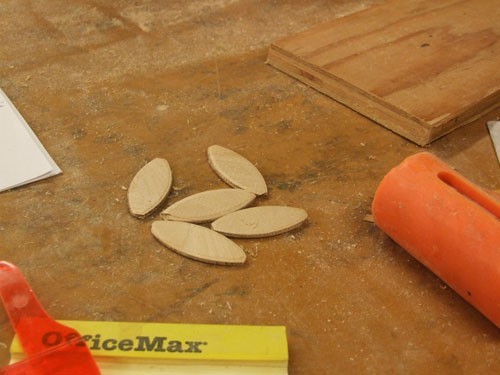
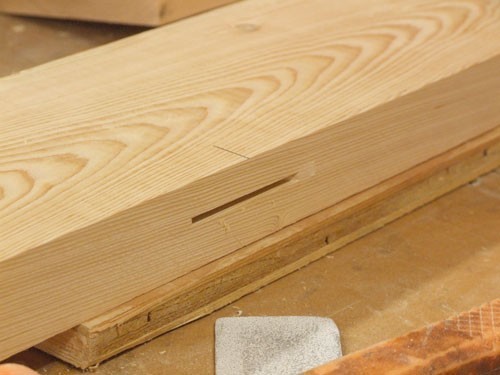

Using a biscuit cutter, slots are made in both boards to be joined.
Glue is added and wafers called biscuits are added.
The two boards are adjoined...
Clamped securely...
And left to dry.

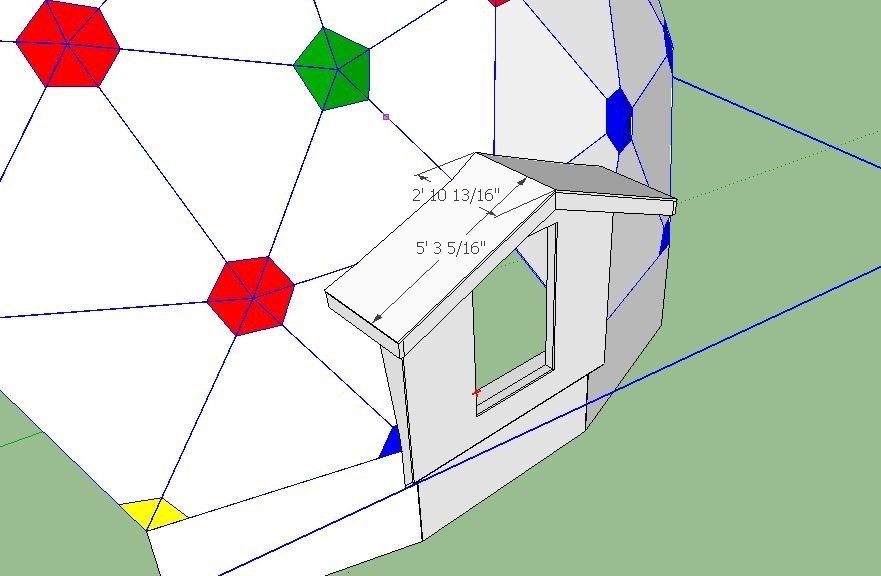
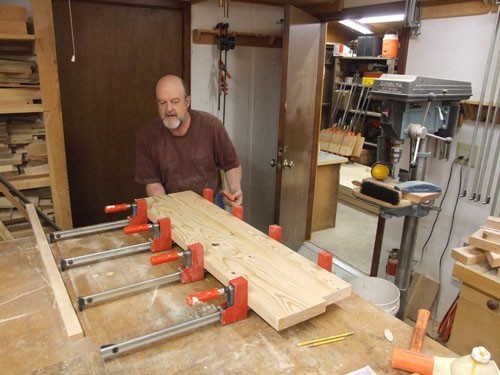
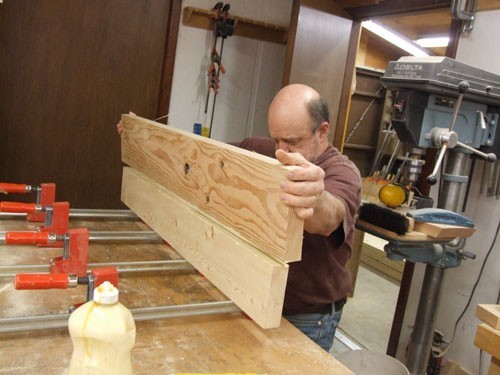
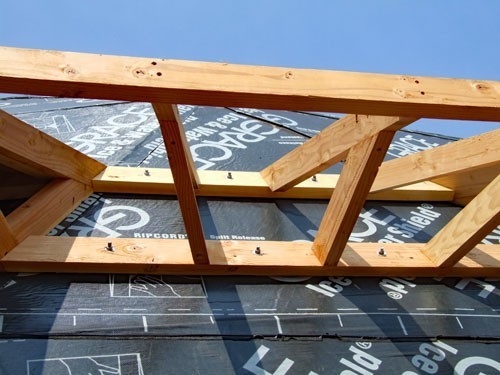
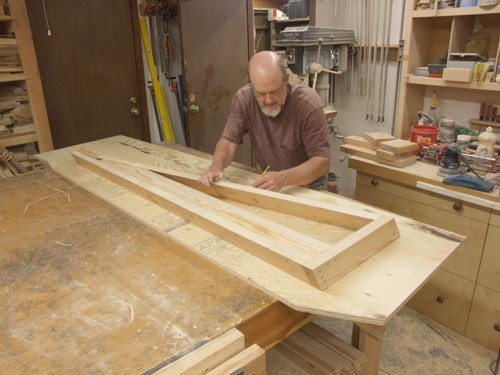
After the wall panels are complete it is time to build the roof panels. These panels have cleats that lay against the dome at a more horizontal angle than the wall panels. To be on a plane level with both the roof and the ceiling the panels are more than 14 inches wide.
So Dan starts by gluing two boards together for a wide enough blank.

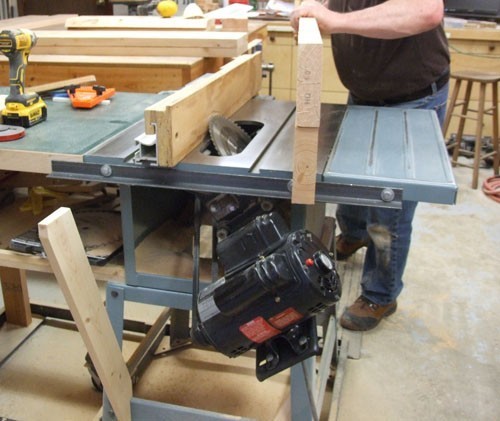
The table saw is able to rip bevels up to 36 degrees. After 36 the motor tilts up too much and then the outfeed table has to be disassembled. Then it can go to 45 degrees.
So, what to do when you need 54 degrees?
Using a Wixey box you set the blade to the complementary angle of 54 which is 36 degrees.
Then cut the board standing on edge. Be very mindful of kickback!
Flip it over and cut the other side.
It is so awesome when it all fits together.

Meanwhile....
Bruce has been very busy at the dome site. He has most of the deck frame painted, and has started attaching the pressure treated nailer boards.
Bruce has been very busy at the dome site. He has most of the deck frame painted, and has started attaching the pressure treated nailer boards.

Five done, one to go. Then on to the eyebrow dormers.

7-28-18
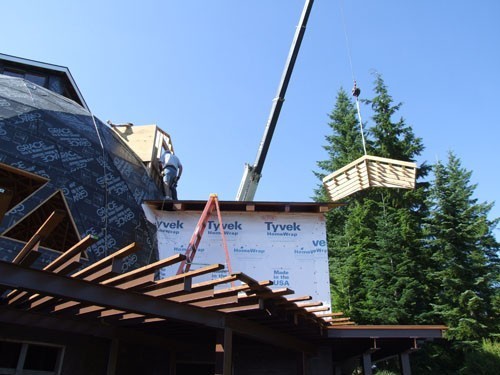
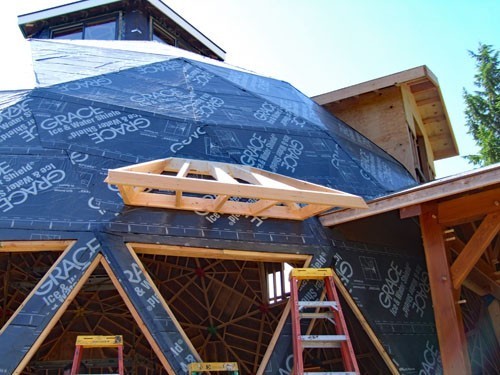
We hauled the panels for the three upper dormers to the dome site and unloaded them.
We hauled the panels for the three upper dormers to the dome site and unloaded them.
Dan and Bob begin to assemble the front and side panels.
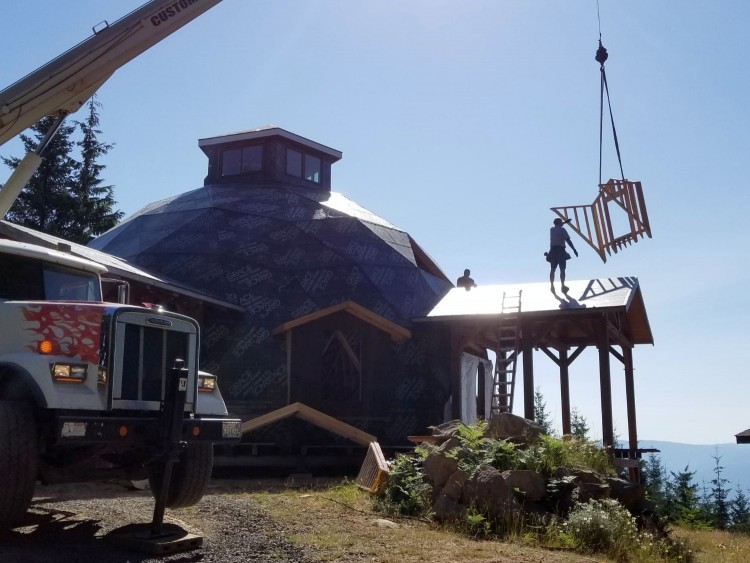
While Dan is meeting the crane at the gate, Brandon and Mike cut the opening for the first dormer.
The crane is set up and making the first pick by 9:30. Bob and Josh have some of the dormer pieces assembled on the ground.


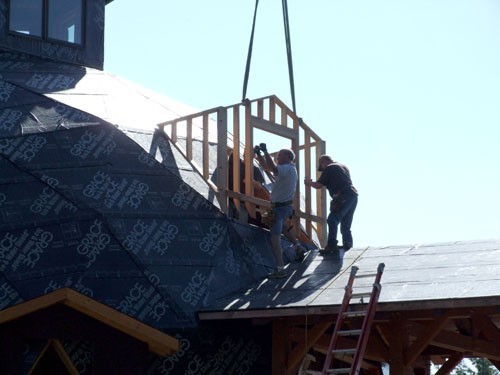
Dan and Bob are on the roof to receive the dormer while Josh is on scaffolding inside the dome.
The dormer gets positioned, marked on the dome, moved away, dome drilled for bolts, dormer moved back, then bolted.
Then the roof panels get sent up.
And the sheeting is installed.
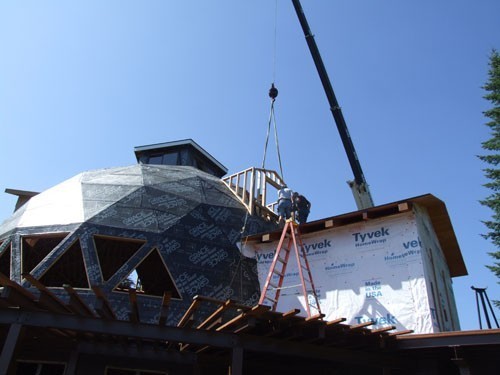


The second dormer gets placed.
The roof panels waiting their turn.
After the two dormers on this side are up, the crane moves to the other side of the dome to place the final dormer.
The walls of the final dormer are in place.
As soon as the plywood is attached to the sides the roof can be placed.


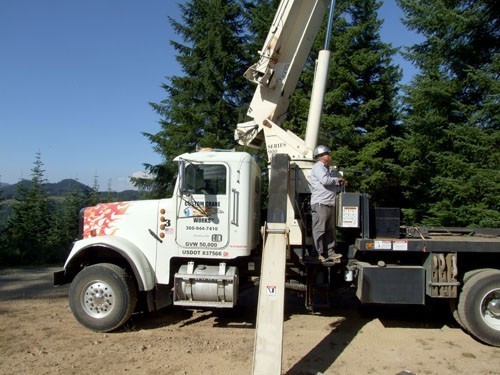
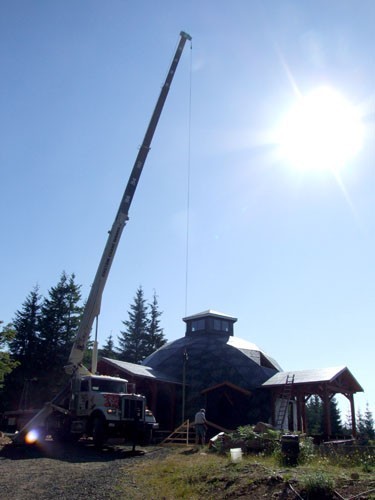
The company we rented the crane from last year no longer has cranes. So we rented this one from "Custom Crane Works" and it came with operator Todd.
The shadows were getting long as they finished securing the final upper dormer.
All three dormers fit like they were supposed to!
The final sheeting will get added after we finish securing the dormers.

8-4-18
James, Dan, & Nolan installed the first two uppies of the eyebrow dormers. Then they installed fascia boards and barge rafters on the bedroom frame.
James, Dan, & Nolan installed the first two uppies of the eyebrow dormers. Then they installed fascia boards and barge rafters on the bedroom frame.
We needed to get these two installed so we can take measurements for the crickets.


On the bedroom timber frame we are building an insulated-vented roof system known as a cold roof.
8-5-18
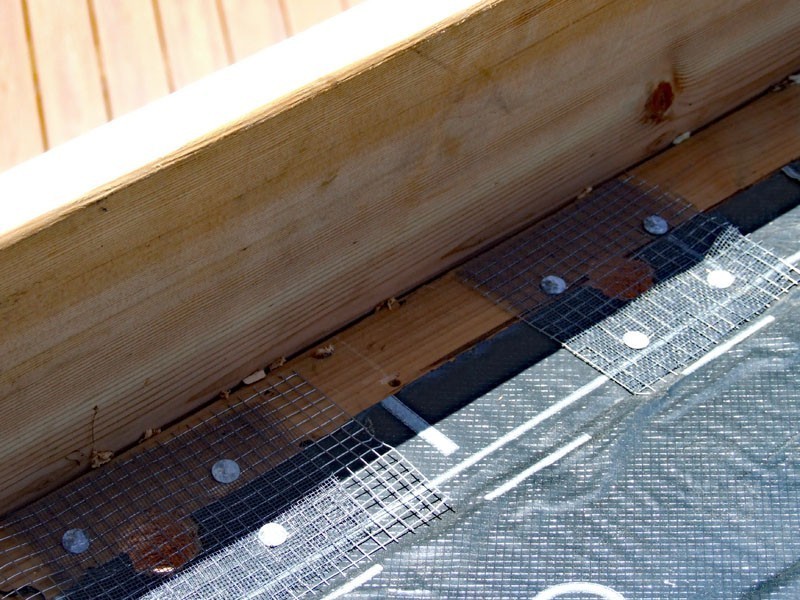
Dan and Mike started the roof system by drilling holes at the edge of the eves.
Dan and Mike started the roof system by drilling holes at the edge of the eves.
Then I attached screen and mesh to keep critters and bugs out.
Then they added foam insulation panels. Keeping the panels back from the edge where the holes are,
(more on this roof system later).
(more on this roof system later).
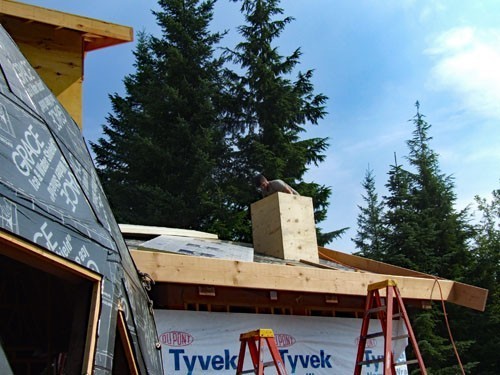
When it got too hot on the roof, they went inside and built the chimney chase.

8-6-18
Dan cut the hole for the chimney and Robbie helped install the chimney chase. Then they finished the insulation on the bedroom roof.
Dan cut the hole for the chimney and Robbie helped install the chimney chase. Then they finished the insulation on the bedroom roof.


8-12-18
Dan built the two crickets in the shop this week. They are very unusually shaped pieces. Dan says he is now a cricketator. A practitioner of cricketology!
Dan built the two crickets in the shop this week. They are very unusually shaped pieces. Dan says he is now a cricketator. A practitioner of cricketology!
If fits!!! Just like it was made for that spot.
Dan and Marty installed trim on the entry frame.
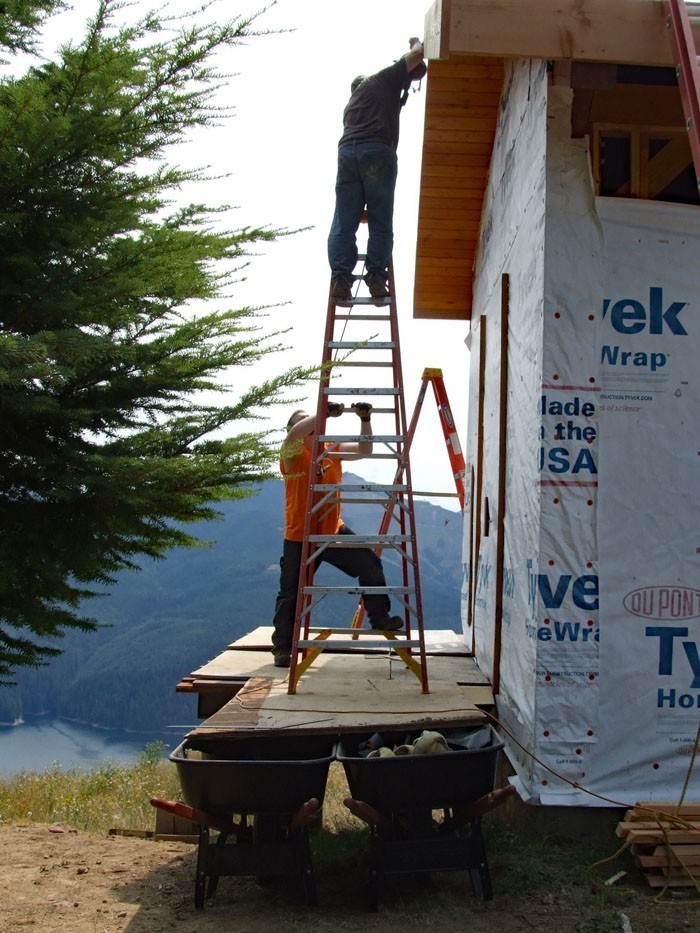
Then Marty harnessed up to do some high work. He installed the trim on the deck roof and nailed off the dormer over the bedroom extension.
OSHA approved? I think not.


8-14-18
We bolted dormers and attached plywood. Everything is getting well secured. No snow is going to knock these off!
We bolted dormers and attached plywood. Everything is getting well secured. No snow is going to knock these off!
Bruce is doing beautiful work on the deck. We are so pleased with how it's looking.
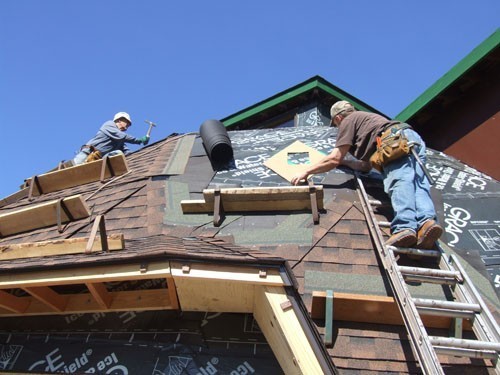
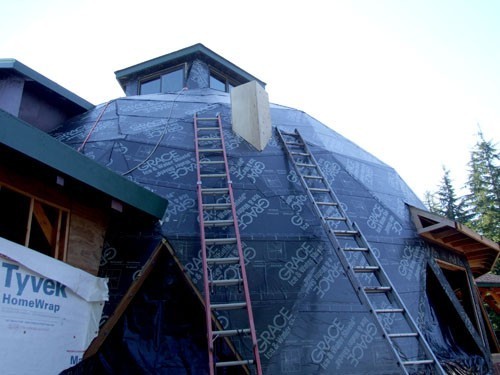
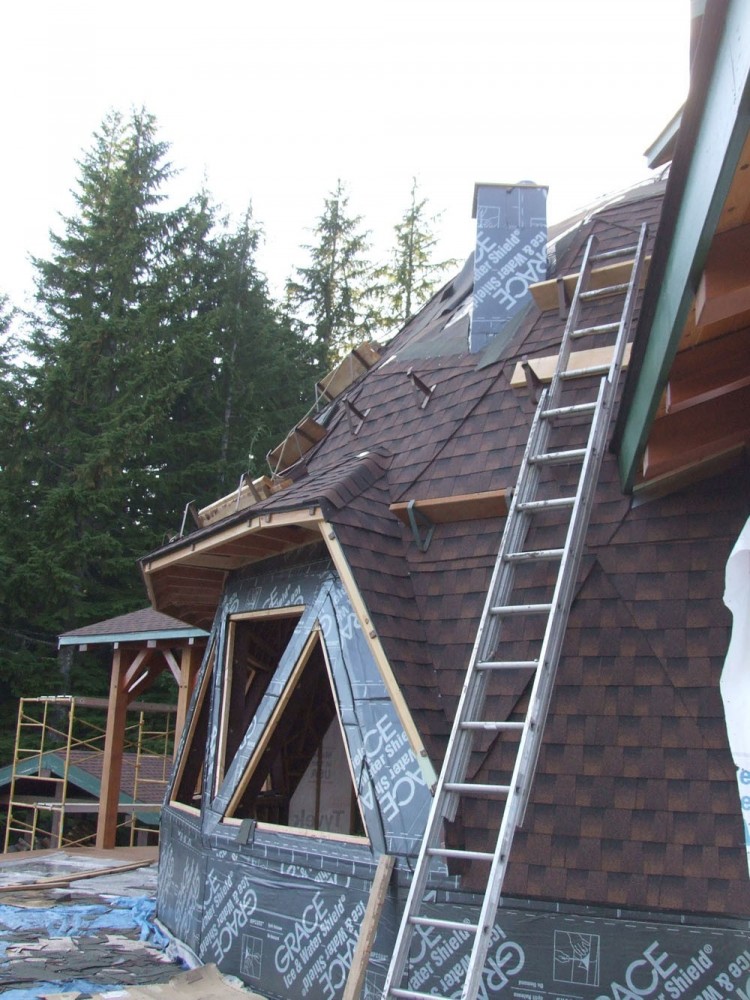
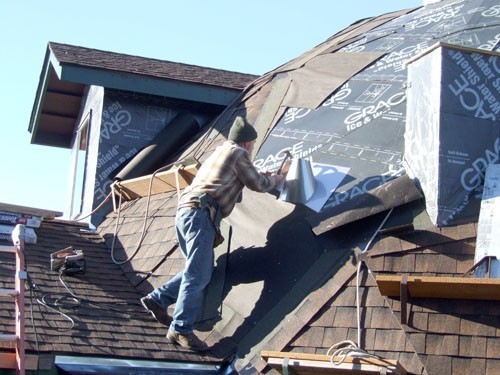
Jerome is here and is starting the roof today.

(wrong cricket)
We are going to do everything we can to try and stay ahead of him.

8-18-18
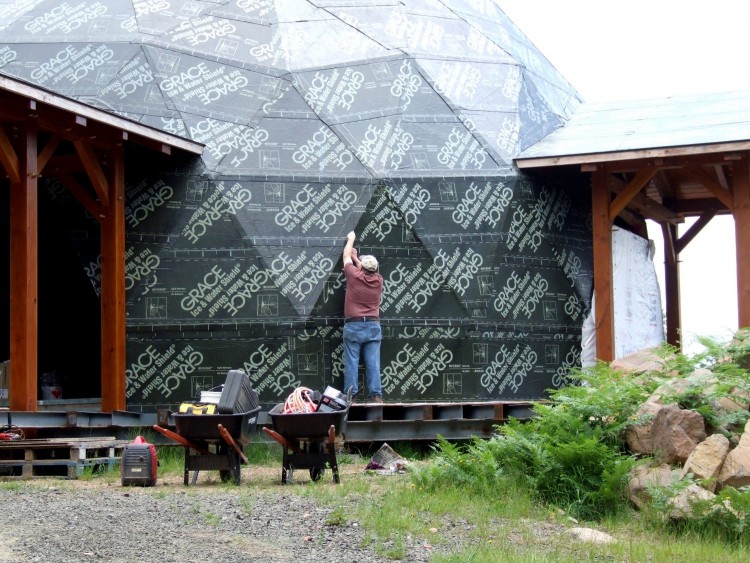
Dan and Josh installed cleats on the dome to designate the border between roofing and siding.
Dan and Josh installed cleats on the dome to designate the border between roofing and siding.


8-21-18
Dan built the four downie pieces for the eyebrow dormers this week.
Dan built the four downie pieces for the eyebrow dormers this week.
8-25-18
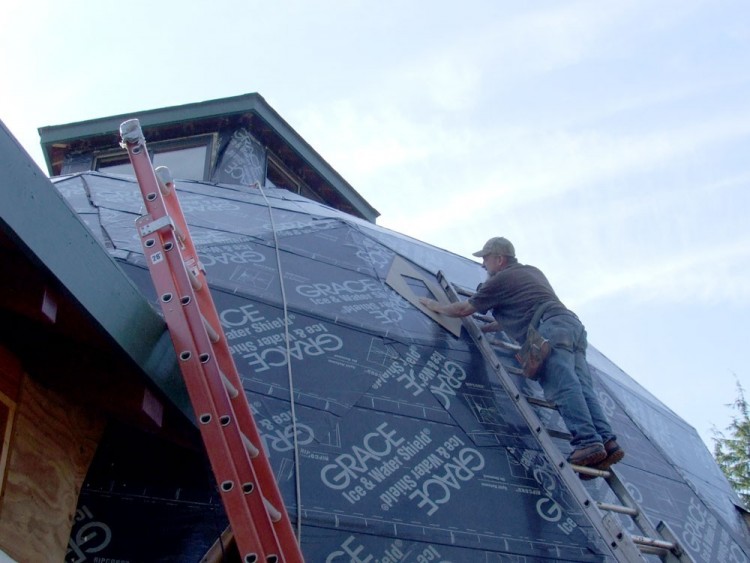
With the cleats on the dome Jerome has more area to roof and is making good progress.
With the cleats on the dome Jerome has more area to roof and is making good progress.
8-25-18
The first downie is installed. The location of the pieces is proving to be a challange.
The first downie is installed. The location of the pieces is proving to be a challange.
It took all day with "trial and error" (more of the error) for us to get the south eyebrow uppies and downies installed.
The roof is looking awesome!

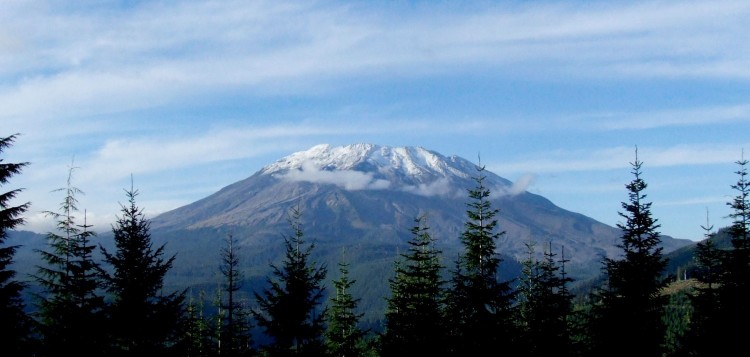
Hardly any snow left on the mountain. I know we need rain but I'm hoping for not too much till we get our roof on.


The next thing to build is the "turn the corner" pieces for the eyebrow dormers.
Dan's confidence is building. He says if I can draw and dimension it he can build it. Hmmmm..... Iv'e always assumed he could, but he probably shouldn't have said it out loud. Ha Ha


September 1st. Really? Yikes!
9-1-18
Dan and I installed the sleeper rafters on the bedroom roof. This roof system has no ridge piece to allow for air flow.
Dan and I installed the sleeper rafters on the bedroom roof. This roof system has no ridge piece to allow for air flow.
He used timber lock screws to go through the sleepers and insulation and into the roof decking below.
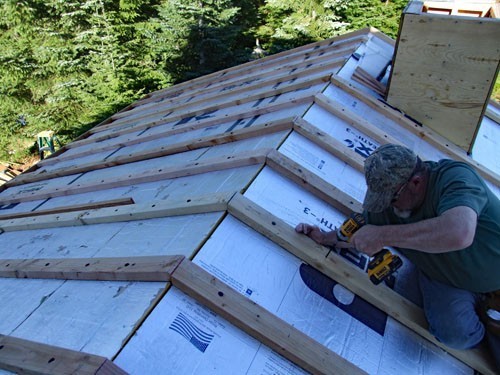
Jerome is making progress on the installation of the roof.
9-2-18
Bob spent the day at the dome and helped with eyebrow dormers. The uppies and downies on the north side are now complete.
Bob spent the day at the dome and helped with eyebrow dormers. The uppies and downies on the north side are now complete.
Then using a laser Bob brought, we transferred the middle mark of the plumbing stack in the basement to the ceiling to find where it would penetrate the dome.
Not a good spot. Guess we will not be going straight up.
Next we installed the corner piece and
the side piece on the South eyebrow dormer.
9-3-18
Dan and Nolan sheeted the bedroom roof.
Dan and Nolan sheeted the bedroom roof.
The plywood sheeting gets held back from the ridge of the roof.


9-8-18
We installed the plywood and cleats on the bedroom next to the dome.
We installed the plywood and cleats on the bedroom next to the dome.
9-8-18
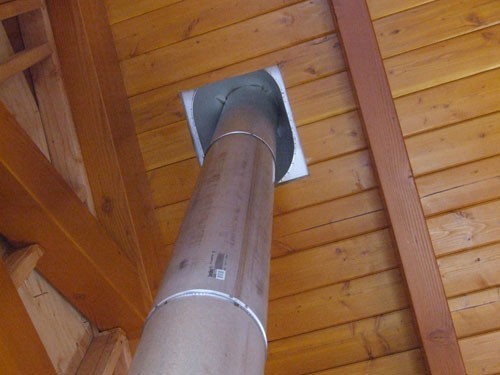
Bruce installed the chimney cathedral box and stove pipe.
Bruce installed the chimney cathedral box and stove pipe.
9-9-18
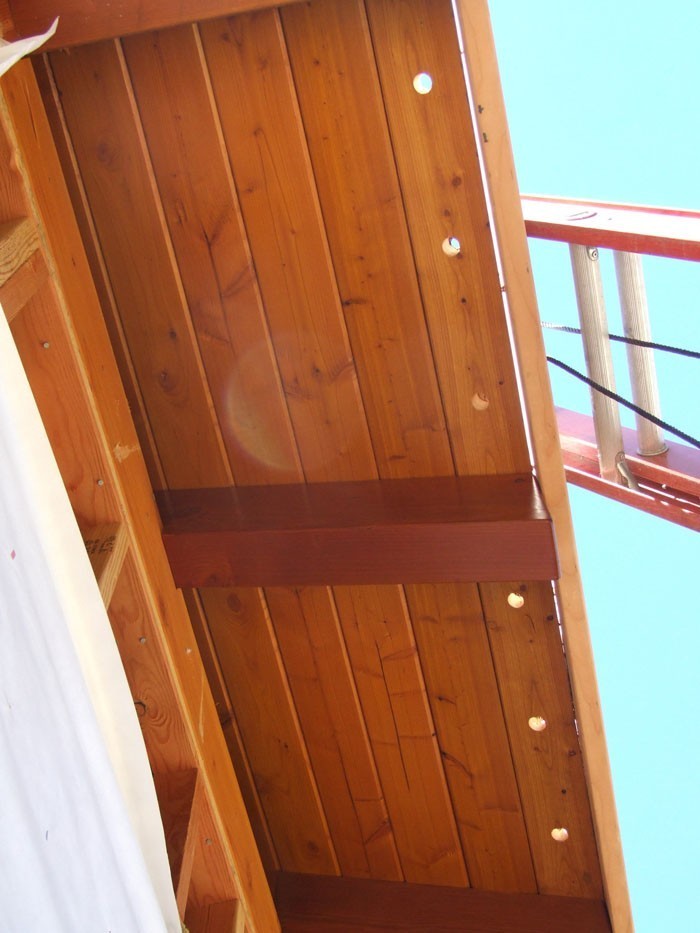
After getting the plywood nailed off and the trim installed we finished the Grace on the bedroom roof and dormers.
After getting the plywood nailed off and the trim installed we finished the Grace on the bedroom roof and dormers.
9-9-18
This part of the dome is looking good with it's roof and painted trim.
This part of the dome is looking good with it's roof and painted trim.
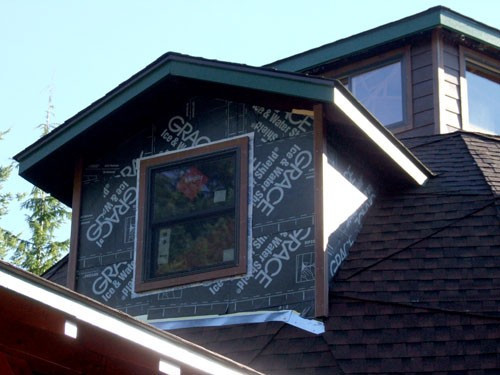
With rain coming for the next few days we tarped our windows that don't yet have dormers over them.
9-13-18
The chimney chases that go on the dome for the pellet stoves are more complicated than the one for the wood stove on the bedroom roof.
The chimney chases that go on the dome for the pellet stoves are more complicated than the one for the wood stove on the bedroom roof.
Both chases ready for plywood.
The bathroom dormer is the last dormer to build.
9-15-18
The front wall panel framed.
The front wall panel framed.
9-18-18 New snow on the mountain.


9-18-18
Time to install the chimney chases for the pellet stoves.
Time to install the chimney chases for the pellet stoves.
First we made a template of the bottom of the chase and of the hole we needed to cut.
Then using the measurements from my design in Sketchup, Dan places and marks the dome for the chase.
After cutting away the Grace, he cuts the plywood opening for the stove pipe.
Awesome! We have a chimney opening. It will be even more awesome if it is in the right place!
First, Dan installed the flashing which will keep the pipe centered. Next, using a rope and a ladder, we pulled up the chase and placed it. It sits plumb on the dome and over the hole at the same time. Which means we got it right. Yes!
Now on to the other side, repeating the process. We built the chases in a diamond pattern instead of square for a practical reason. When snow and ice build up above and come down all at once the point in the back will deflect it away and leave our chimney intact.
Then both chases got plywood, Grace, and a temporary lid.

Saturday is all about finishing building the bathroom dormer. Sunday we have help arriving for the installation and we really really want to get it completed.
Stardate 0922.18
Captain's Log:
Finished roof panel at 20:30 hours. It's going to be a long night (or actually a short night).
Captain's Log:
Finished roof panel at 20:30 hours. It's going to be a long night (or actually a short night).
The side wall pieces are rough sized.
Captain's Log: 20:55 Lieutenant Robbie shows up on his way home to help load the two completed panels onto the transporter.


Captain's Log: 21:45
The bevel ripping is complete and the mitering begins.
The bevel ripping is complete and the mitering begins.

The pieces get double edge beveled on the table saw.
A lot of the cuts are unique and the saw has to be set for each one.
Many of the compound angles are too intense to cut on the radial arm saw. Dan looks to see if the angle he needs is on one of the set up blocks he has already made.
Using the digital protractor to set the saw.
He does have the angle he needs and can set the saw without making another guide.
He clamps the piece and makes the cut.
Trimming the end with a pull saw.
Stardate 0923.18
Captain's Log 01:40 hours.
My mission is near complete.
My mission is near complete.
The last dormer piece!
(I know it's a bad picture but it was 2:30 a.m. and that's as good as it gets).
(I know it's a bad picture but it was 2:30 a.m. and that's as good as it gets).


9-23-18
After a restful 3.5 hours of sleep we hauled the last of the dormer panels to the dome.
After a restful 3.5 hours of sleep we hauled the last of the dormer panels to the dome.
We attached the side and front walls together and Bruce and Mike helped us lift it into place.
After some minor adjustments we used two jacks to get it properly placed.
After it was secured they added the roof panel.
Then the sheeting.
Still having time left in the day, we put up the corner piece of the north eyebrow dormer.
....and the side piece.
We completed the sheeting and put Grace on the eyebrow dormer and called it a day.
Jerome has the south eyebrow dormer roofed and is working his way up.


9-29-18
Today we start on windows. Dan and Bruce start with the basement windows for a warm-up.
Today we start on windows. Dan and Bruce start with the basement windows for a warm-up.
Meanwhile, Jerome is finishing the ventilated roof on the bedroom extension. First, he cuts away the temporary ridge.
Then installs a roll of ridge vent (thick mesh) over the opening.
Last, he attaches ridge cap shingles and the breathable vented roof is complete.
(I keep watching for it to take a breath, but so far nothing).
(I keep watching for it to take a breath, but so far nothing).


After the basement windows were in they installed the three loft dormer windows. Two double hung on this side and an egress casement on the other side
I nailed off the windows then Dan and I flashed them and we called it a day.
The windows are fitting perfectly.
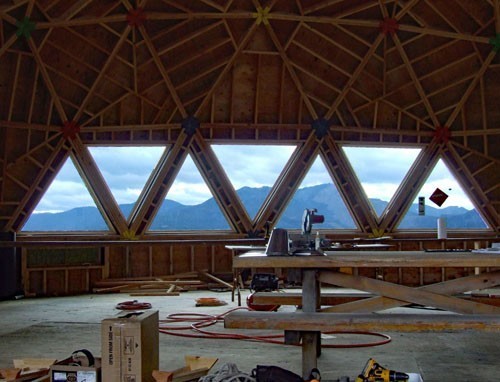
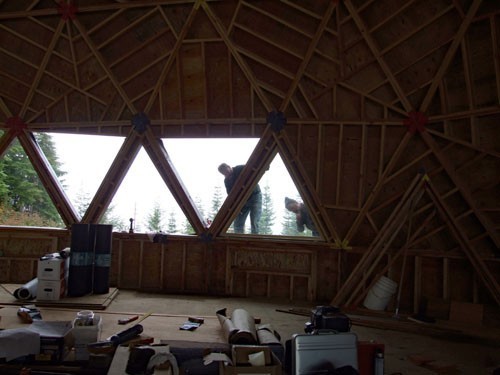
This is a special day in dome building for me. This dome was designed around the two arrays of triangle windows and it is awesome to be looking through them.
The four basement windows, three upper dormer windows, and seven south picture array windows are all installed, nailed off, and flashed.
9-30-18
Triangle window day. Bruce and Dan installed the south window array.
Triangle window day. Bruce and Dan installed the south window array.


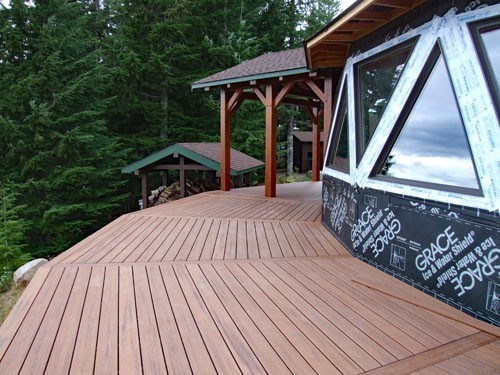
During the week I put the last two coats of finish on the deck timber frame.
10-6-18
The first window of the north array. Bruce put on the under flashing during the week.
The first window of the north array. Bruce put on the under flashing during the week.
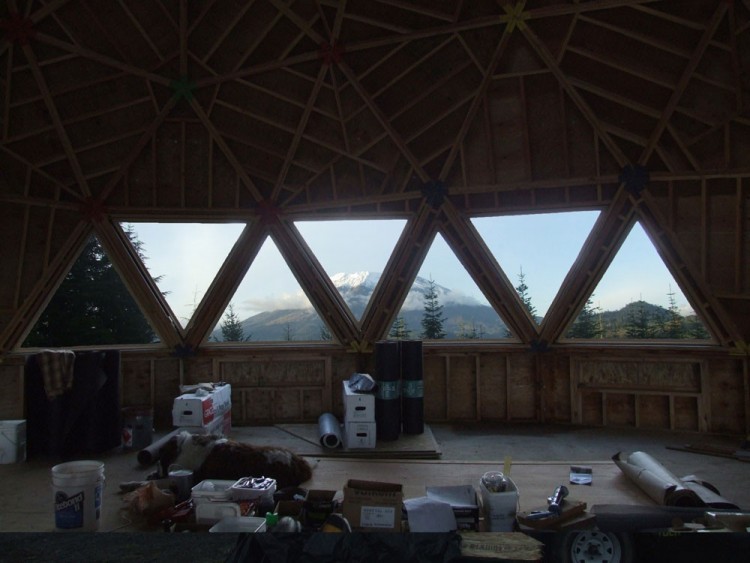
The fog swirled in and out part of the day but stayed dry.
By late afternoon the fog had cleared and we got a view of the mountain with fresh snow through our new windows.
They also got the guest bedroom window and bathroom window in.
10-7-18
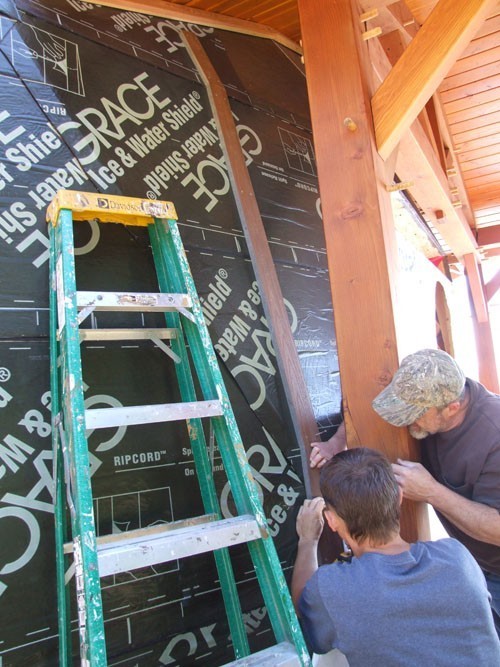
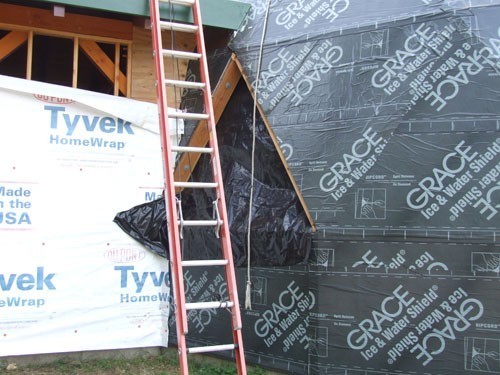
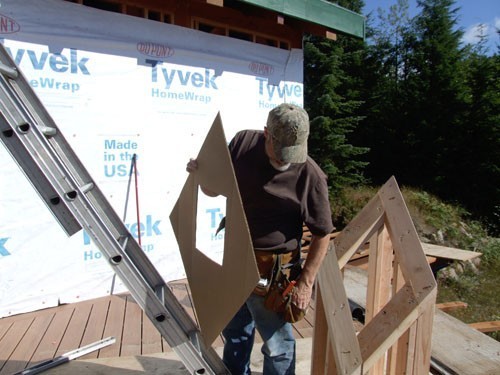
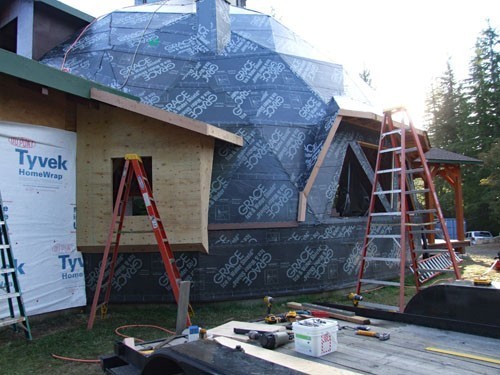
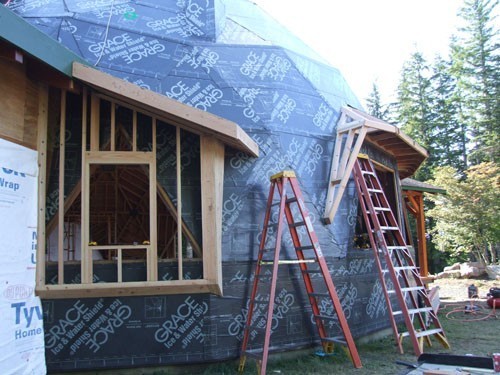
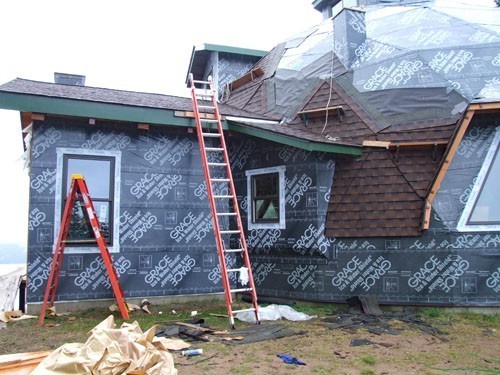
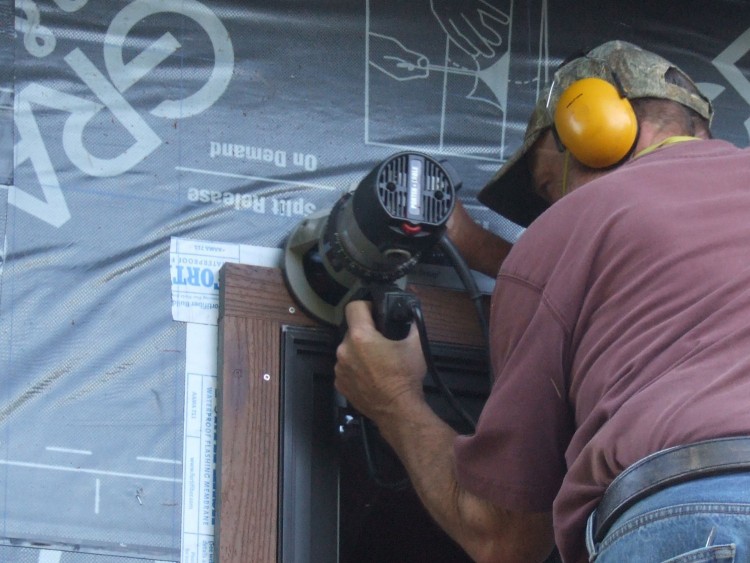
Today the master bedroom is the project. Bruce and Dan tore off the wind shredded Tyvek, (Tyvek is just not ment to go that long without siding) finished sheeting the side walls, and cut the window openings.
Today the master bedroom is the project. Bruce and Dan tore off the wind shredded Tyvek, (Tyvek is just not ment to go that long without siding) finished sheeting the side walls, and cut the window openings.
Then they Graced the south wall and installed the south bedroom window.
The north bedroom wall with Grace and window installed and bathroom window installed in its dormer.

While Bruce and Dan worked on the master bedroom I nailed off and flashed the north array of windows.
The weather is not as nice today with a few light showers.


After considering our options for window and corner trim, Dan came up with the idea of making moldings out of Trex decking material.
He rough sized it to length and ripped it to width in the shop at home.
Examples of corner trim for the bedroom and corner trim for the cupola.

10-14-18
Dan worked on installing trim on the bedroom.
Dan worked on installing trim on the bedroom.
I prepainted Hardie Plank boards. They will at least have one coat to protect them till spring.

Dan installed our plumbing vent flashing. What a beautiful, sunny weekend although it is very windy!
10-16-18
Jerome is past the last chimney chase and working his way around the north side.
Jerome is past the last chimney chase and working his way around the north side.


10-21-18
Dan completed the exterior of the chimney chase with Trex trim and Hardie Plank siding. Then I added two more coats of paint on it. I like the look.
Dan completed the exterior of the chimney chase with Trex trim and Hardie Plank siding. Then I added two more coats of paint on it. I like the look.
Dan and Bruce finished the installation of the stove pipe.
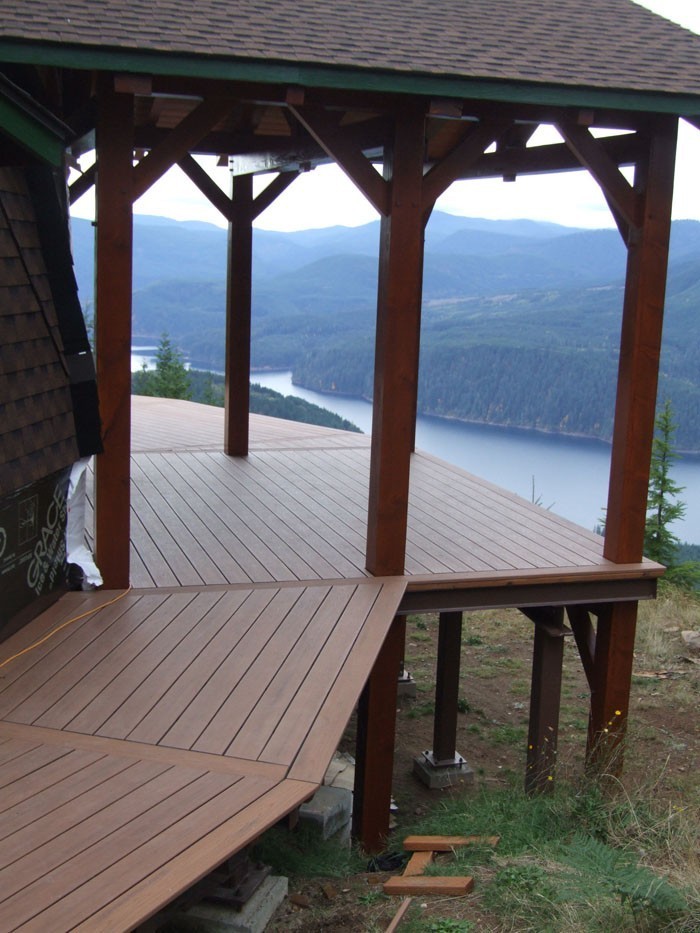
With the south side roofing complete I could pick up the tarps and really get a good look at the completed decking. We will add railings and trim next year.
I love the way the Trex deck turned out. Can't wait to have a party on the patio! But we should probably wait for railings before serving alkihol:}

10-20-18
Every day a little closer.
Every day a little closer.


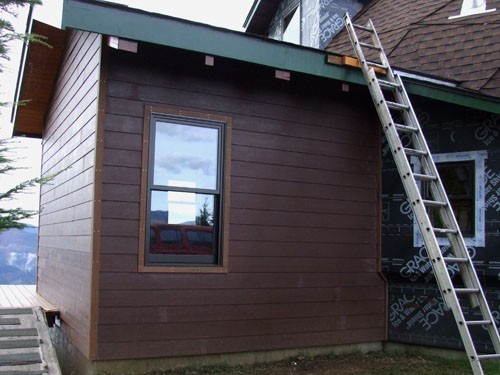
During the week Bruce hung the siding on the bedroom walls. I won't get the green trim color painted around the windows till next year but I think it looks awesome.
10-27-18
Bruce had the scaffolding set up in the middle of the dome when we arrived for the weekend. Although it's still a hike to the top it is easier than climbing the roof.
Bruce had the scaffolding set up in the middle of the dome when we arrived for the weekend. Although it's still a hike to the top it is easier than climbing the roof.
They spent Saturday installing trim on the cupola while I painted more Hardie Plank. (Sunday Mother Nature did not play nice and Dan worked at his office)
10-22-18
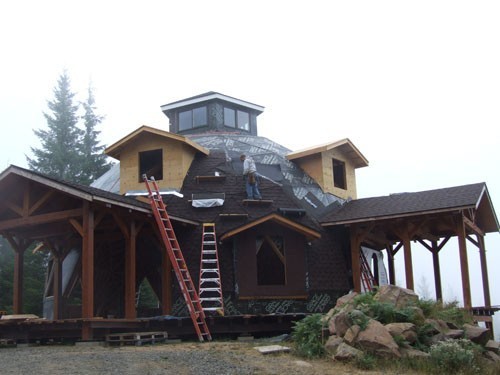
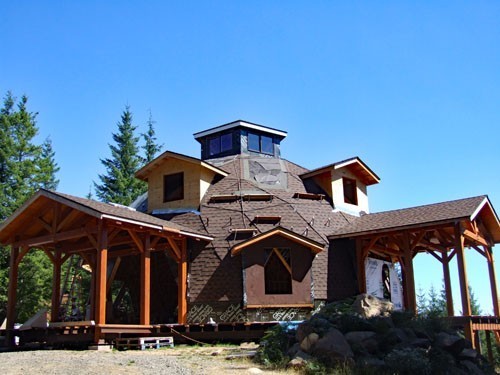
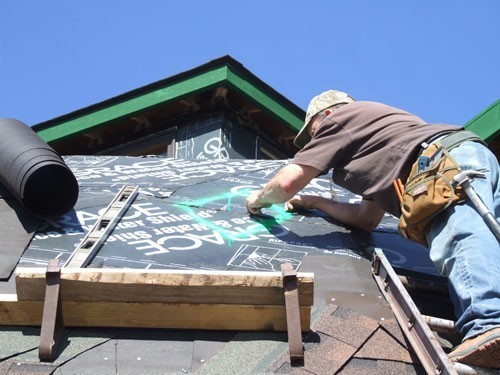
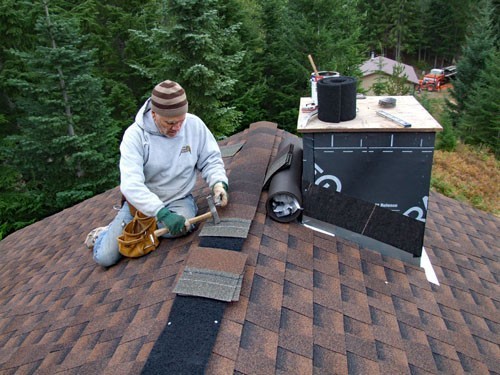
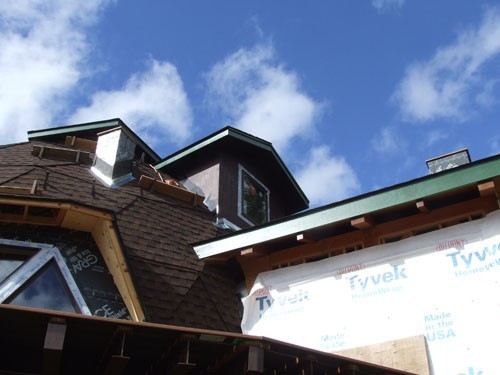
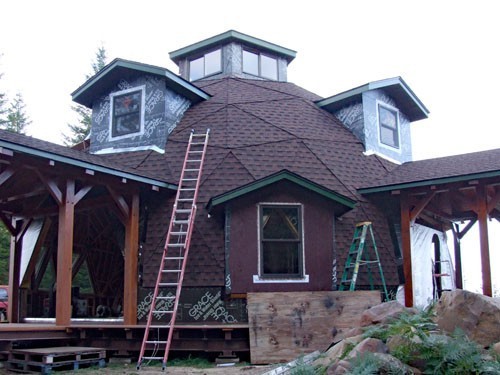
Jerome completed the roof today.
Jerome completed the roof today.
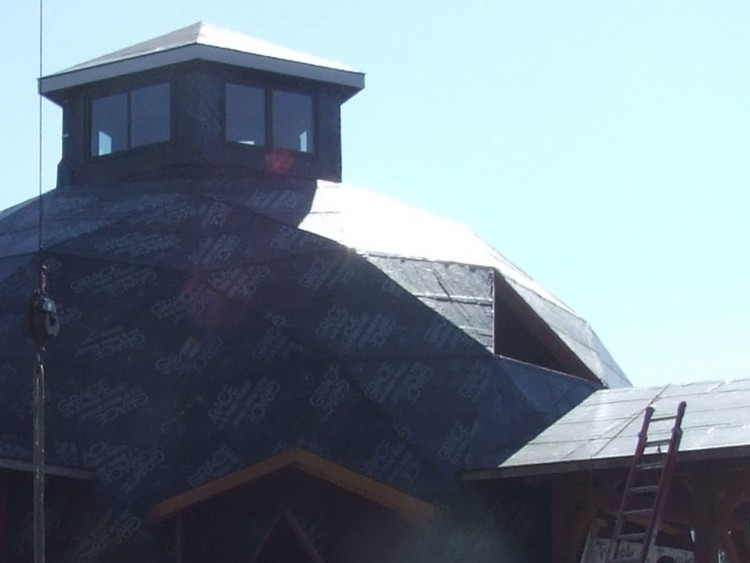
Click on the picture for dome roofing pictures.


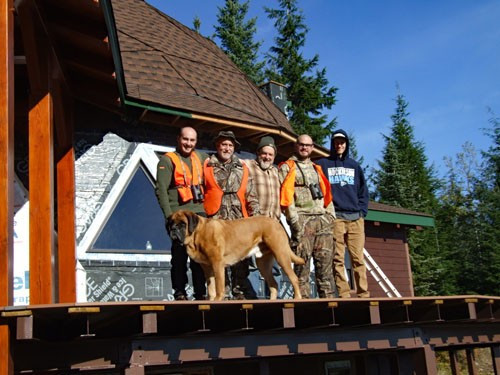
Hunt'n season has arrived. We aren't quite where we had hoped to be because of all the time spent on the dormers this summer. So Dan hunted when it rained and worked on the project when it didn't.
We installed our Wise Way gravity pellet stove in the basement. It will eventually go upstairs (We have a beautiful Pacific Energy wood stove for here). We really just wanted an opportunity to check out the Wise Way and see what it could do before putting it upstairs. We are so far very pleased with this stove.
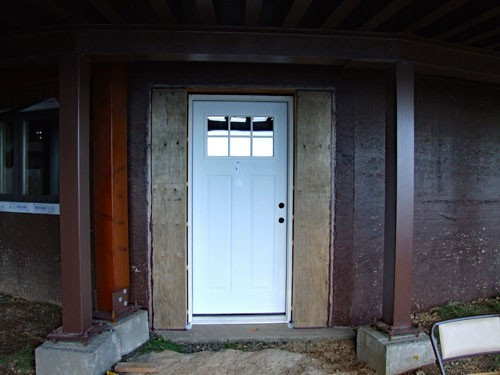
But if we are going to get the basement warm we are going to need a door. Dan works on building the wall for the exterior door.
Securing the wall to the concrete floor.
Dan and I finished installing the trim on the cupola, then Bruce took some time off from hunting and helped Dan put the Hardie Plank siding on.
Awesome. We are trying to get the upper elements done first as they will take the worst beating from any harsh weather.
11-12-18
Dan and Bruce installed the corner and window trim on the three upper dormers.
Dan and Bruce installed the corner and window trim on the three upper dormers.
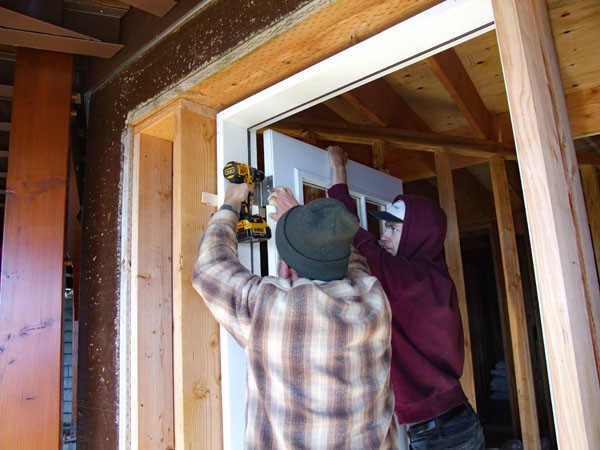
Our grandson Ethan joined us for the weekend and helped install the basement door. The first door was built so poorly and so out of square that they uninstalled it, returned it to town, got a new one, and got back to the dome at dark.
Sunday we started in just about the same place as Saturday, but things went much smoother with a good door. Next year I will do a stone surround and paint the door.
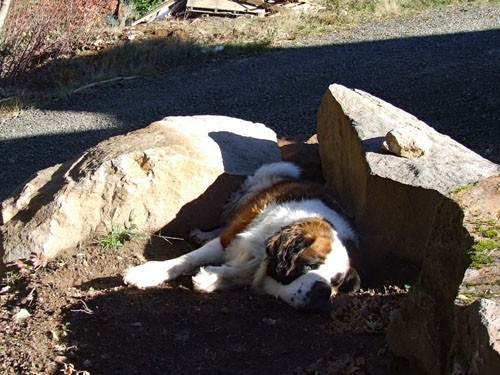
For some time now I have believed that heavy snow has been breaking off my blueberry bushes branches. But after witnessing Buck mow down the rest of the blueberries and moving to a vine maple before I could shoo him away I realize it just ain't so!
He looks so innocent when he is sleeping. Ah, but we know better.
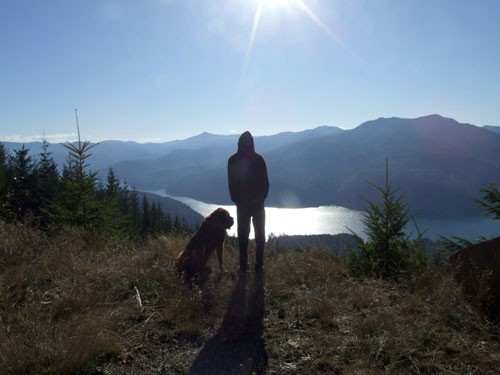
A beautiful spot for both Man and Beast.


Dan's Mom passed away November 23rd. She will be greatly missed and greatly remembered.
12-1-18
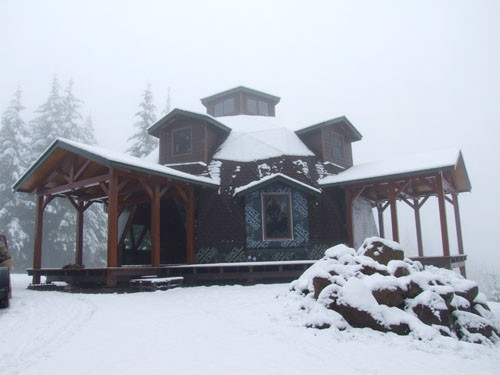
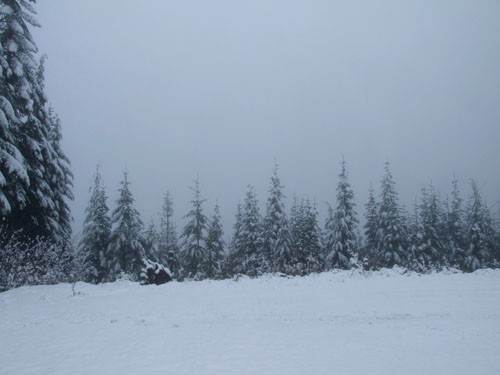
We had cut hunting season short and didn't winterize the cabin. We went to the dome first and discovered a little snow up top.
We had cut hunting season short and didn't winterize the cabin. We went to the dome first and discovered a little snow up top.
Where'd the mountain go?
During the week, before the snow arrived, Bruce sided the upper dormers and buttoned things up for us.
We packed up all the tools to take home for end of season maintenance. Then we cut our Christmas tree and went to the cabin to winterize for winter.
Dan made some final adjustments to the door and installed the knob and deadbolt. I foamed around the jamb and we locked the basement for the first time.
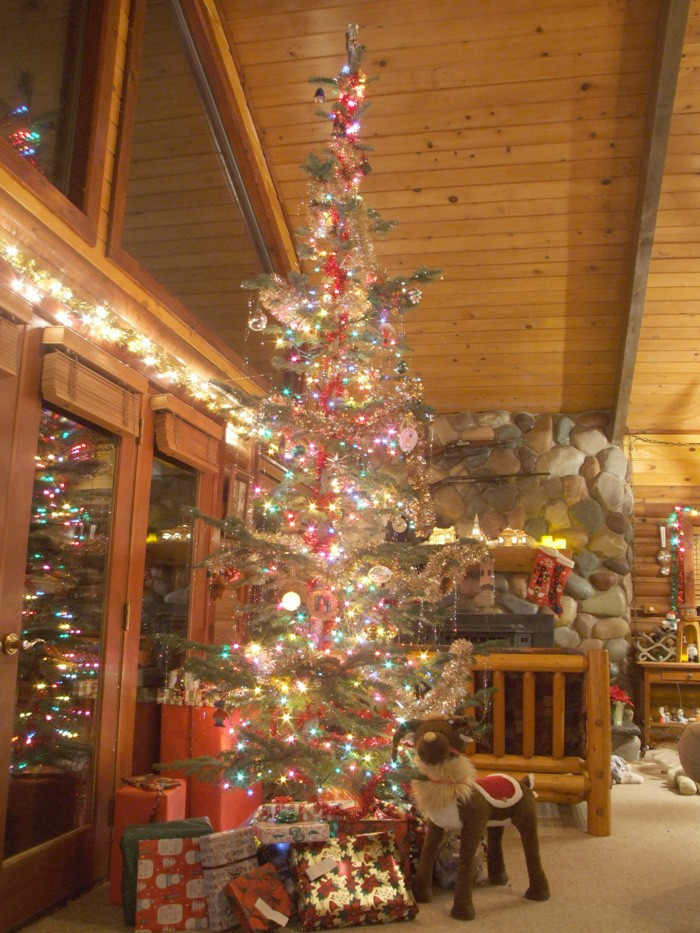

Merry Christmas Everybody!
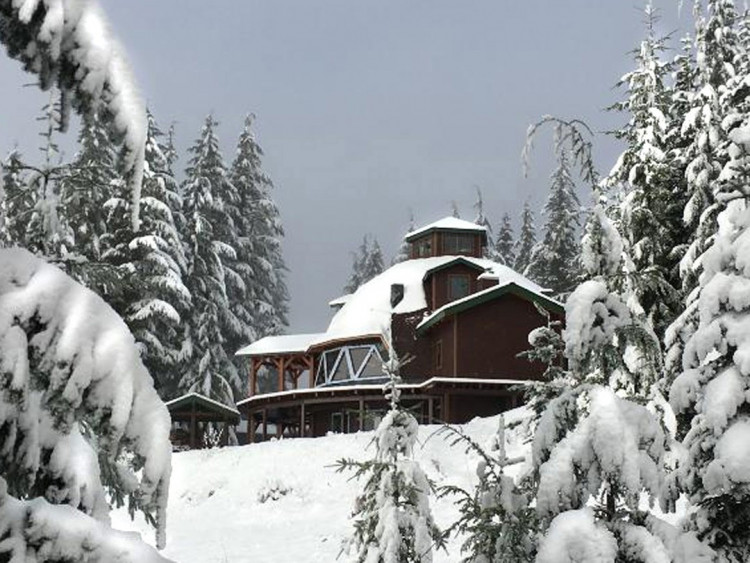
12-27-18
Bruce sent us "snow on the dome pictures".