2023
This will be our first full year of living off-grid at the Timber Dome.
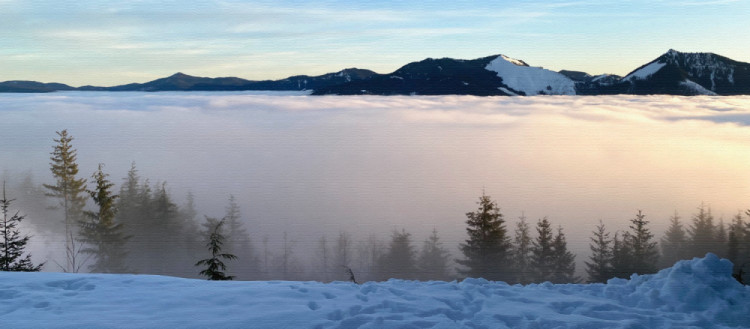
I wish I could just walk accross the clouds and do some hiking on that side of the reservoir.
At the beginning of the year there is still plenty of snow left but the road is clear.
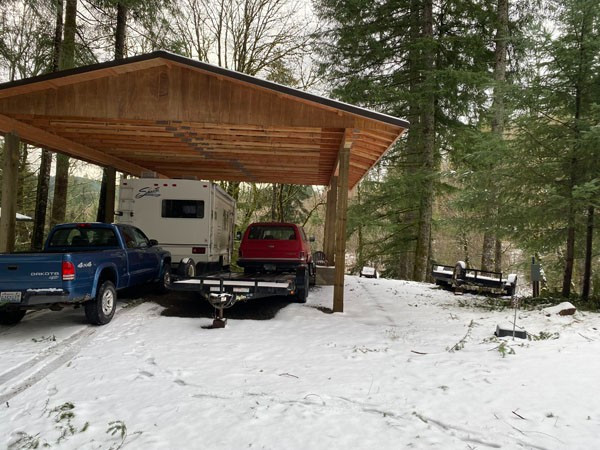
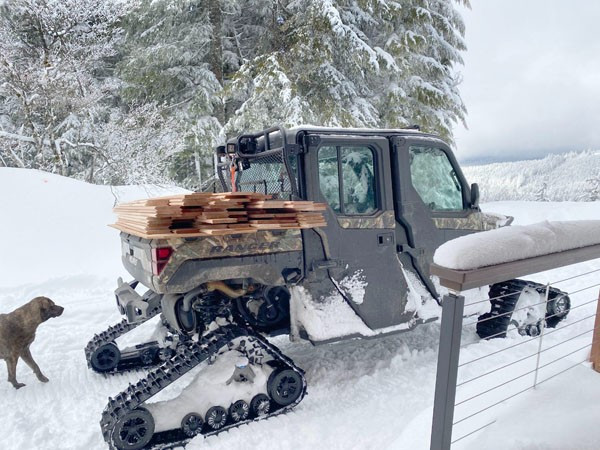
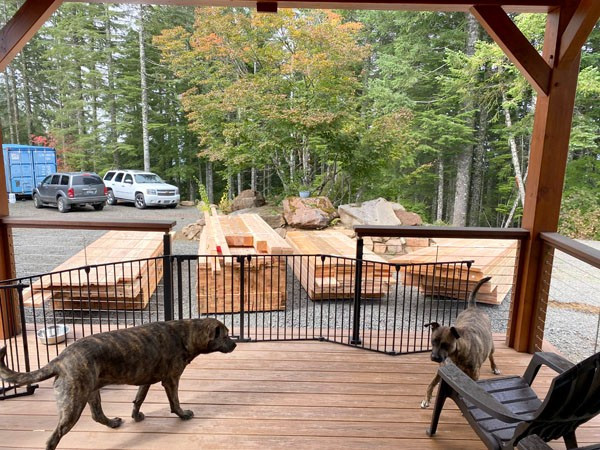
We moved the pickup to our campground site. It is nice to have a covered area at a lower elevation to store some vehicles.
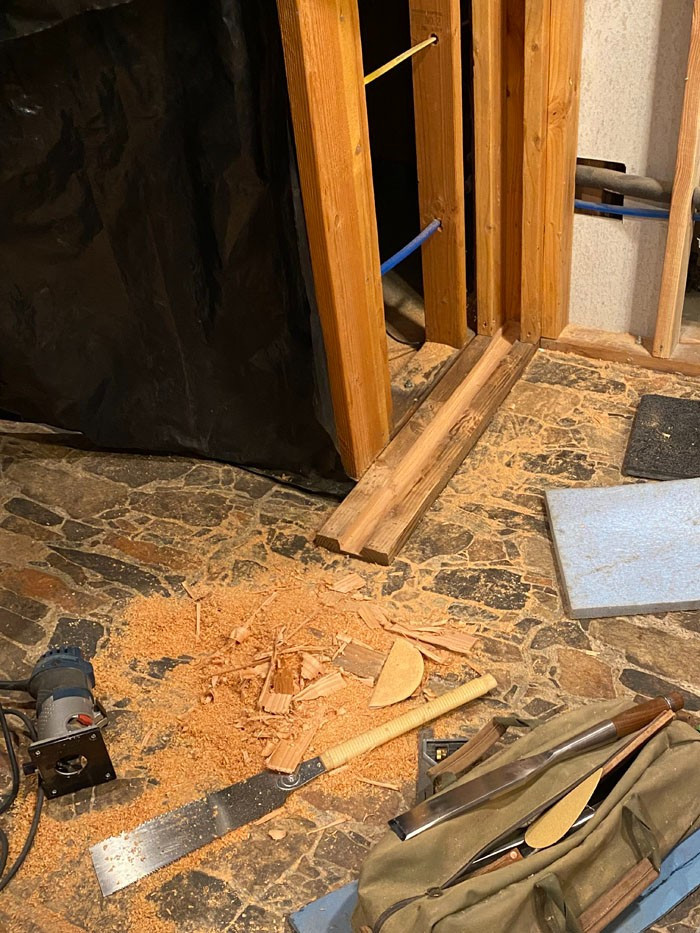
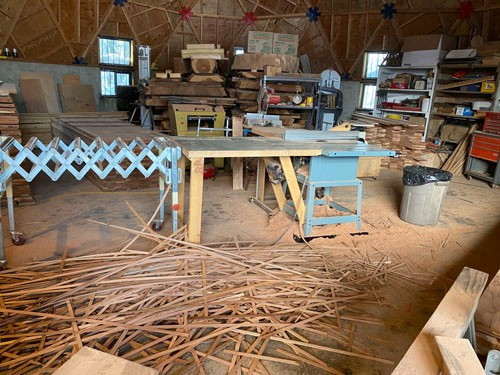
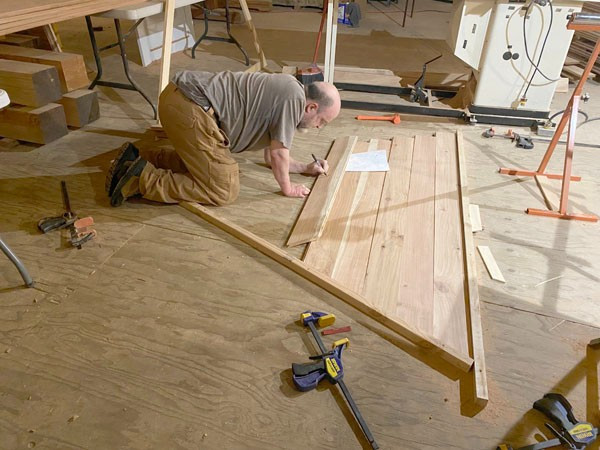
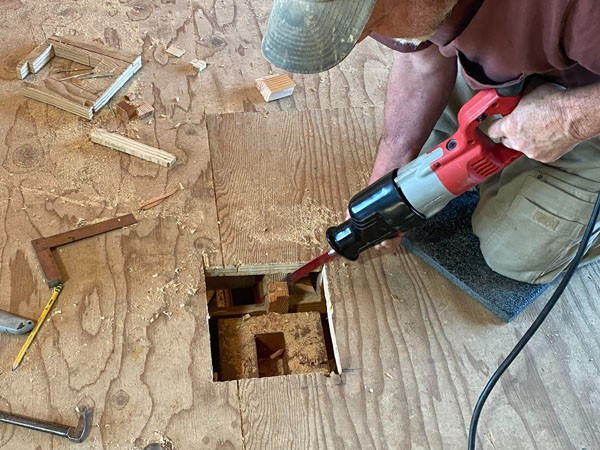
Dan cut the channel in the floor plate for the pocket door.
And cut some of the parts for the wall that will contain the pocket door.
The pocket door is for the toilet alcove in the basement bathroom. The tub/shower and toilet alcoves are separate private areas so that when we have a houseful of guests the bathroom isn't tied up if someone wants a nice long soak in the tub.
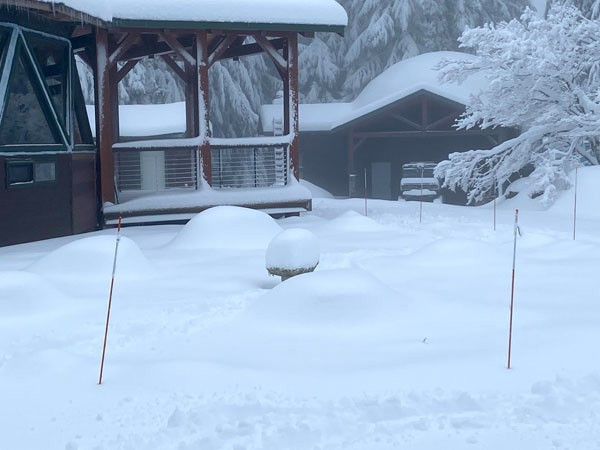
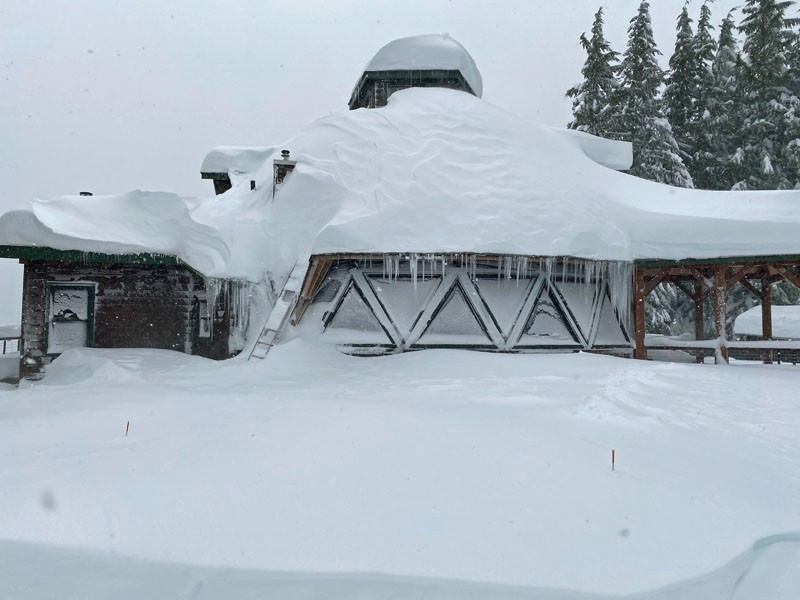
Warm weather for mid-January. The front yard glacier is disappearing.
But it is still winter.
And so it starts snowing....
And snowing....
And soon it is a beautiful winter wonderland again.
And then it got very cold. The hi/low thermometer registered a low of 5 degrees. Pretty cold for this area.
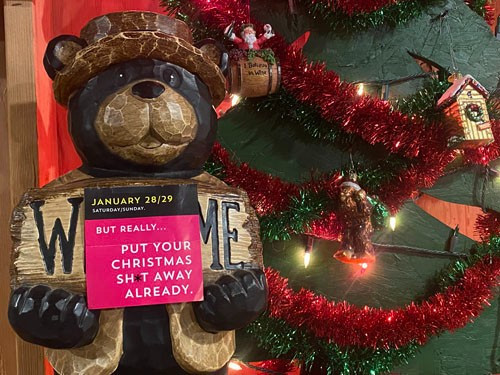
Even our "Welcome" sign got cold enough for the snow to freeze to it.
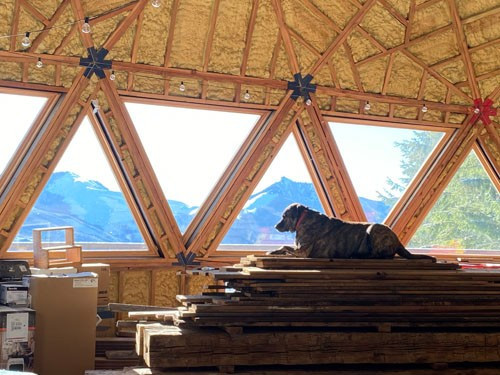
Abby loves being outside, but it was too cold even for her. She found a way to look out on her kingdom and not freeze!
Christmas reminder: Lori took it from Carrie, Dan took it from Lori, I took it from Dan. As soon as I get undecorated I will send it to my daughter.
HeHeHe
I saw her Christmas stuff when we zoomed the other night.
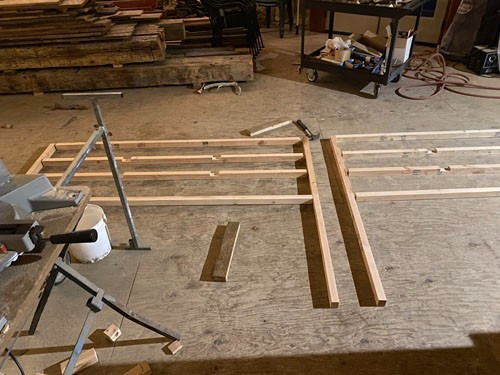
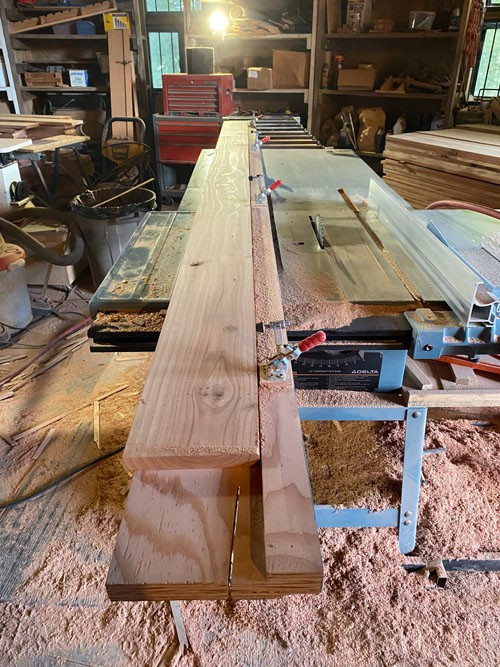
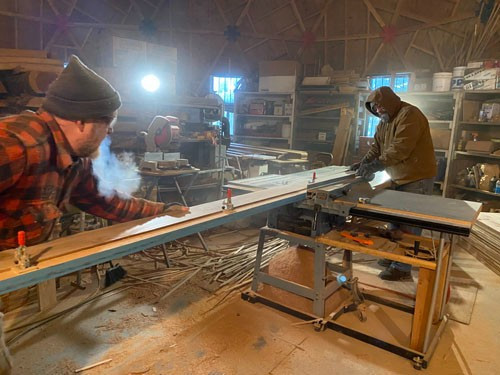
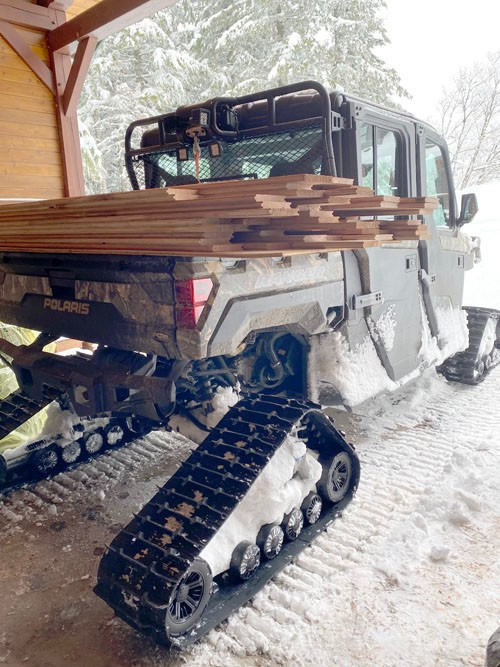
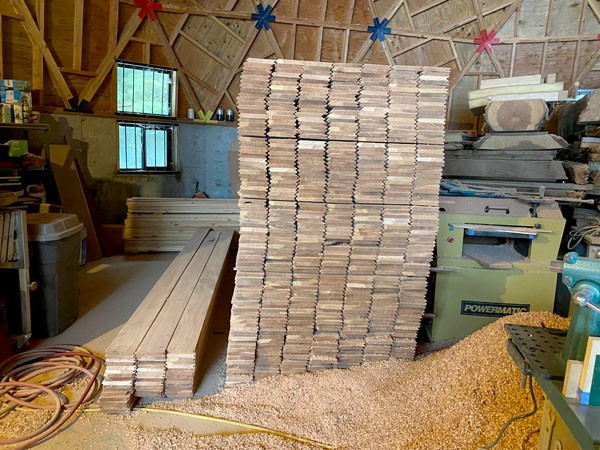
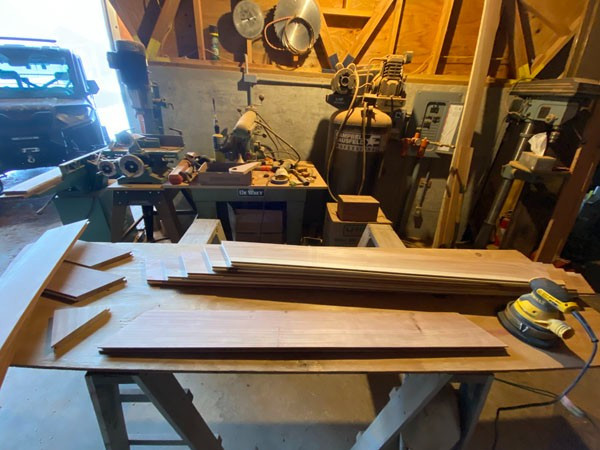
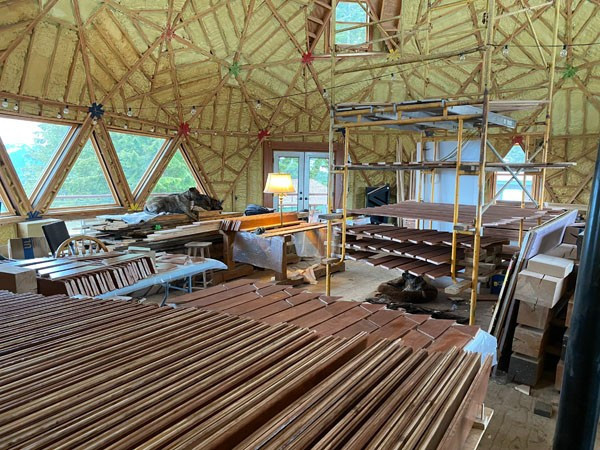
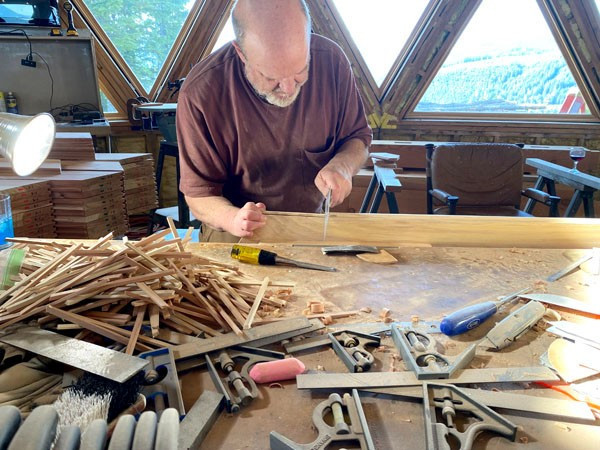
The next step in the redwood project is board straightening. The board gets clamped into the jig.
With a bit of the board hanging off the jig it can be ran through the table saw to get one straight edge.
Then stacked the same way on the pile of boards with one edge straightened.
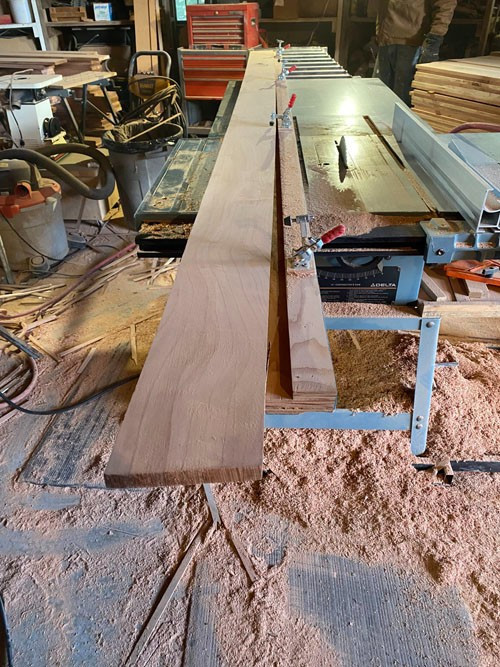
When the batch is done the other side is cut on the table saw without the jig. No need for the jig because the first side is now straight and can be used against the fence.
This step makes kindling not shavings.
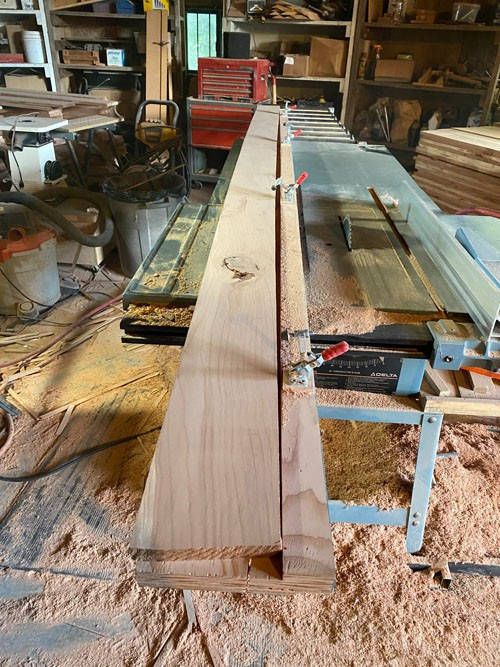
Some of the boards are just too bowed to be straightened whole because it wouldn't leave enough width to match the rest of the boards.
But these are not wasted. They go on the "bad boy pile".
Then Dan determines where to cut them in two or three pieces to take enough bow out of them to make them work. Then they are run though the board straightening process. We will be able to use a lot of shorts because we are paneling triangles.
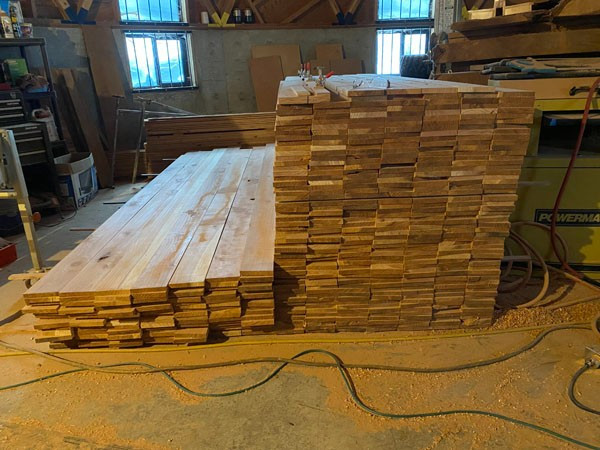
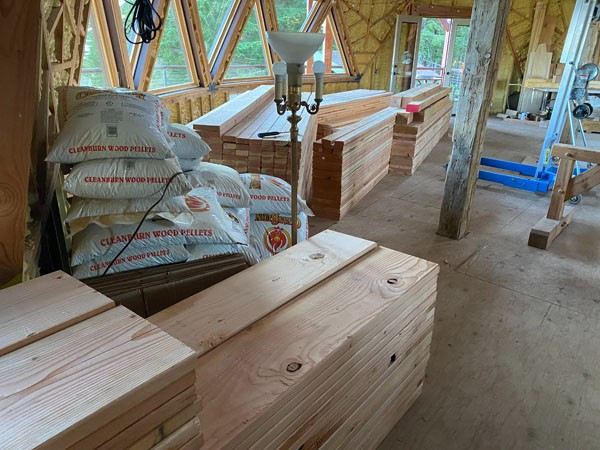
February 8th they finished making all the redwood boards straight and uniform.
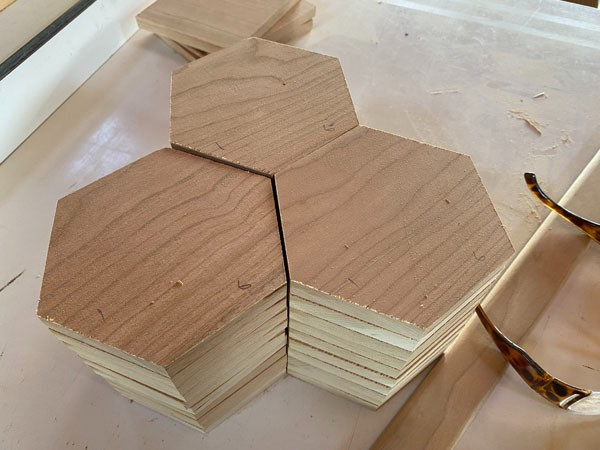
pocket door
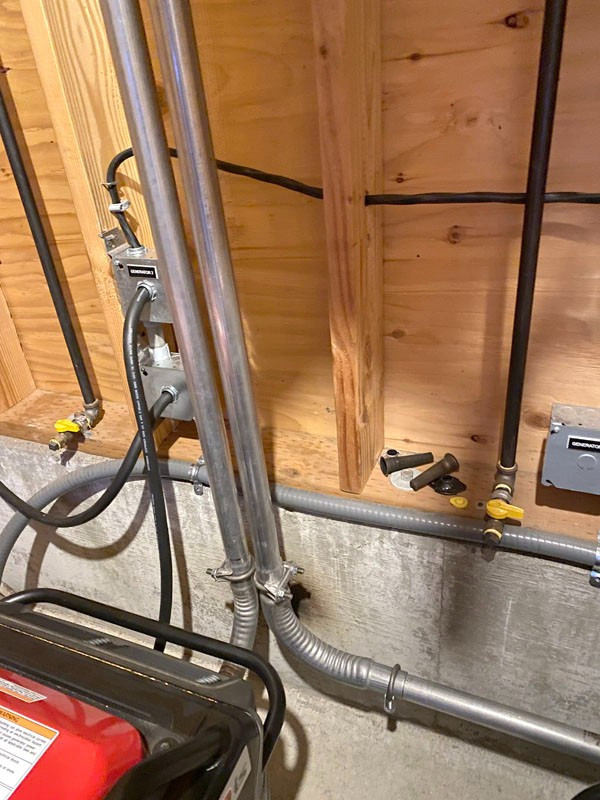
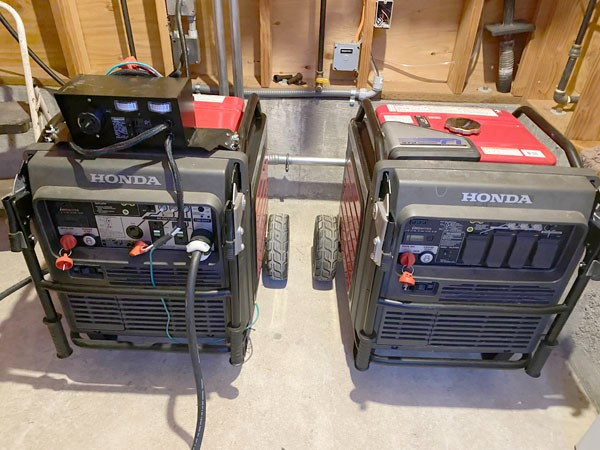
Last fall when our 10k generator died we bought another 7k and linked them together to run the planer.
But we didn't have the exhaust pipes plumbed up. So we had to pull them to the door and run a fan to exhaust them.
Dan and Bruce got them installed with them exhausting out of the building.
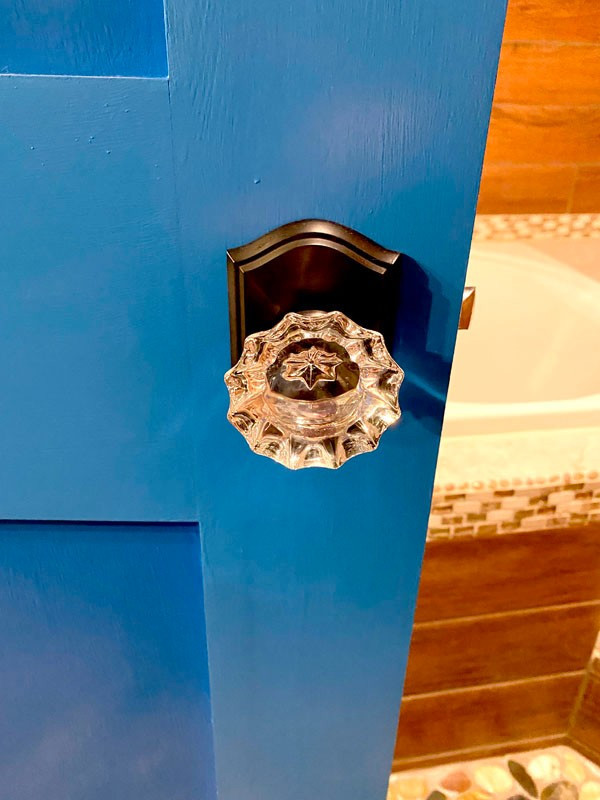
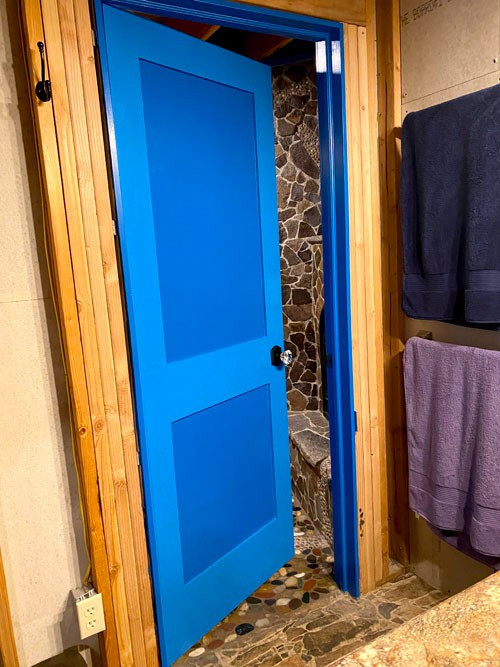
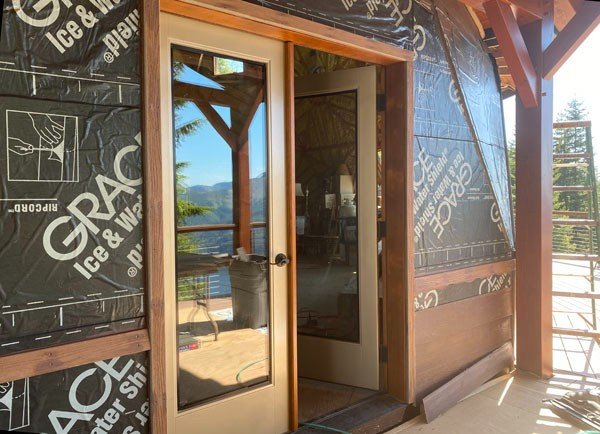
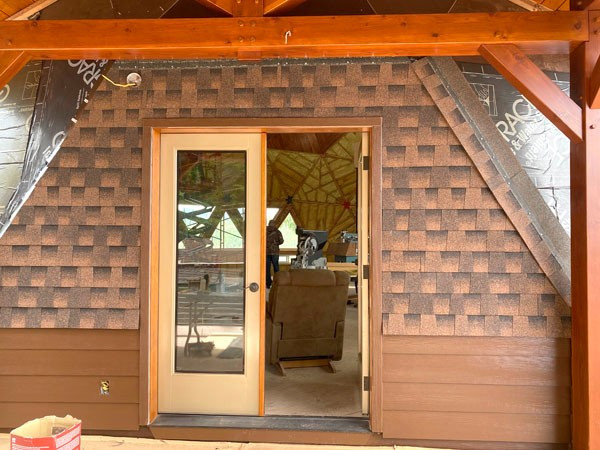
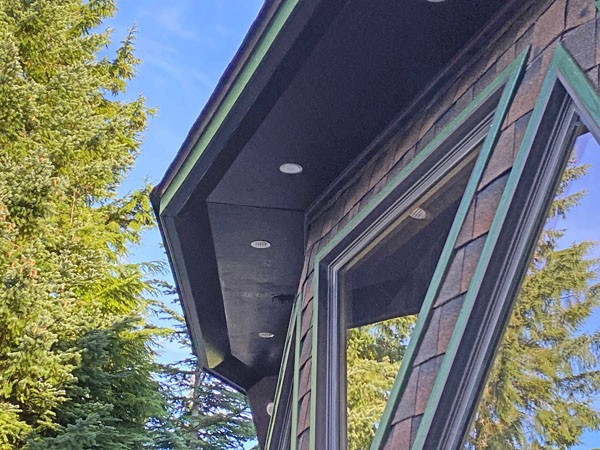
Dan installed and I painted the tub/shower room door. Because it is a door for a wet room I purchased a factory sealed door and it was primered white. All our doors have always been stained a wood tone. I like the colorful door and I think it accents all the natural materials in the shower room (and someday in the main bath area).
We added a glass door knob with privacy lock. I loved the glass knobs that were in my Grandparents house, so choose that for here.
And Dan installed the pocket door. It is not finished as it still needs handles and a lock, but it is so much better than the black plastic that was the door. And of course the bathroom walls need to be paneled. But that has to wait till we get through all our inspections.
Back to home page
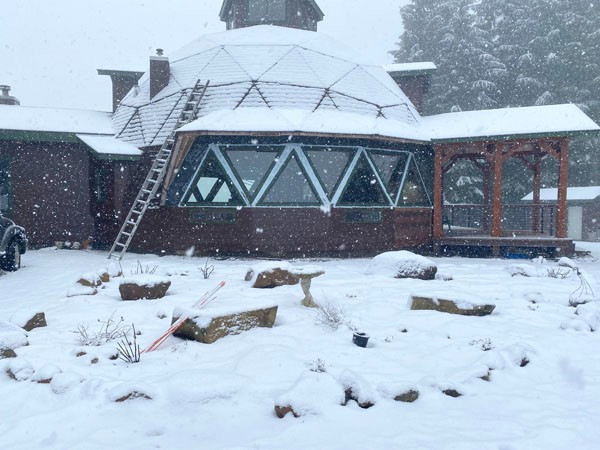
By Feb. 10 the snow had all melted on the south side and partly on the north side. And it was sunny and kinda warm.
But wait....
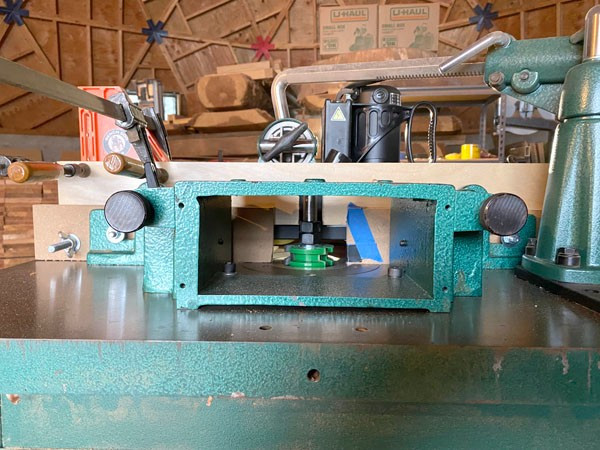
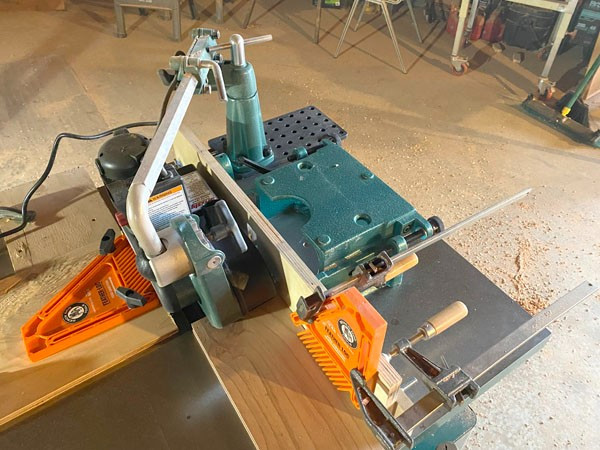
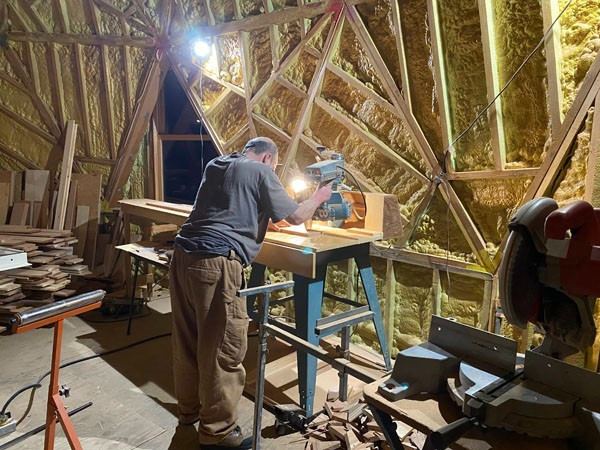
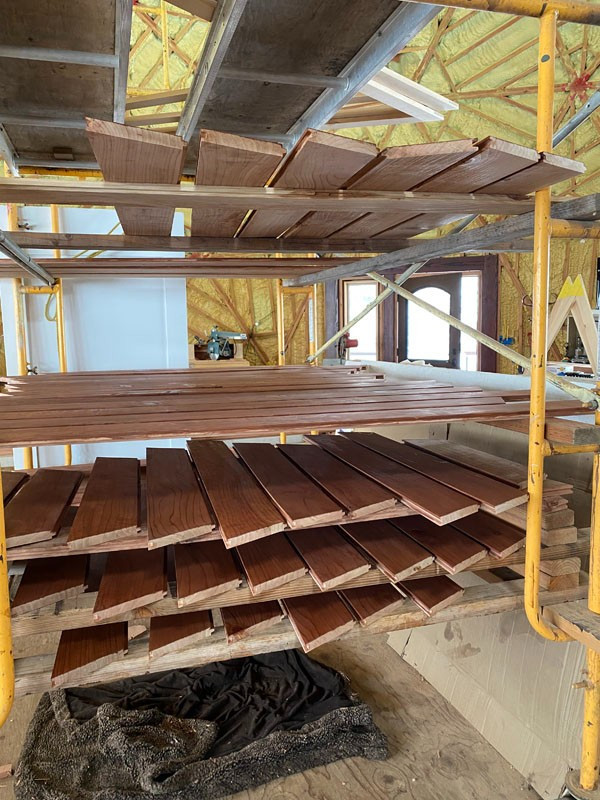
The next step in milling the redwood into paneling is to profile it on the shaper. The board is placed on the shaper table tight against the fence.
The power feeder (the accessory on the top) grabs the board and pulls it through. The feather boards (the orange accessories) hold the board in place.
As it goes past the cutter head it is profiled. This cutter head is for the groove. After a batch of boards are grooved the cutter head is switched out for one that cuts the tongue. There are many choices of cutter heads for many different profiles.
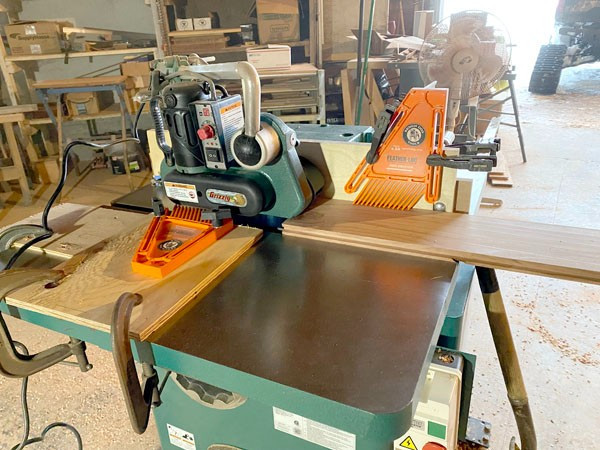
They have now completed the tongue and groove process on all the short pieces.
So we moved them up to the dome for the next step.
Then they grooved a batch of 200 of the long boards.
They will groove another batch of 200 boards before switching to cutting the tongues.
Dan, Danny, Danny's father-in-law, and his friend went on a pheasant hunt in Idaho. They had a fun trip.
It started snowing again the day he left and was accompanied by a steady breeze making interesting snow drifts. Fortunately when I ran the pellet stove upstairs the snow melted off the windows and I could see out again.
Yes, she often sleeps like this.
Yes, she fell on her head.
Yes, I let her do it.
Yes, I was entertained at my dogs' expense :)
Doggy foot warmer. No batteries needed.

The abominable snow blanket!
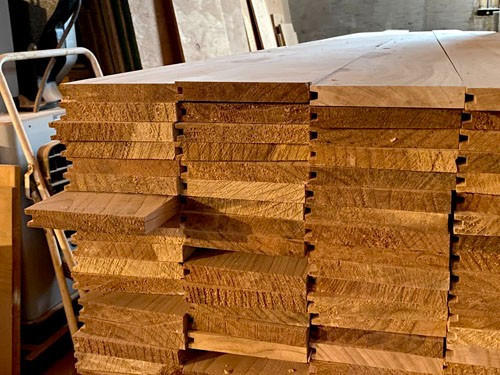
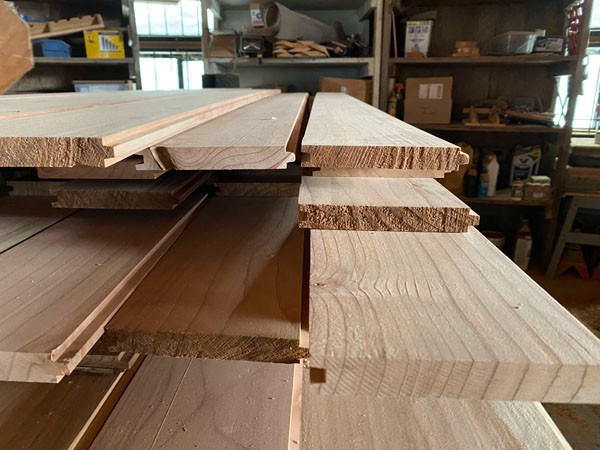
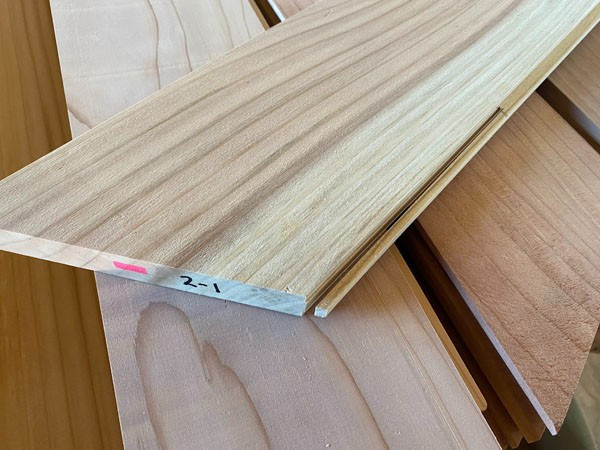
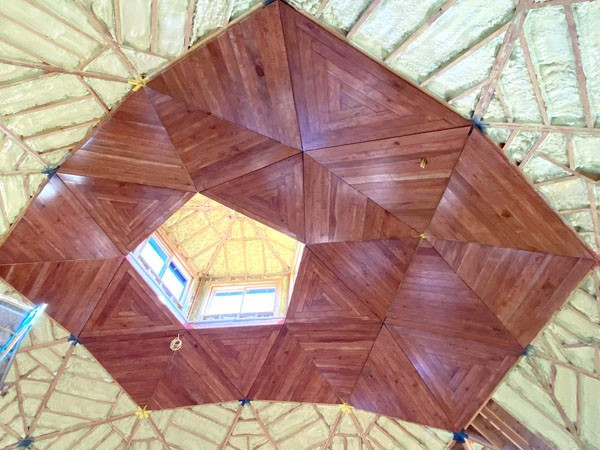
On April 6th the milling of the redwood paneling is complete!
It is flat, all the same thickness, all the same width, and tongue and grooved. If we had purchased paneling this is the stage that it would have arrived at.
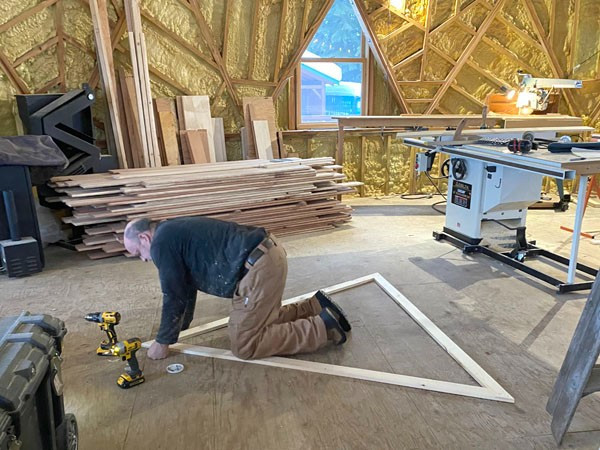
Meanwhile on the days it was just too cold to work on the milling, Dan was making templates for the paneling using measurements of the interior of the triangles.
He made a template of each of the six different triangles.
Then using the angle of the first triangle he was working on, he attached cleats to the floor.
He calculated the rough size of the boards needed then cut the proper angle on one end of each board.
He cut enough boards to make the triangle # that he is working on.
Then using one board of each size he lays them out against the cleats on the floor.
And lays the template on top.
After it is clamped, so the tongue and grooves are together and it is tight to the cleats, Dan draws a line down the edge.
Then he labels the back, and miters the second end.
And stacks them triangle by triangle.
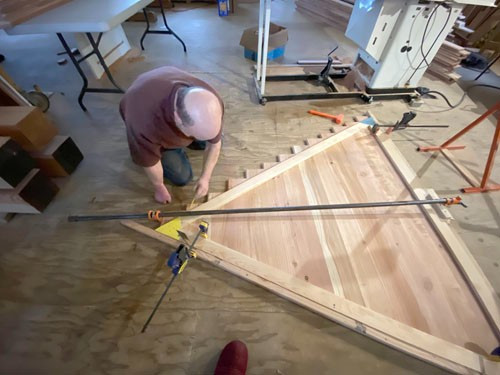
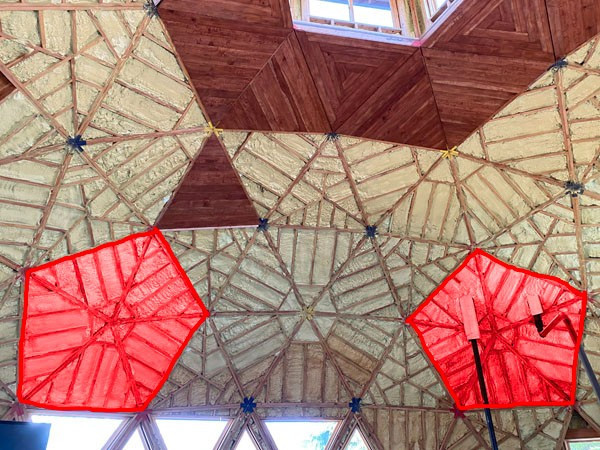
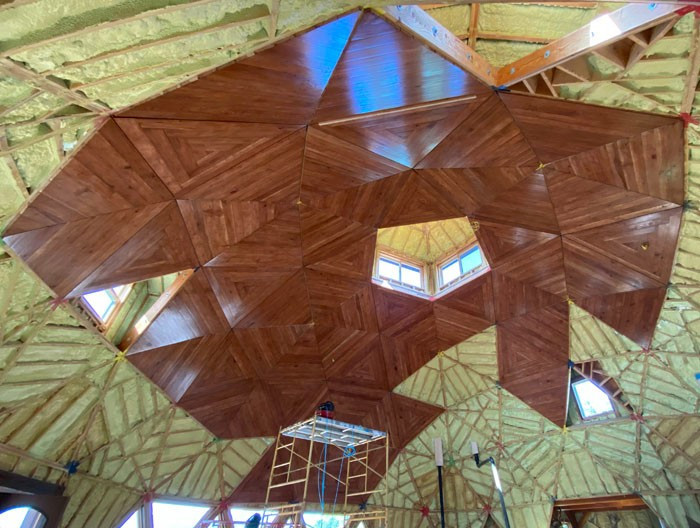
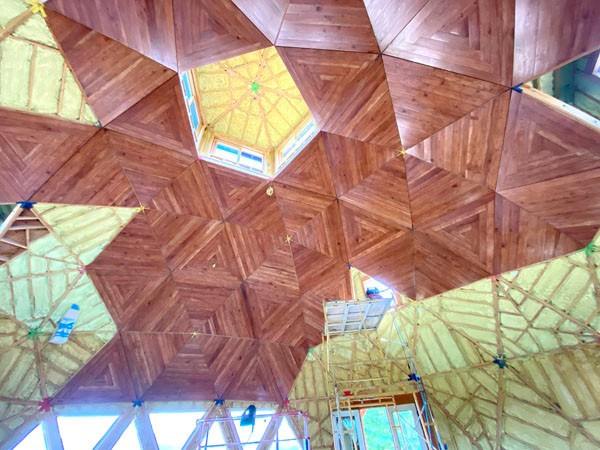
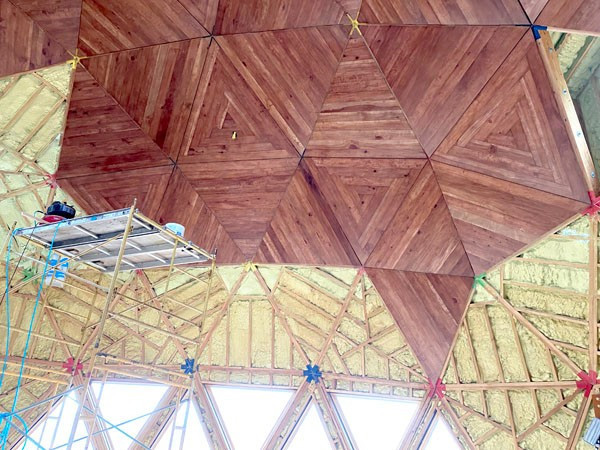
There are 74 triangle panels that get fully paneled. There are 35 triangle panels that get partially paneled. Where the loft attaches to the dome the part of the panel above the loft will be redwood and the part below will match the paneling in the room below. The same with panels where partition walls are attached.
We will panel all the full triangles first. Then after the loft and partition walls are built we will panel the partial triangles.
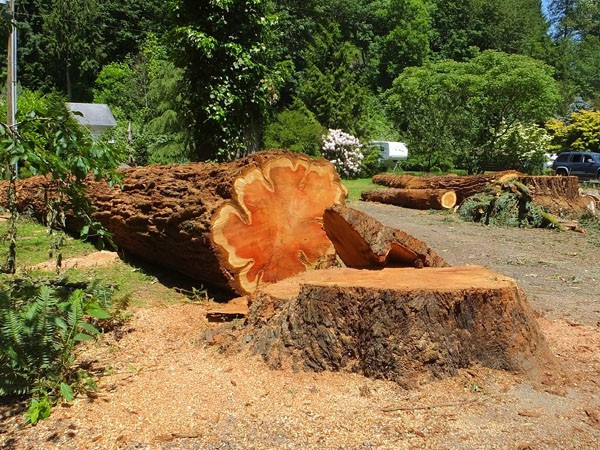
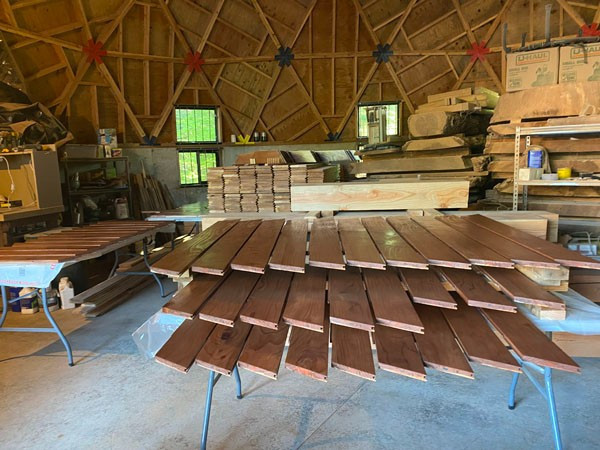
At first I thought I would just clear coat the boards. But the boards from the two trees were so different in appearance with just a clear coat that we changed our minds.
They were both Coastal Redwoods but they looked different when we cut them down. Maybe they were different subspecies of redwoods. It was a shame we had to cut them down, but they were too close to the house and driveway for the size branches they were dropping.
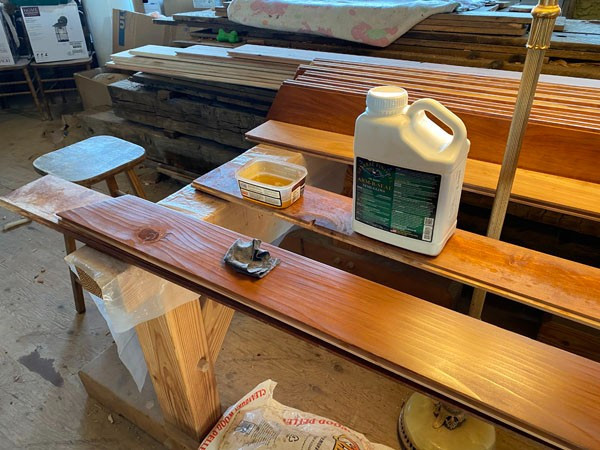
So, after much experimenting with different stains and techniques we decided this was our favorite.
I am doing the finish work upstairs in the dome because it is too cold in the shop for the finish to cure, but I'm trying to minimize the sanding dust in the same area so I am taking the boards to the shop to power sand with 150 grit.
Then taking the pieces back to the dome to apply sanding sealer. I was hoping to not need this step but the stain was just too blotchy when applied without it.
After the sanding sealer dries I take the pieces back to the shop and power sand them with 220 grit. Then back to the dome.
When it's snowing or raining I wrap the boards so they don't get wet.
Then they get a single coat of stain. For best results the stain should be applied within a few hours of the sanding sealer so I found a batch of six triangles worth of boards (78 pieces) is a doable amount to seal, sand, and stain in a day.
Next is the clear coats. This is my favorite finish. I let the stain dry overnight, then wipe on two light coats a few hours apart of Arm R Seal. Let that cure overnight and lightly hand sand and wipe on three more light coats. Let that cure overnight and lightly hand sand and wipe on two more light coats.
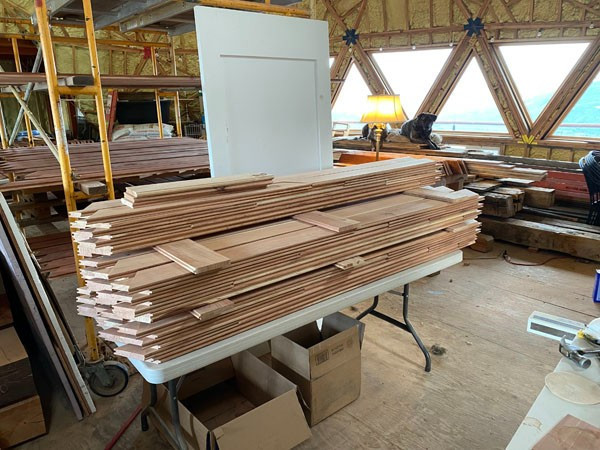
Dan built some drying racks so I can start another batch and let the last two batches cure.
I have pieces all over the dome.
Then they get buffed with steel wool. They will get a final coat after they are installed, which will take care of any scuffs and scratches they may get.
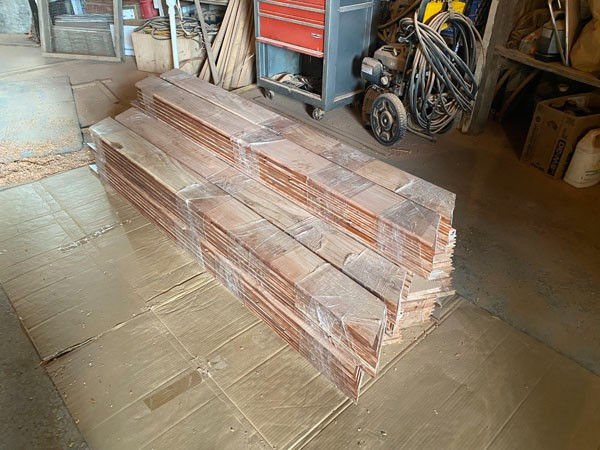
Because they get scrambled up a bit during finishing I sort them by triangle before bundling them.
Then they are stacked with the top pieces upside down and bundled with stretch wrap and taken to the shop. Their identifying number is visible on the top board.
Dan has completed cutting 52 (the #1s,2s,3s, and 6s) of the 74 full triangles that we want to finish before we rent a lift and start installing.
22 left to go. He has 5 #4s and 17 #5s left. They are a different pattern and maybe will take a little longer.
Dan can't make sawdust when I have wet finish drying so we are taking turns with the day and evening shifts, mitering and finishing the redwood boards.
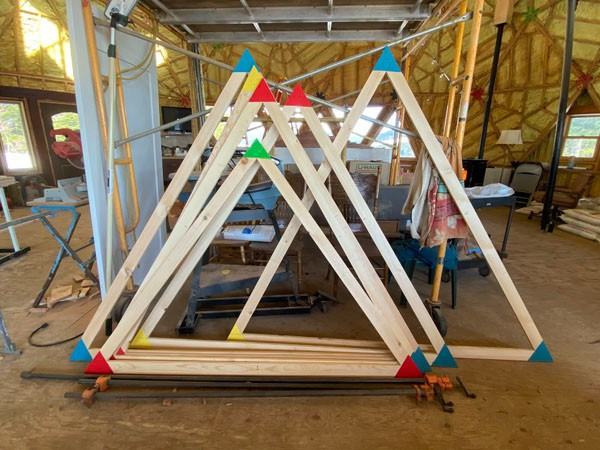
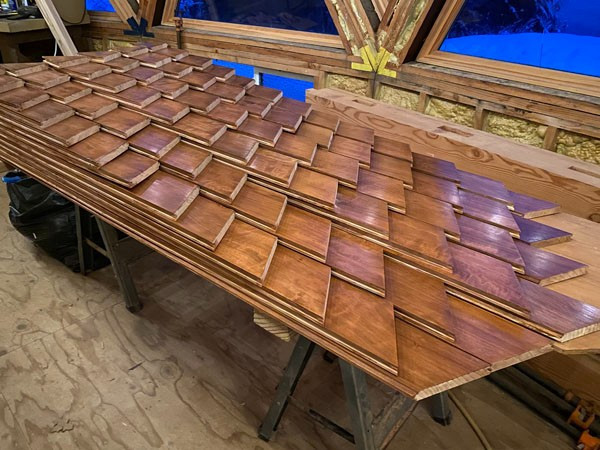
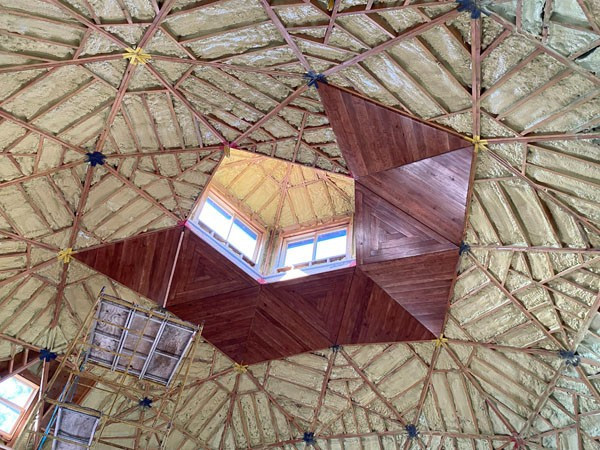
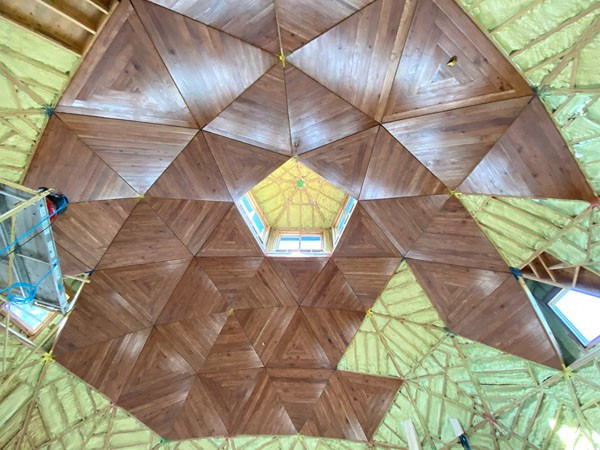
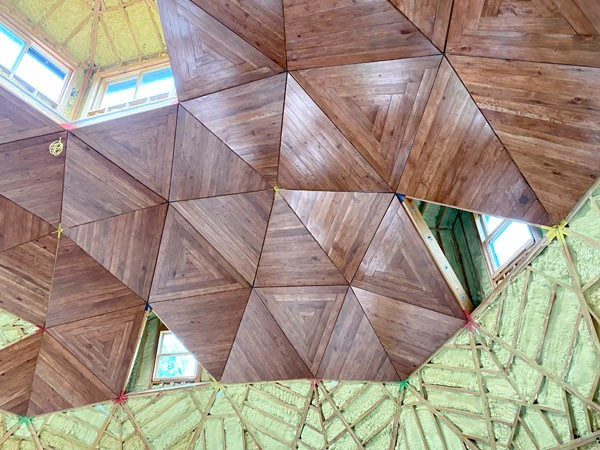
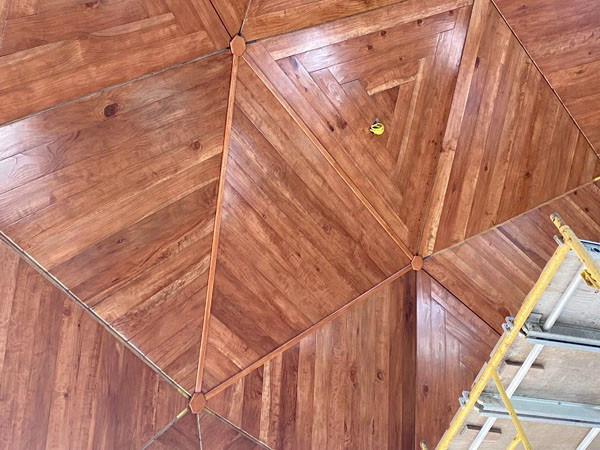
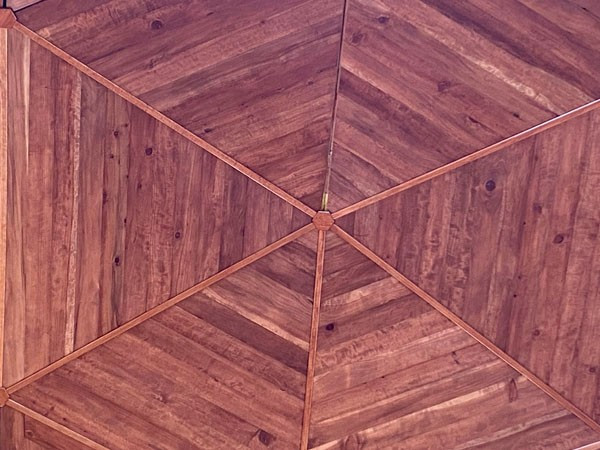
Instead of the boards being parallel to each other they go around the triangle and converge to the center.
and the pentagons of the dome.
After several attempts, Dan figured out a way to assemble them and they look awesome.
On the converging triangle boards, the ends (which have no grooves) meet up with the sides of the boards. This means that part of the toungues have to be removed for the triangles to fit together.
This was a time consuming process. The removed tongue area had to be smooth so as not to create a gap when assembled.
But by May 24th, Dan had all the redwood boards mitered for the 74 triangle we need now. And by May 27th ,I had 63 triangles worth finished and bundled.
With the last 11 in progress in the shop. We moved the finishing area to the shop because it is now warm enough and
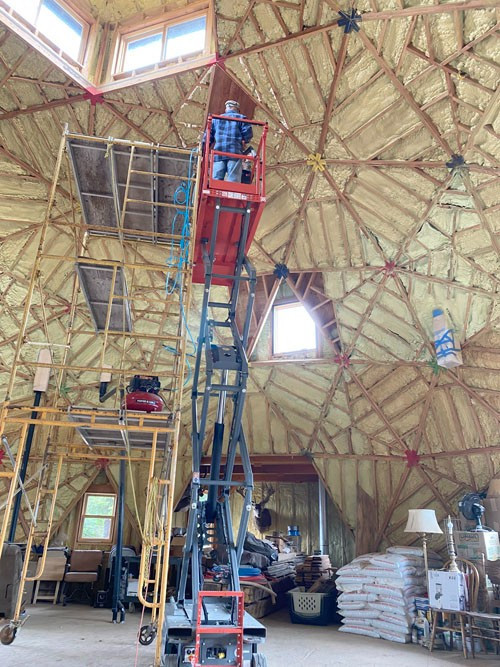
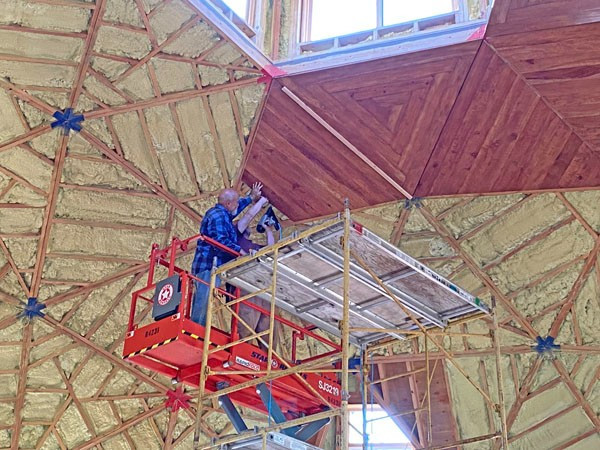
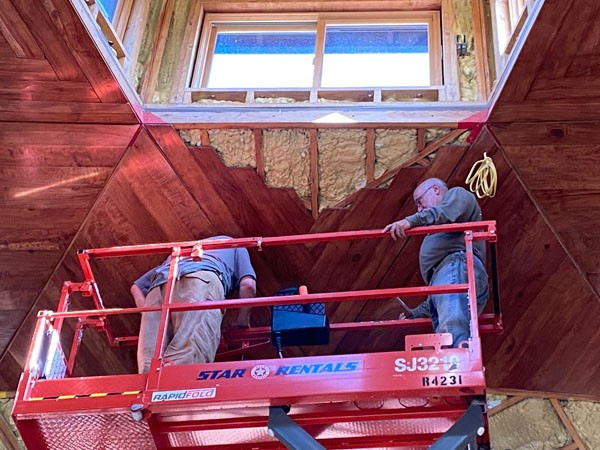
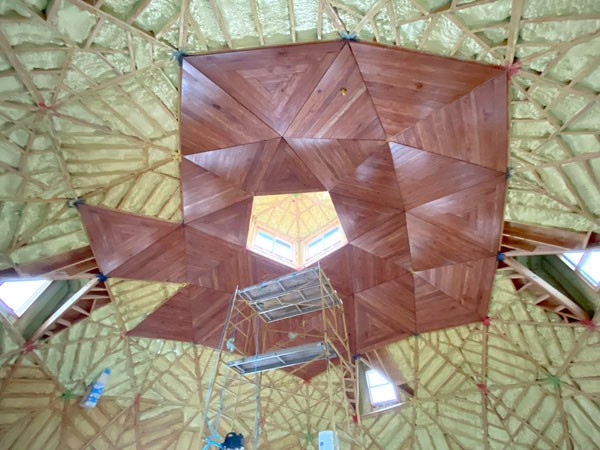
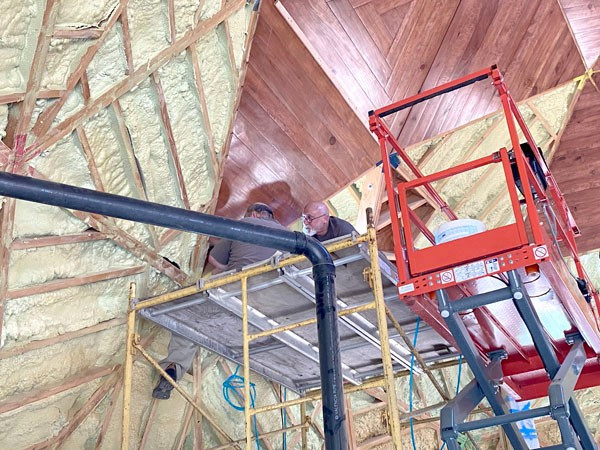
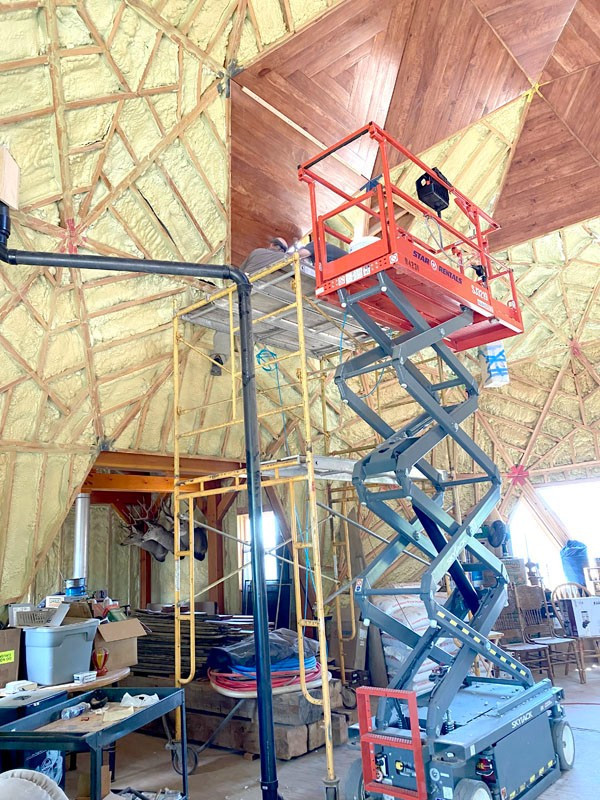
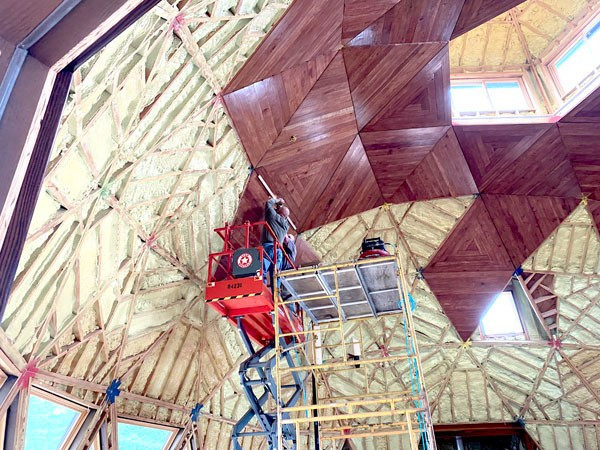
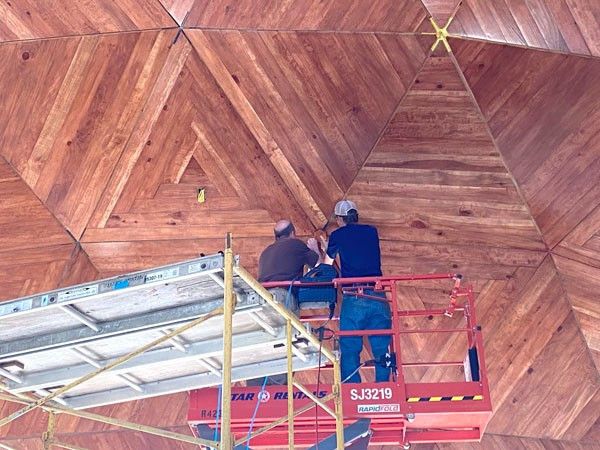
the delivery of the man-lift on Tuesday, May 30th. Ray from Star Rentals brought up the lift and managed to get his truck positioned so as to unload the lift onto the deck, which took some maneuvering because of my rock/flower bed.
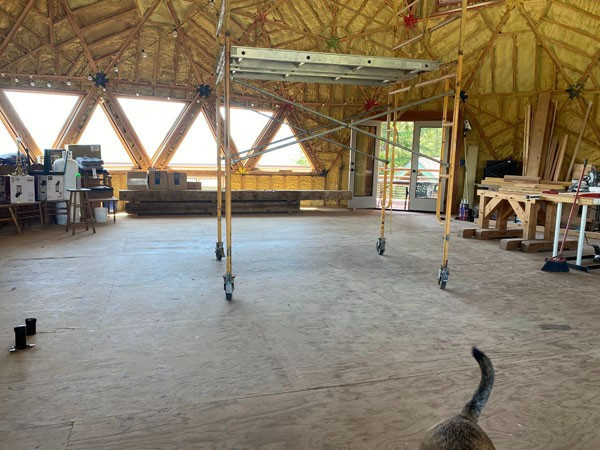
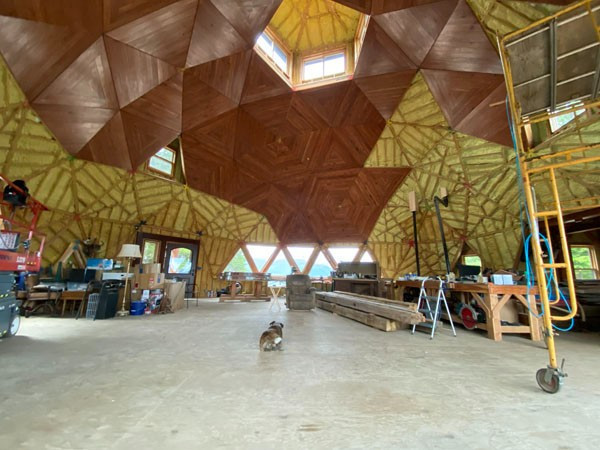
we needed to clear out the the center of the dome (which took Dan four days of moving timbers and materials to the shop) to be ready for....
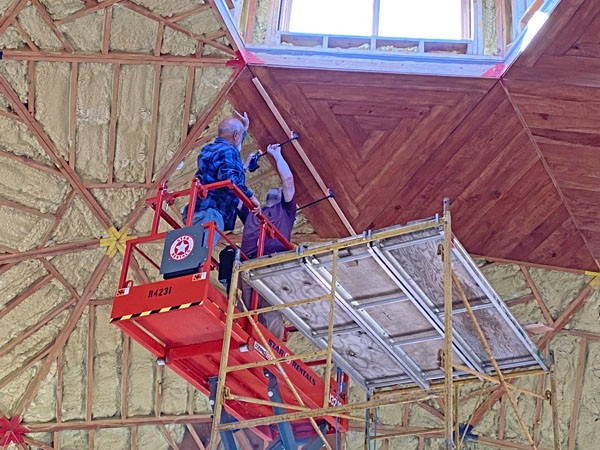
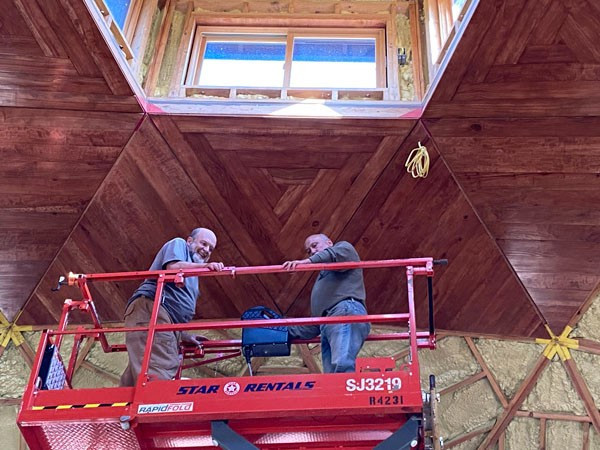
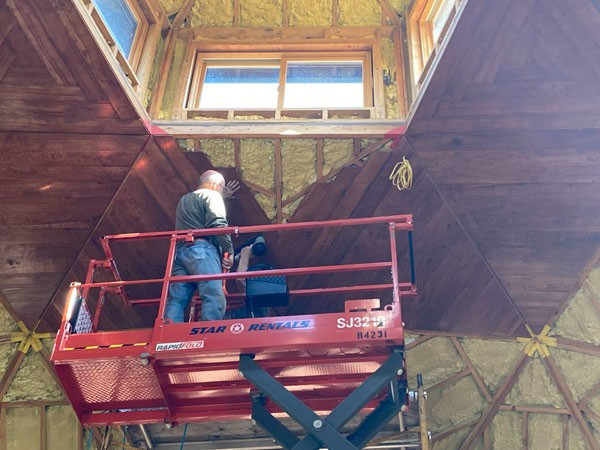
The next day Dan and Mike began installing the redwood paneling.
It went slow at first as they figured out their technique. They ended the day with four triangles paneled, which I thought was pretty good.
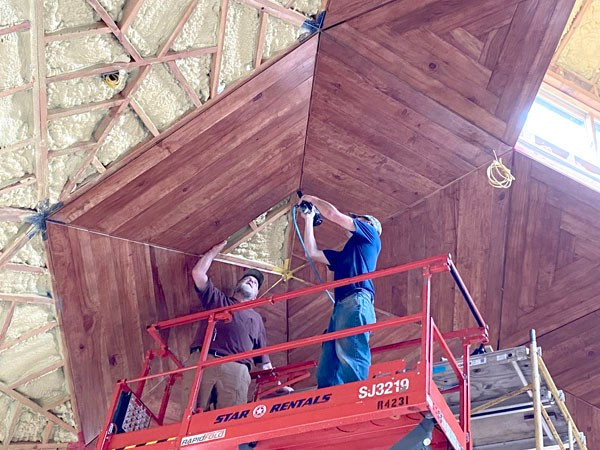
The installation of the triangles with parallel boards was pretty straight forward. They carefully aligned and nailed the first board. Then attached a cleat to the dome that they could clamp to. Then as they installed boards they snugged them up tight with clamps.
As they got to the shorter pieces they didn't need to clamp and were able to just hold them into place while they nailed.
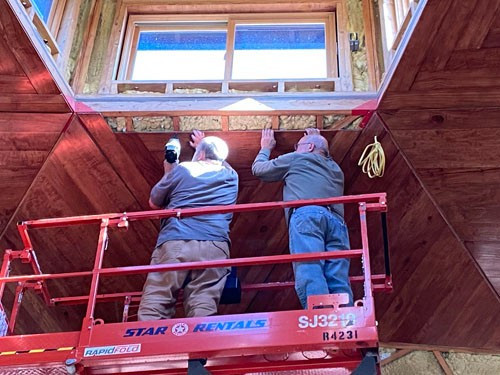
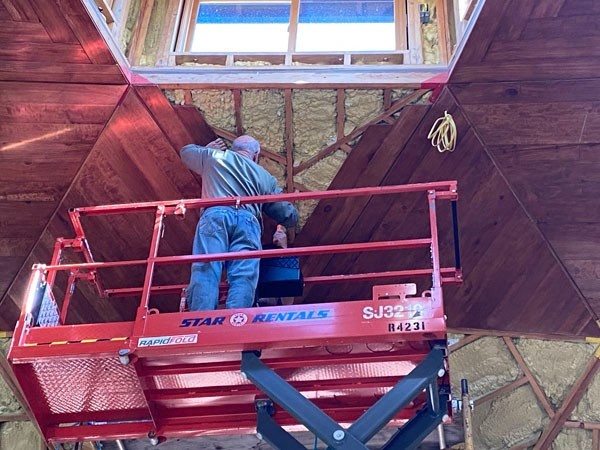
The converging triangles were a little different.
They screwed the first board up positioned all the way to one side.
Then they nailed the other two outside pieces up.
Then removed the first piece.
Attached the next two interior pieces.
Then the next two.
And the final two inner pieces for those two sides. Then they are ready for the small center triangle piece.
Then starting with the smallest piece they work their way from the middle to the outside.
The converging triangles were quite a challenge in the beginning. They do not have much room to lay out pieces and it is easy to get a little disorientated working overhead.
6-2-23
Day 3.
6 triangles paneled.
16 triangles total.
6-1-23
Day 2
6 triangles paneled.
10 triangles total.
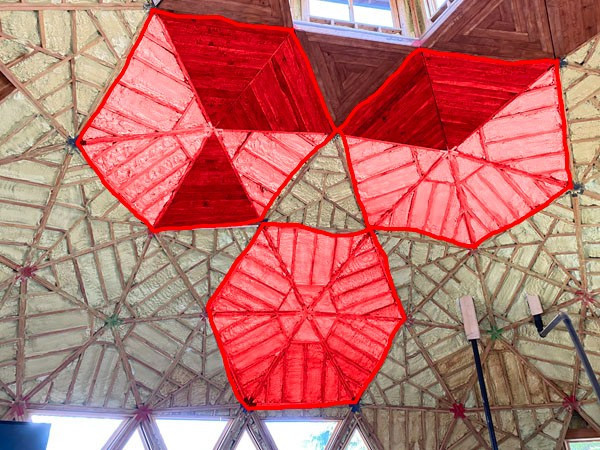
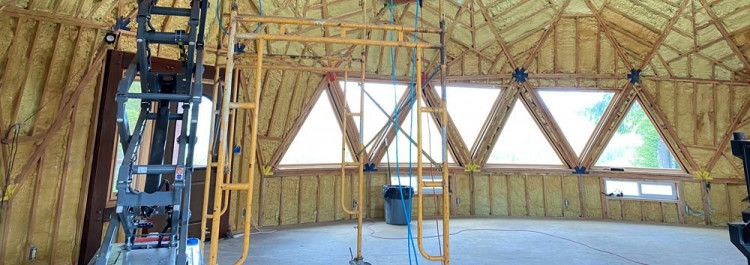
The triangles with the boards that are installed parallel make up the hexagons.
The triangles that are paneled in a converging pattern fill in between the hexagons and pentagons.
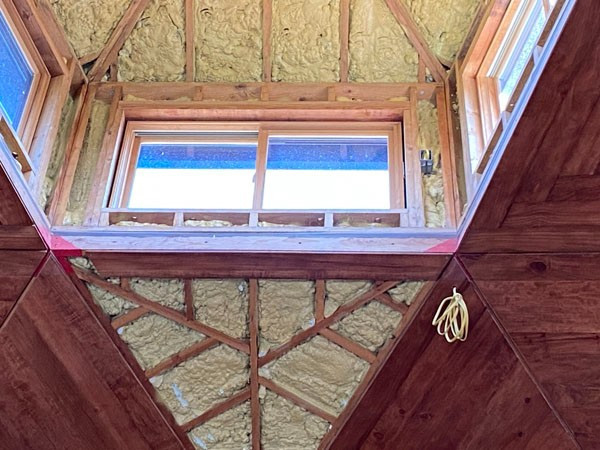
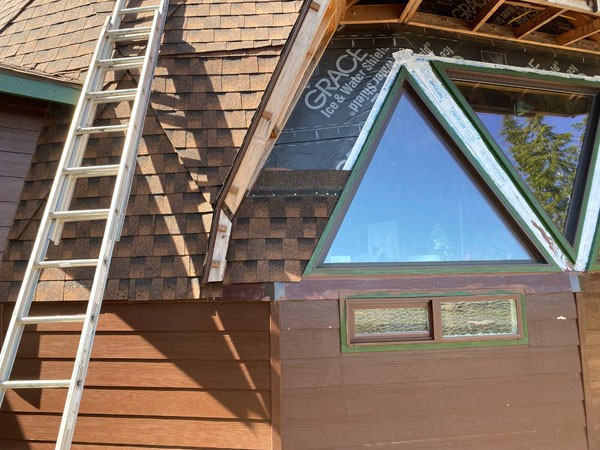
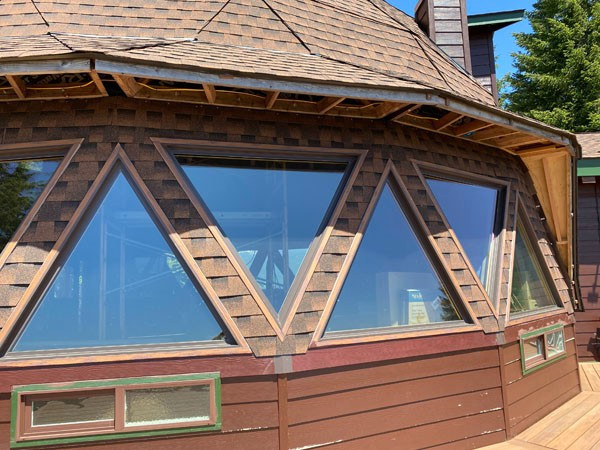
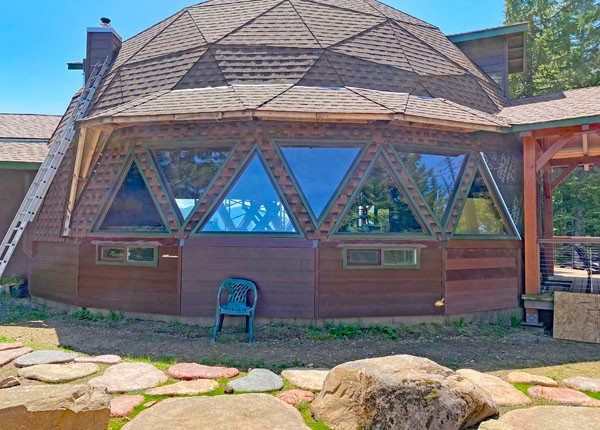
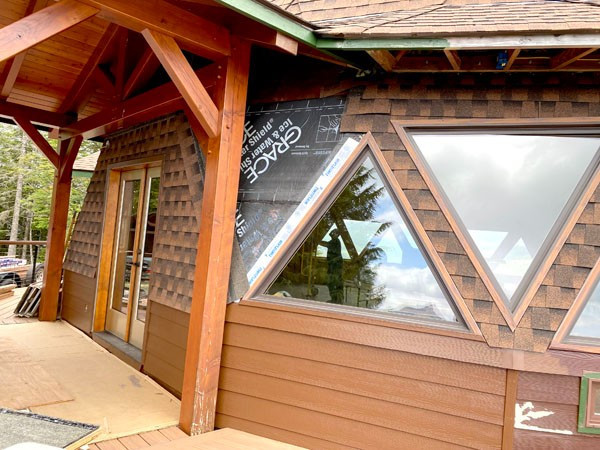
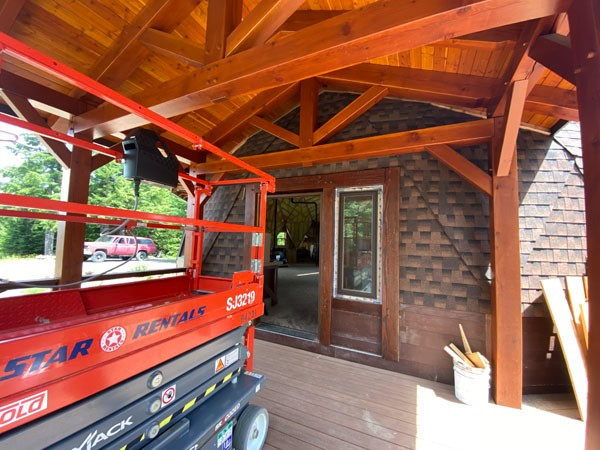
Meanwhile, Bruce has been busy working on the outside. He is roofing between the triangle windows.
He has the north side finished around the windows.
6-5-23
And today he finished around the windows on the south side. Next will be the walls around the doors under the timber frames.
Dan and Josh working on a hexagon.
6-6-23
Day 4.
7 triangles paneled.
23 triangles total.
Bruce has trimmed around the door and installed the trim pieces defining the roofing and siding areas. And got a start on the siding.
6-8-23
Day 5.
8 triangles paneled.
31 triangles total.
6-9-23
Day 6.
5 triangles paneled.
(actually they paneled 6 but one was a redo. The first #5 they did wasn't great, and since then they have greatly improved their technique, so they redid it).
36 triangles total.
Because of a pile of timbers below they decided to work off of the scaffolding (which could straddle the timbers) instead of the lift.
But it made it more difficult to reach the top and bottom of the triangle.
Day 7
37 triangles complete.
Only one triangle today because a lot of the day was spent moving stuff out of the way for the next triangles.
6-13-23
Day 8
7 triangles paneled
44 triangles total.
Bruce got a good start on roofing the french door wall.
5-31-23
Day 1
4 triangles
6-14-23
Day 9
6 triangles paneled.
50 triangles total.
23 left to go. It was 74 total but we ruined one taking it off and redoing it, so now it is 73. It still works out OK because we have enough material and the one we are now missing is on the bottom row and we will just make it later when we are making all the paneling for the partial triangles.
6-15-23
Day 10
7 triangles paneled.
57 triangles total.
6-16-23
Day 11
4 triangles paneled.
(spent part of the day moving stuff around again :)
61 triangles total.
6-20-23
Day 12
6 triangles paneled.
67 triangles total.
6-21-23
Day 13
6 triangles paneled.
73 triangles total.
The last piece of the last triangle, for now.
The rest of the triangles will have to wait to get paneled till the loft and walls are attached to the dome. Once the loft is built we should be able to reach everything that's left with ladders.
Meanwhile...
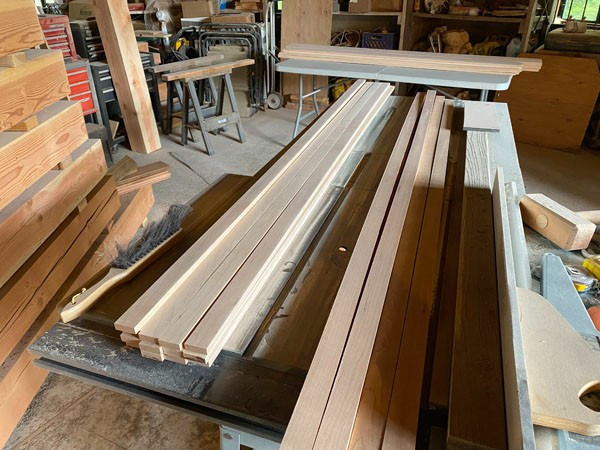
When we didn't have help installing paneling, we were making trim. Dan bought some Cherry boards and ripped them down into 1 1/2 inch strips.
Then he built a jig to hold the boards while I sanded them. The jig held them flat and on edge making sanding a little easier. There are a lot of pieces and the hardwood takes a while to sand.
We decided to use a hardwood instead of the soft Redwood for extra strength.
He was able to use the same jig to hold them while he put a round-over on the edges.
He put a bevel on the backside to help make the pieces lay against the triangles giving him more area to nail.
And after I got them finished they are ready to be installed.
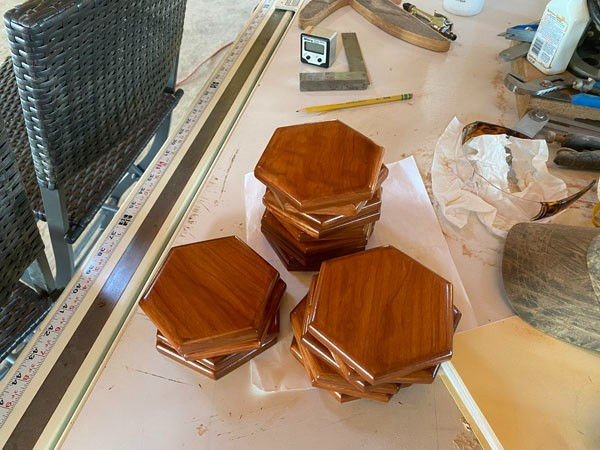
Then he made a jig to cut the hexegons. I was gone to town when he cut these or there would be pics of him using the jig :)
And after they were sanded, rounded over, and finished, they were ready to be installed.
Bruce finished the roofing and siding around the french doors and up under the timber frame. It looks awesome!
Dan and Josh putting up the first couple of hexagons.
With three of the hexagons up they could cut and fit and install the first of the trim pieces.
Piece by piece the triangles are trimmed and getting a finished look.
The hexagons can't be installed in the nodes where there is unfinished triangles, but we installed as many as we could at this time.
It has turned out even better than I thought it would and was worth all the effort.
Bruce finished the siding and roofing around the entry door and up under the timber frame. The last of the underlayment on the dome is covered up!
Then he moved to roofing the generator shed.
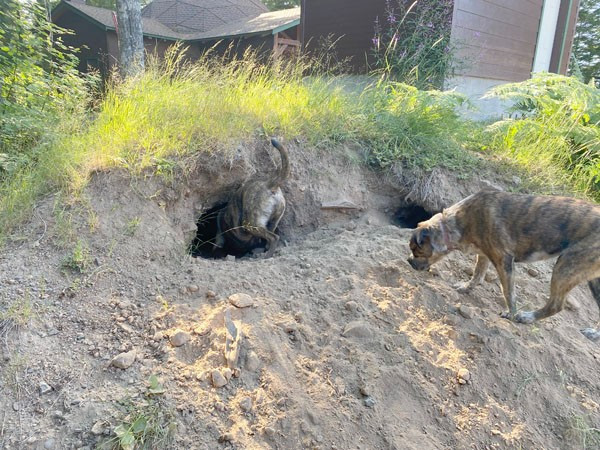
I gave the dogs their own place to dig to keep them out of the flower beds. They have dug quite a den!
On July 18th the man-lift from Star Rentals went away.
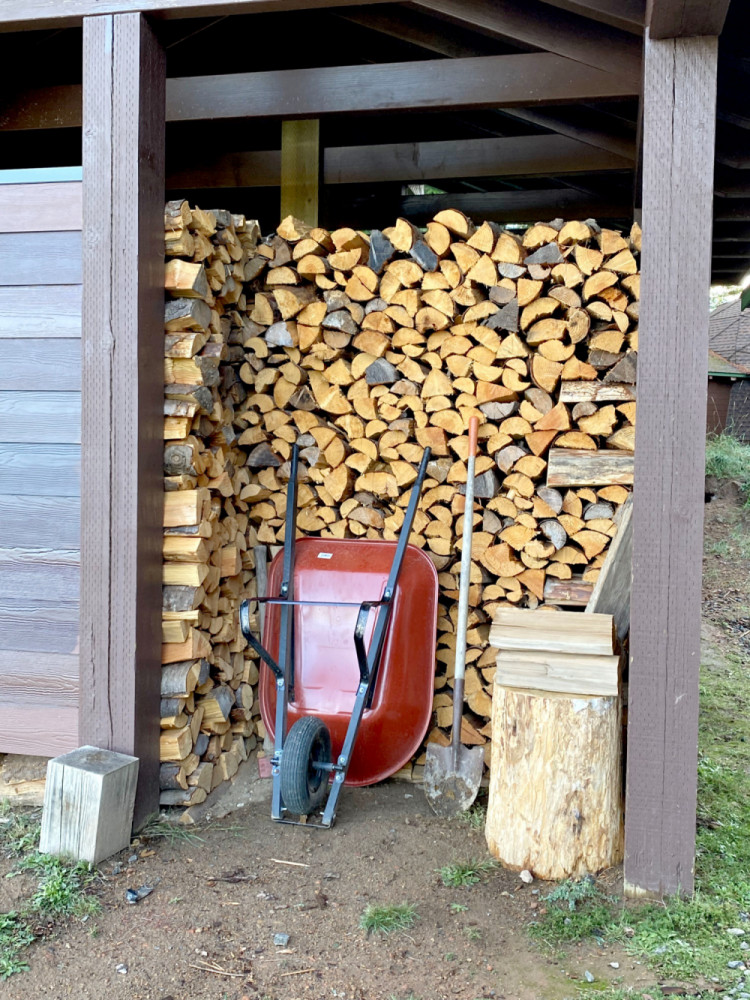
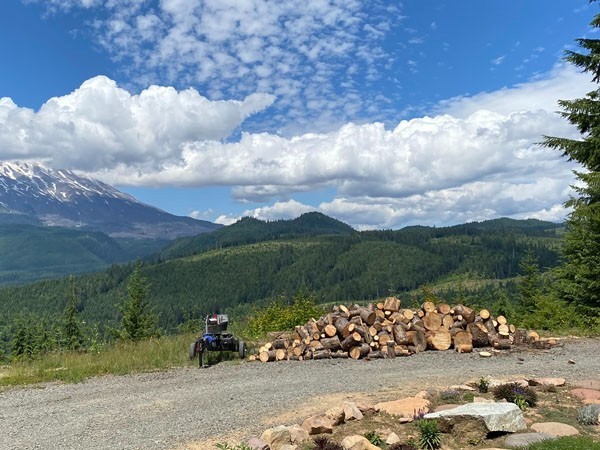
Next was firewood. It is a good feeling to have a full woodshed.
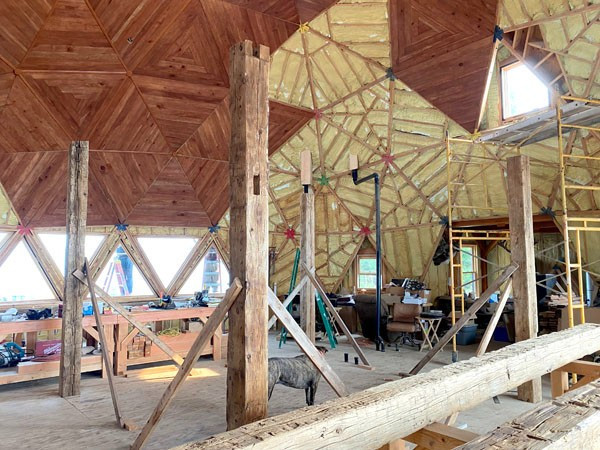
Then Dan started the kitchen timber frame.
First he cut a hole in the floor above the timber below.
The timbers below sit on extra thick footers poured right into the slab below. The timbers are heavy but are supported all the way to the ground.
Then a tenon is cut on the end of the post to match the mortise on the post below.
Two posts are temporarily standing in place.
We watched meteor showers with friends in August. Kellie photobombed our timed picture, making her the "star" of the show.
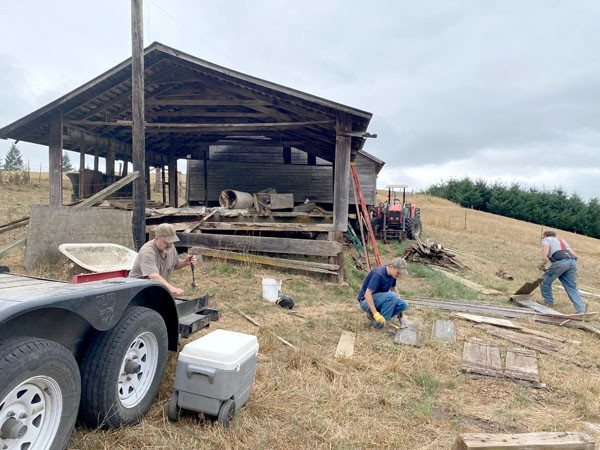
We got an opportunity to salvage some cedar barnwood from the "chicken house" on what was once my Great Grandparents' farm.
Once all four posts are standing and braced they are measured and marked for uniform height. Then brought down and cut.
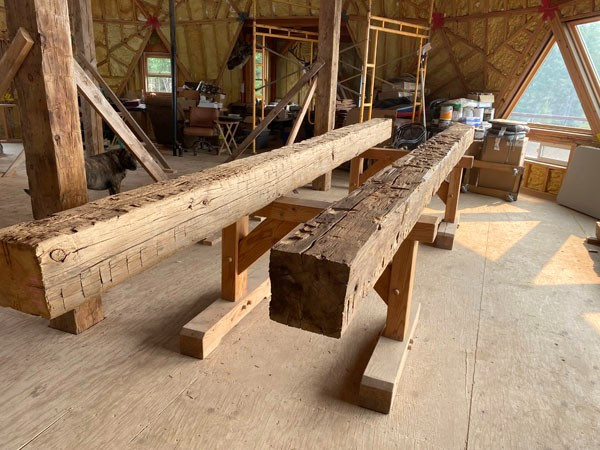
The timbers are dirty and splintery. They were pressure washed when we first got them but they need more. I am wire brushing, scraping, smoothing, and blowing them off with the air compressor. Then I am coating them with lacquer. They are turning out very well.
Working the antique timbers is a new challenge for Dan. The timbers themselves can't be made square so the joinery must be.
Next the mortises for the five timber joists are cut on one of the summers beams.
These are the two summer beams with shoulders and mortises to sit on the top of the four posts.
Then using the Genie lift the summer beam is placed on two of the posts.
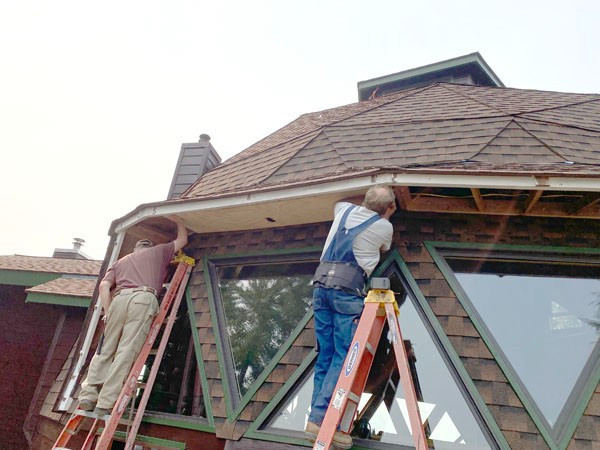
Dan would love to just keep timber framing, but with nice weather he and Bruce started the soffits on the eyebrow dormer.
This took a lot longer than hoped.
But it looks great. The north eyebrow dormer is complete with the south one to go.
While Dan was timber framing, Bruce was working on painting the exterior.
Short on a few materials for the south dormer so we switched to taking down a few trees.
Starting with a couple of dead ones.
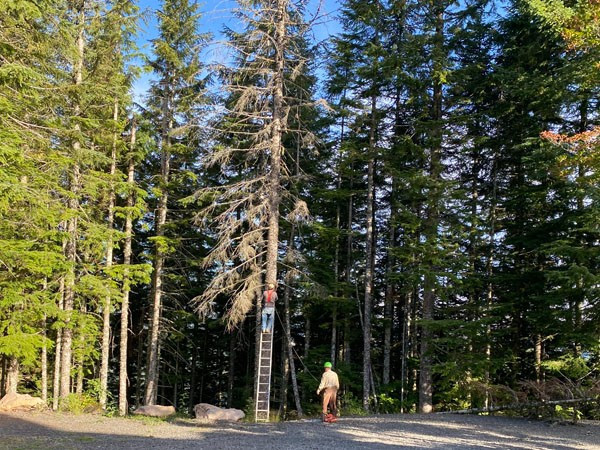
In addition to the dead ones we also took a row of trees from around the shop.
The trees had grown considerably since we cleared the site to build the shop and were hanging over the roof.
The roof is happier now!
And these will be firewood for next year.
Is this a sign?
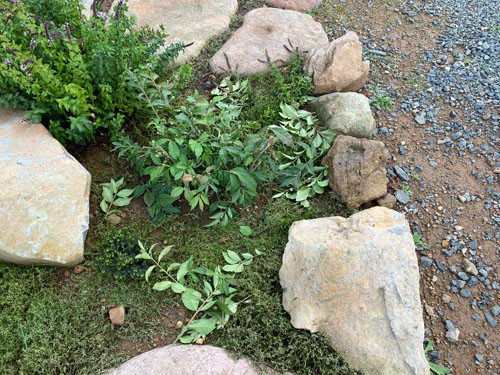
My flower bed is finally starting to fill in despite the clay soil, timber rats, and our youngest dog Remi.
But as fall progresses the timber rats deside it's time to build nests again and start mowing down the plants again.
So I said "Abby, get the rat".
I wish it were that easy. She is not fast or quick but she is stealthy and patient and does get a few.
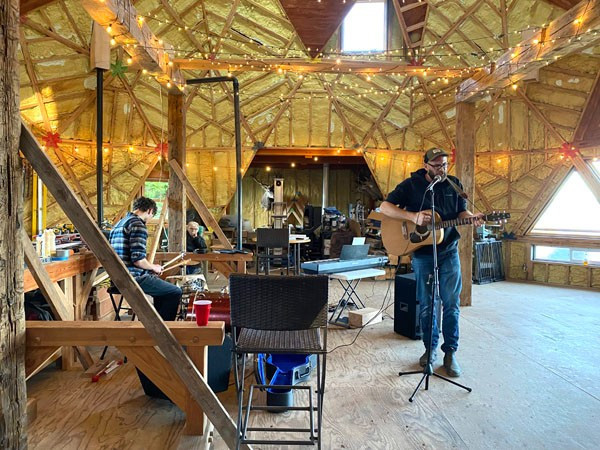
The end of September we had a Hootenanny and it was a hoot!
I finally finished the drawing we needed to put together a lumber order. We wanted to get it on hand before winter is here.
Dan checked around for the best prices and it was delivered October 5th.
We have about four days before more rain is here to get it moved inside.
Now it is all inside staying nice and dry till we get to it.
We took a vote and you can't leave again without us.
These antique timbers came from two barns that were taken down and repurposed. The barns were built in 1872 and 1888. For more information about these timbers check out our "Repurposed Stuff" page.


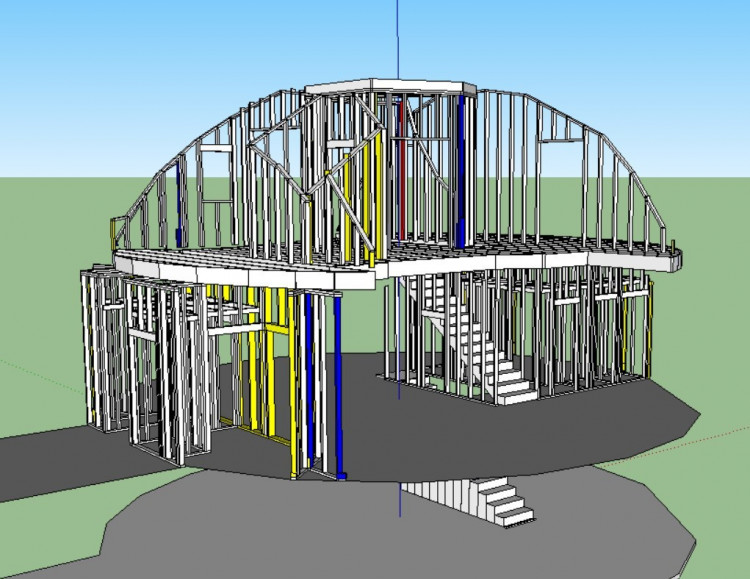


Back to the kitchen timber frame. Dan starts making the tenons on the timber joists.
He works with the summer beams just off the floor to get all the joists fitted on one end.


I'm starting to get a real appreciation for how massive this frame is going to look.
I got to pick where each timber goes in my kitchen. Then Dan numbered them after he fit them into their spot.
The summer beams that the joists fit into have some slight taper and twist. So each joists is adjusted on the end to fit against the beam. Making the "square end" not exactly square.
This one still needs to get its shoulder adjusted.


10-25-23
Our first snow accumulation of the season. Although, it wasn't much and it didn't last long.
And then the boys put some meat in the freezer.


Bruce came over with his tractor and removed some bushes in front of the solar panels.
They weren't tall enough to block the panels but were a real pain when snow built up at the bottom. Now shoveling the snow away will be much easier.


Mild days for most of November. We discovered the rock pit we hike around is starting to fill with water.
The dogs think it is great that mother nature has made them another pond!

11-23-23
It has been cold and clear and "the pond" has frozen over on top. Abby and Trevor know not to walk on it but I'm not so sure about Remi so we leave for now.


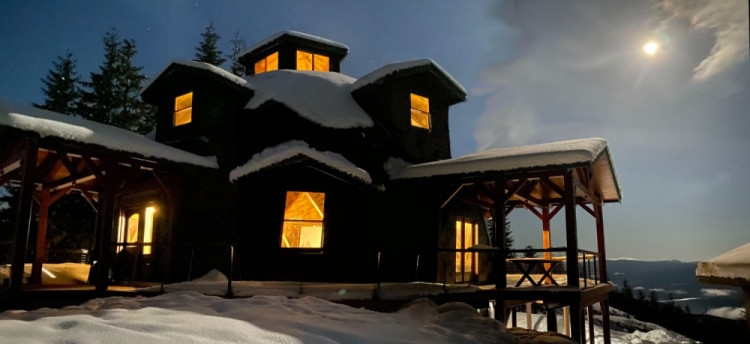
Dan wasn't really working in the dark, I just had to light expose for the mountain :)
Back when we bought our timbers, one was rotten on the end. But we thought that was okay because we had about three feet extra to cut off.
But there was still some rot on the end. Wanting to save the old timber but make it strong enough to use we decided to fill it with resin.
We taped any cracks we thought resin my leak out. Then using the Genie lift we lifted it upright.
Then we poured the resin in.
And then it ran out!

But eventually we got it to stay and filled the beam.


Dan made mortise inserts before poring the resin. Now the beam is a strong, viable summer beam ready for timber joists.

Bringing it back down was more of a challenge. These old beams are old growth and very heavy.
So up it goes so Dan can mark the locations for the braces.


It is getting colder so I put my planters of bulbs to bed for the winter. I am hoping to grow more lilies next year.
I covered them with leaves to keep them from freezing and put them in a cage so the critters don't eat them.

Now it is time to start the braces out of our 6 x 6 antique timbers.


Because of the irregularities of the timbers Dan uses plywood to run the saw along.
And the tenon is not necessarily parallel with the sides but instead with the tenon on the other end.

All the rain has taken its toll on the road. Fortunately it was only a couple of days before a detour was set up and we could get around this.


Once we could get through to town again (the regular way) we purchased the plywood sheathing for the loft floor, that we will someday get to :)

Nov. 30th
Our first real snow of the season. Totaling about a foot over three days. Dan is busy cutting braces.


With the snow gone, we got some of our timbers for the loft door surrounds up the hill and stored inside.
Dan finished the six braces and I got them lacquered.
The old planer was on its last leg. with unavailable parts and obsolete pieces it was time for a new one. So here it is. Yah!


Next, Dan built a jig to support his router while removing wood for a small shoulder where the brace sits against the post.
He gets close with the router then finished with his chisel.


We decorated a little for Christmas.
We attended a Christmas Eve candle light service. Listened to our son's sermon.
Watched our granddaughter and grandson in the nativity play.
And watched another grandson perform with the band.
And spent time with out-of-town son and daughter-in-law.


Then celebrated Christmas with family at our daughter's house.
Christmas
Merry

12-31-23 Absolutely gorgeous day for the last day of the year!
Sunny, calm, and mild. But where's my winter?
